Tuesday, 30 November 2010

A New Dimension


After almost 5 months planning and experimenting for this workshop I am very pleased to announce I now have dates set for January 10th and March 22nd 2011.
This will be a full day’s workshop with lunch provided.

For more information and booking details click the banner below.
Hope to see you there!

A-NEW-DIMENSION banner

Andy

Friday, 26 November 2010

Faux Crystal Glaze Backgrounds

I wanted to try and reproduce a pottery crystal glaze effect using DecoArt Acrylic paints and these are the results using a similar technique to the walnut effect featured on this blog.
These bisque interlocking vases from County Love Ceramics are very cool.
They would also make fabulous backgrounds for stamping onto.
I will post a tutorial soon.

You can find all DecoArt Products here

Faux Crystal Glaze Americana (Small)

Americana Spray Image Transfer

Hello,
Sorry for the lack of posts, I have been busy training this week but I have managed to put together a little video showing the spray image transfer technique. This is my first attempt at video so apologies if I babble!!
Hopefully it will make understanding the process a little easier for you.

Saturday, 20 November 2010

Texture Glass

What a week!  It’s been so busy that I have not had much time to play but when I received some new products from DecoArt yesterday I just had to have a quick go with the Texture Glass on a test tile.
What I really liked about the product is the fact it does not self level and stays exactly where you apply it. The drying time is quite long when applied thick, but this gives you plenty of working time to model and texture it. I popped this tile on a radiator last night and it was dry by this morning.
I also used it for an Image transfer and It worked really well, possibly better than Duraclear.
I am teaching an intensive pottery painting course for 4 days next week so I shall have to find time in the evenings to play with all the new products.

Glass texture paint
Texture Glass is a gel-like product that dries clear. Easily applied with a palette knife, fan brush or texture Tool, it can enhance the look of most hard surfaces. Texture Glass is used in home decor as well as crafting. Picture frames, vases, urns and other flat or smooth surfaces can be dimensional with the addition of Texture Glass.
TextureGlass

Thursday, 18 November 2010

Ultraviolet Polymer Clay Skins

Polymer clay skins are fun to do and can cover a variety of media.
The Decopatch starfish below is made from Papier Mache, it was then covered with a polymer clay skin which I made from millefiori and glow in the dark Fimo. The effects are very cool!


DAYTIME!

fimo skin
NIGHTIME!
DSC_0814
Here is another starfish.

DSC_0819
Andy

Tuesday, 16 November 2010

My Walnut Effect Tutorial

Having been asked  many times to explain my process for the walnut effect I use so here it is,

DSC_0250 (Medium)DSC_026 (Medium)

I start by base coating my piece with two acrylic colours, Americana Honey Brown and Champagne Gold.
2010-11-11 15.03.48
Apply them liberally, mixing but not blending as you cover the surface.
2010-11-11 15.05.44
Once the basecoat is dry add water to some Americana Burnt umber until it is the consistency of milk. Apply one coat over the base coat working quickly.

2010-11-11 15.09.42
Next we add the magic ingredient, Isoclene which is a Isopropanol based cleaning fluid. Pour a little into a small container, I normally pour into my pallet and have it ready before applying the watered down coat.
Dip the handle end of a brush into the Isoclene and place down onto the wet Burnt Umber. The paint should start to disperse.
Working quickly cover the surface of the piece, overlapping dots of different sizes.

2010-11-11 15.13.11
When happy with the effect and the paint is nearly dry lay a piece of kitchen roll onto the surface and lightly pat with your fingers and remove.

2010-11-11 15.14.57
The kitchen roll will remove a little of the paint adding to the overall effect shown below by the arrows.
SAMSUNG
This technique can be used with variety of different colour combinations.
2010-11-16 10.49.07

2010-11-16 10.46.18
Andy.

Sunday, 14 November 2010

NOTICE

All back to normal now!


Ok quick update if you use a google android phone please be aware of an app called Picasa tool, it will allow you to delete your whole blog album without giving you a warning and there is no way of recovering it without a recycle bin that you would have on windows. 
I am lucky that i keep all my pictures backed up but this really is not an easy job restoring all the posts.


Andy

Clock Templates

 
Click the picture to download Clock templates

Rudolf's on the alcohol again!

Had a chance today to have a quick play with my Adirondack alcohol inks on this Heart shaped Ceramic Christmas tree decoration. The stamp came free with a magazine.
I must use these inks more.
How many sleeps left till Christmas?? 40 days, is it really that close already!

alcohol ink decoration 1

Saturday, 13 November 2010

I Have No Idea

Where this came from and what its all about I have no idea!
It started out as an image transfer on a tile that went horribly wrong so rather than bin it I started doodling with different media and went along with it for the ride!
Mediums used include gesso, plaster, paper, enamelling, silicone, Distress ink, Versa magic ink, Stazon, Alcohol ink, Americana acrylic, paper, glass stains and Triple thick…Am I boring you yet!
Smile
The photo is not the best and the white dots you can see are Triple Thick acrylic glaze applied to look like rain drops when it catches the light.
Not sure what to do with it now though!


Have a good day,
Andy

All Things Oriental

Hello all,
Below is a set of digital stamps I have been working on and may have them turned into cling mounted rubber stamps.
To test how they would look stamped onto an item, I have used my image transfer technique onto a new piece of bisque just arrived from Duncan.
Its an Asian style utensil holder which I have turned into a vase but it will work as both.
            thumb-db6790


Here is how to do it!
  1. Apply three coats of Lamp Black Patio paint to the inside and top detail of the utensil caddy and allow to dry. This will make it waterproof and weather resistant.
  2. Stamp onto the bisque using Stazon ink or use my image transfer technique.   (You can find this technique here).
  3. For a matte waterproof finish apply two coats of Decoart Duraclear Matte varnish.
  4. To finish apply a little Gold gilding wax or gold acrylic to the edge of the top detail.
                                    Click picture for larger view


Thursday, 11 November 2010

Tick Tock Make Your Own Clock

Hello all,
Clocks make great gifts and really are not that expensive to produce.
These 20cm x 20cm bisque tiles make such wonderful clock faces so today I decided to make a few using Inks, image transfer and acrylic paint.

First of all I designed a few clock templates in Photoshop which I could then print as a mirror image and transfer onto the tiles.
Here are the templates.
Templates now uploaded here.

For the first clock I simply sprayed my laser printed image with Americana Gloss spray sealer and transferred the image onto the tile. Black ink works great with this method. If you missed the tutorial on this technique look under image transfer on this blog.
I then coloured in the design with a brush using Versa inks mixed with a little water. I have never used Pro Markers but I’m sure they would work great for this, they are next on my shopping list!  The design in the corners was stamped using Stazon Jet Black ink. I then fitted the clock mechanism.
The frame was base coated in Dazzling Metallic Emperors Gold, once dry I stamped the frame with embossing ink and lightly dusted with Gold Perfect Pearls.
Click On Pictures For Larger Views


The same method has been used for this clock other than the frame which I applied a walnut effect to using Americana acrylics.


I love this British Grunge clock, this ones coming home with me!! 
I have used the Duraclear Matte image transfer method for this clock which is also explained in a tutorial on this blog.


Take care,
Andy

Tuesday, 9 November 2010

Triple Thick Accents


No time for a tutorial today as I am off to visit my two daughters for shopping and lunch but before I go I just wanted to share with you some 4” x 4” tiles and a star Christmas decoration accented and sealed with Decoart Triple Thick brush on gloss glaze.
It works very much like Glossy Accents and stays put where you place it and dries quickly.

Click On Pictures For Larger View

Image transfer, Versamagic and Triple Thick


Image Transfer, Distress Inks and accented with Triple Thick.


Image Transfer, Lindsey Mason Stamp with stazon and glazed with Triple Thick...See I can do cutesy!!


I have a feeling that when I return home my pockets will be empty!!
Have a great day,
Andy

Saturday, 6 November 2010

Digital Stamping Image Transfer

What is digital stamping? As many of you know I am fairly new to the stamping world but have been working with ceramics and mixed media for as long as I care to remember. Card making in itself, if using two or more types of media is classed as mixed media. I have noticed recently in my searches on the internet that references to digital stamping are popping up more and more so I decided to have a look to see what it was all about.
It turns out that this is something I have been doing for years using Photoshop and Illustrator but had no idea it had a name!
In the world of ceramics I produce digital images to be printed into waterslide decals which can then be fired into the surface of the glaze.

Ok ok I will get to the point! Image transfer onto a glazed pottery item using a ceramic waterslide decal is fairly easy. But what if I want to apply my digital images to unglazed pottery, wood or canvas and get a lovely crisp result?
At first I was going to try the Golden gel medium technique but unfortunately there was none to hand so I tried it with a few products from the Decoart range…. I love to experiment!
One product that worked fantastically and is far cheaper was the Americana DuraClear Satin Varnish.
Can I just point out I do not work for Decoart or receive any commission from sales of there products. (DecoArt if your listening I need new strings for my guitar!Smile).

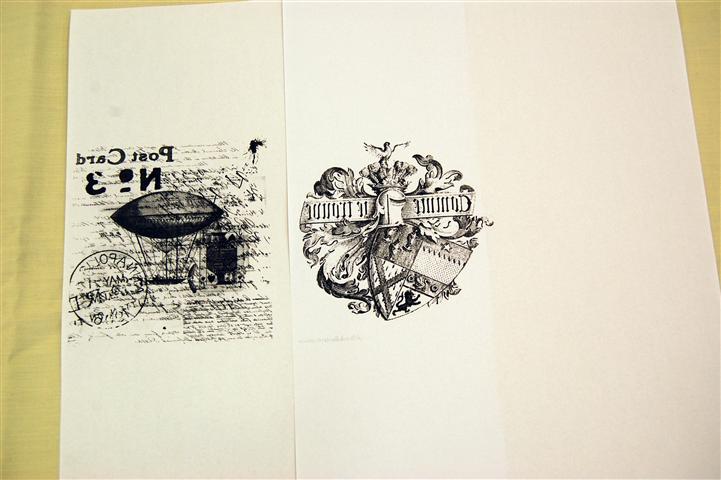
Ok I printed out a few of my designs pictured below apart from the second image which came from The Graphics Fairy. A really good resource for royalty free images. All images were printed on a laser copier, not sure at this stage if inkjet will work.
Digital Stamp Postcardorn034 (Small)digital stamp birds (Small)Digital Stamp Grunge (Small)


For surface preparation apply one good coat of acrylic paint to the piece.


Next print a mirror image of the artwork to the desired size. This is important if text is to be included.


Cut out you image using a pair of scissors.


Once the acrylic basecoat is dry, apply a thick layer of DuraClear satin varnish to the surface, make sure the entire surface is covered.


Immediately place the artwork print side down onto the piece and run over the surface with a brayer several times to remove any air pockets and to ensure good adhesion.


Dry the piece with a heat tool for approximately five minutes. Dampen the paper with water and start gently rubbing the surface with fingers turning the paper into pulp and removing the first layer of paper.


Note: This technique will most probably work best if left to dry overnight but I am impatient.
Dry it with a heat tool for a further five minutes and leave to dry for one hour before returning it to the sink and removing the rest of the paper to reveal the transferred image.


It worked really well apart from one small area where the image came off. I think this was either because I should have let it dry for a longer period or I missed a part of the tile with the DuraClear varnish but on the whole I was very happy with the end results.


As these are to be used as coasters, I finished them with four coats of Americana Traditions Satin varnish for a durable alcohol resistant finish.


Next I tried the technique on some small canvases, the first one I really rushed the drying and some of the image came away but it looked kinda cool so out came the distress inks and I applied Vintage Photo gently to the canvas to antique it.


The second canvas I was a little more patient with!


Ok so to conclude this quick tutorial, if you want a perfect transfer leave it overnight to dry, you may find you need to score the paper first with some sand paper to allow the water to penetrate. For the grungy look or for the more impatient of you out there, use your heat tool and experiment with the times.

I am going to try this with DuraClear matte varnish on Monday as it should have a better adhesion, I will let you know the result's.
There are now two videos posted in the video section of this blog on another very quick way to transfer images

Hope this has been of interest,

Andy