
Hello,
Over at the Craft Barn Blog its Andy Skinner week starting today! Each day the blog will have a new tutorial using my stamps posted by the very talented design team.
I will be at the Craft Barn on Saturday the 3rd demonstrating and on Sunday the 4th I will be there running an all day workshop so hopefully I will see some of you there!
Here is my contribution, all materials used can be found???…. yep you guessed it, at the Craft Barn
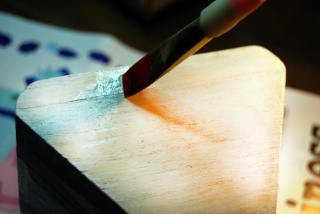
Weathered Box

Lightly sand the box and seal with Multi medium matte and allow to dry.
Next apply a watered down wash of Decoart Gesso to the entire surface, you should be able to see the wood grain through the gesso. Allow this to dry.
Paint a little pva glue in random areas where you would like the paint to crack. Apply Vaseline with your fingers to areas you would like the paint to peel.
Pour a little Americana Indian turquoise and Snow (Titanium) white onto a pallet, with the pva glue still wet pick up the two colours onto a brush and apply this to the box, mixing the colours lightly as you go.
Once dry you will notice that the paint has cracked where the pva glue was applied. Now take a cloth and rub over the surface to start the paint peeling where the Vaseline was applied.
Sand the surface lightly with a fine grade sandpaper to soften the edges of the peeled paint.

Water down some Americana Burnt umber and Lamp (Ebony) black and pick up the paint onto a toothbrush. lightly speckle the box by flicking the bristles with your finger. Note: It is advisable to test this on some scrap paper first.
Highlight the edges with a little gold rub on using your fingers

Stamp the script with Walnut stain Distress Ink. Stamp the dove, cherub and antique sign with Black archival ink.
Highlight some areas within the stamps with a little titanium white to make them pop.
Finally, once fully dried attach a metal clasp, and spray with a light coat of Americana Matte spray sealer.

Materials List
Wooden Box
Decoart Americana in:
Indian Turquoise
Snow White
Burnt Umber
Lamp Black
Pva Glue
Multi Medium Matte
Decoart gesso
Walnut Stain Distress Ink
Black archival ink
Metal Clasp
Stamps
Batik Garden
Antiques
Simply Angelic
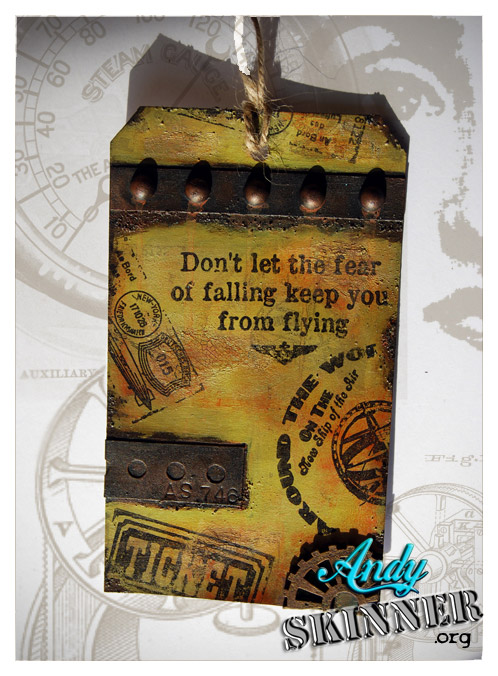
Simple Tag

Position the Tando clock mask over the tag. Pick up a little Americana snow white onto a stencil brush and paint in the numerals, allow to dry.
Using a blending tool apply mustard seed distress ink to the entire surface of the tag. Next blend barn door Distress ink, top left and bottom right of the tag.
Stamp the script top right and bottom left of the tag, using Broken China distress ink.
Stamp butterfly’s, berry bush and Object d' art using black archival ink.
Colour in the butterfly’s with fired brick, broken china and spiced marmalade distress ink using a brush.
Highlight the body's with an inksentials white gel pen.
Materials List
300 gsm tag
Tando clock mask
Americana snow white
Distress Ink in:
Mustard seed
Barn door
Broken china
Fired brick
Spiced marmalade
Black Archival Ink
Inksentials white gel pen
Stamps
Batik Garden
Antiques
A Winters Tale
Gothic
Bisque Hanging Heart Ornament

Basecoat the bisque heart hanging ornament with Multi matte medium.
Once dry apply clear rock candy to the surface. I prefer to use a slightly stiffer brush than the one supplied with the bottle, to give a more even application.
Once cracks appear, finish the drying process with a heat tool.
Paint surface with Americana lamp black and allow to dry for approx 2 minutes.
Wipe back black acrylic using a baby wipe until it remains in the cracks only.
Sand surface with 280 grade wet & dry fine sandpaper, this gives a smooth professional finish which is ideal for stamping onto.

After stamping apply Rub 'n Buff: Gold leaf to the edges.
I dipped this heart ornament using the alcohol ink floating method with brights, then applied the same technique as above.

Materials List
Bisque Heart ornament
Matte Medium
Distress rock candy
Americana lamp black
Rub & buff gold leaf
Adirondac Alcohol inks in:
Plum
Pool
Citrus
Stamps
Simply Angelic
Lindsay Mason Designs: Tattered Butterflies
- Have a great day,
Andy


")


