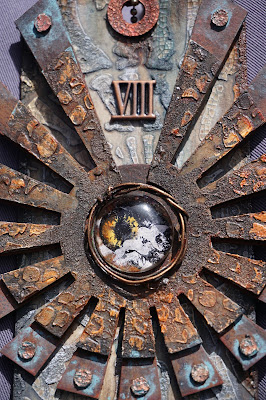
Hi folks, Dee here. As I am typing this up I am waiting for a call from the hospital to go pick up my son who is having his wisdom teeth pulled out!!! I remember having mine out and it really hurt plus I looked like I had been in the boxing ring with Mike Tyson! Remember him?With Tando Creatives Andy Skinner Industrial Wings Kit I have created this post using Andy's salt technique on the wings.
Firstly I applied DecoArt Crackle Paste through Andy's Fossil stencil. I also replaced the stencil and put some Texture Sand Paste in area's and around the edges.
Once dry I applied a coat of Titan Buff and followed with very watery washes of Prussian Blue and Raw Umber.
I added a coat of Black Antiquing Cream around all the sides then knocked back with a baby wipe. The Texture Sand Paste soaks up the black and creates an unusual effect.
Above is a close up of the sand paste after the Antiquing Creamhas been absorbed. Quinacridone Gold along with touches of Metallic Lustre were applied after the cream.A bit of dry brushing was used over the entire tag. That was the base tag done next came the wings.
ANDY'S SALT TECHNIQUE
I gave a the base wing a coat of gesso when this was dry I followed it with a very watery coat of Payne's Grey. While still very wet I sprinkled salt over it. Once dry I followed it with a very watery coat of Carbon Black and followed the same process. As you can see in the photo it gives a
lovely mottled effect.
Once it was dry and all the salt had been brushed off, a coat of Quinacridone Gold was applied.
A photo of the finished base wing.
I started with the smallest wing using the Andy Skinner Shedded 12x3 Stencil with Modelling Paste and Texture Sand Paste.
...a couple of coats of watery Payne's Grey.
Followed by Quinacridone Gold.
For the centre piece I stamped the eye stamp from the HANDLE WITH CARE rubber stamp set onto white card with black Archival Ink. I painted the pupil with Yellow Iron Oxide and tinged the edges
with Cadmium Orange. I followed this with a top coat of Media Interference Gold.
I brushed matt medium over the image this was then covered with the glass bead. Rusty wire was manipulated with pliers then glued around the centre bead.
An old rusty washer was used for the tag hole and Patina Antiquing Cream was used to highlight the end of the wings.
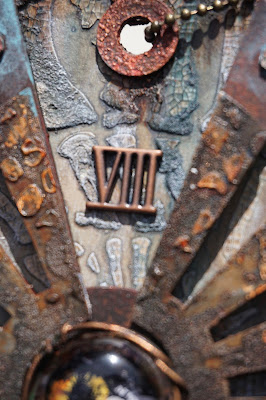
On the name plate I used Payne's Grey with Tinting Base followed
by Crackle Glaze and Metallic Lustre CHAMPAGNE ICE. The inset was card washed with iron oxide then stamped with the numbers from the SKULDOGGERY rubber stamp set.

I hope you have all enjoyed my post please feel free to ask any questions or let me know what you think. (PS my son is now home and got a nice swollen face but is fine!)
Cheers,
Dee x
Products used:
- Handle with Care rubber stamp set
- Skuldoggery rubber stamp set
- Deco Art Fluid Acrylics: Payne's Grey, Prussian Blue Hue, Quinacridone Gold, Raw Umber, Carbon Black, Yellow Iron Oxide, Cadmium Orange, Interference Gold
- Deco Art Antiquing Cream: Patina, Carbon Black
- Pastes and mediums: Crackle Paste, Texture Sand Paste, White Modelling Paste, Gesso, Tinting Base, Matte Medium
- Fossil stencil
- Shedded Stencil
All products can be purchased through Tando Creative.


Love, love, love! Thanks for the tutorial and pics!
ReplyDeleteThank you
DeleteYummy xx
ReplyDeleteThank you
DeleteTerrific! Love your process, and your outcome!
ReplyDeleteThank you
DeleteUtterly sublime Dee, love it xxx
ReplyDeleteThank you X
DeletePretty freakin cool Dee!
ReplyDeleteThank you Jackie x
DeleteI love this technique, and the results are amazing.
ReplyDeleteThank you Barbara x
Delete