Showing posts with label Industrial Stamp. Show all posts

Friday, 15 June 2018

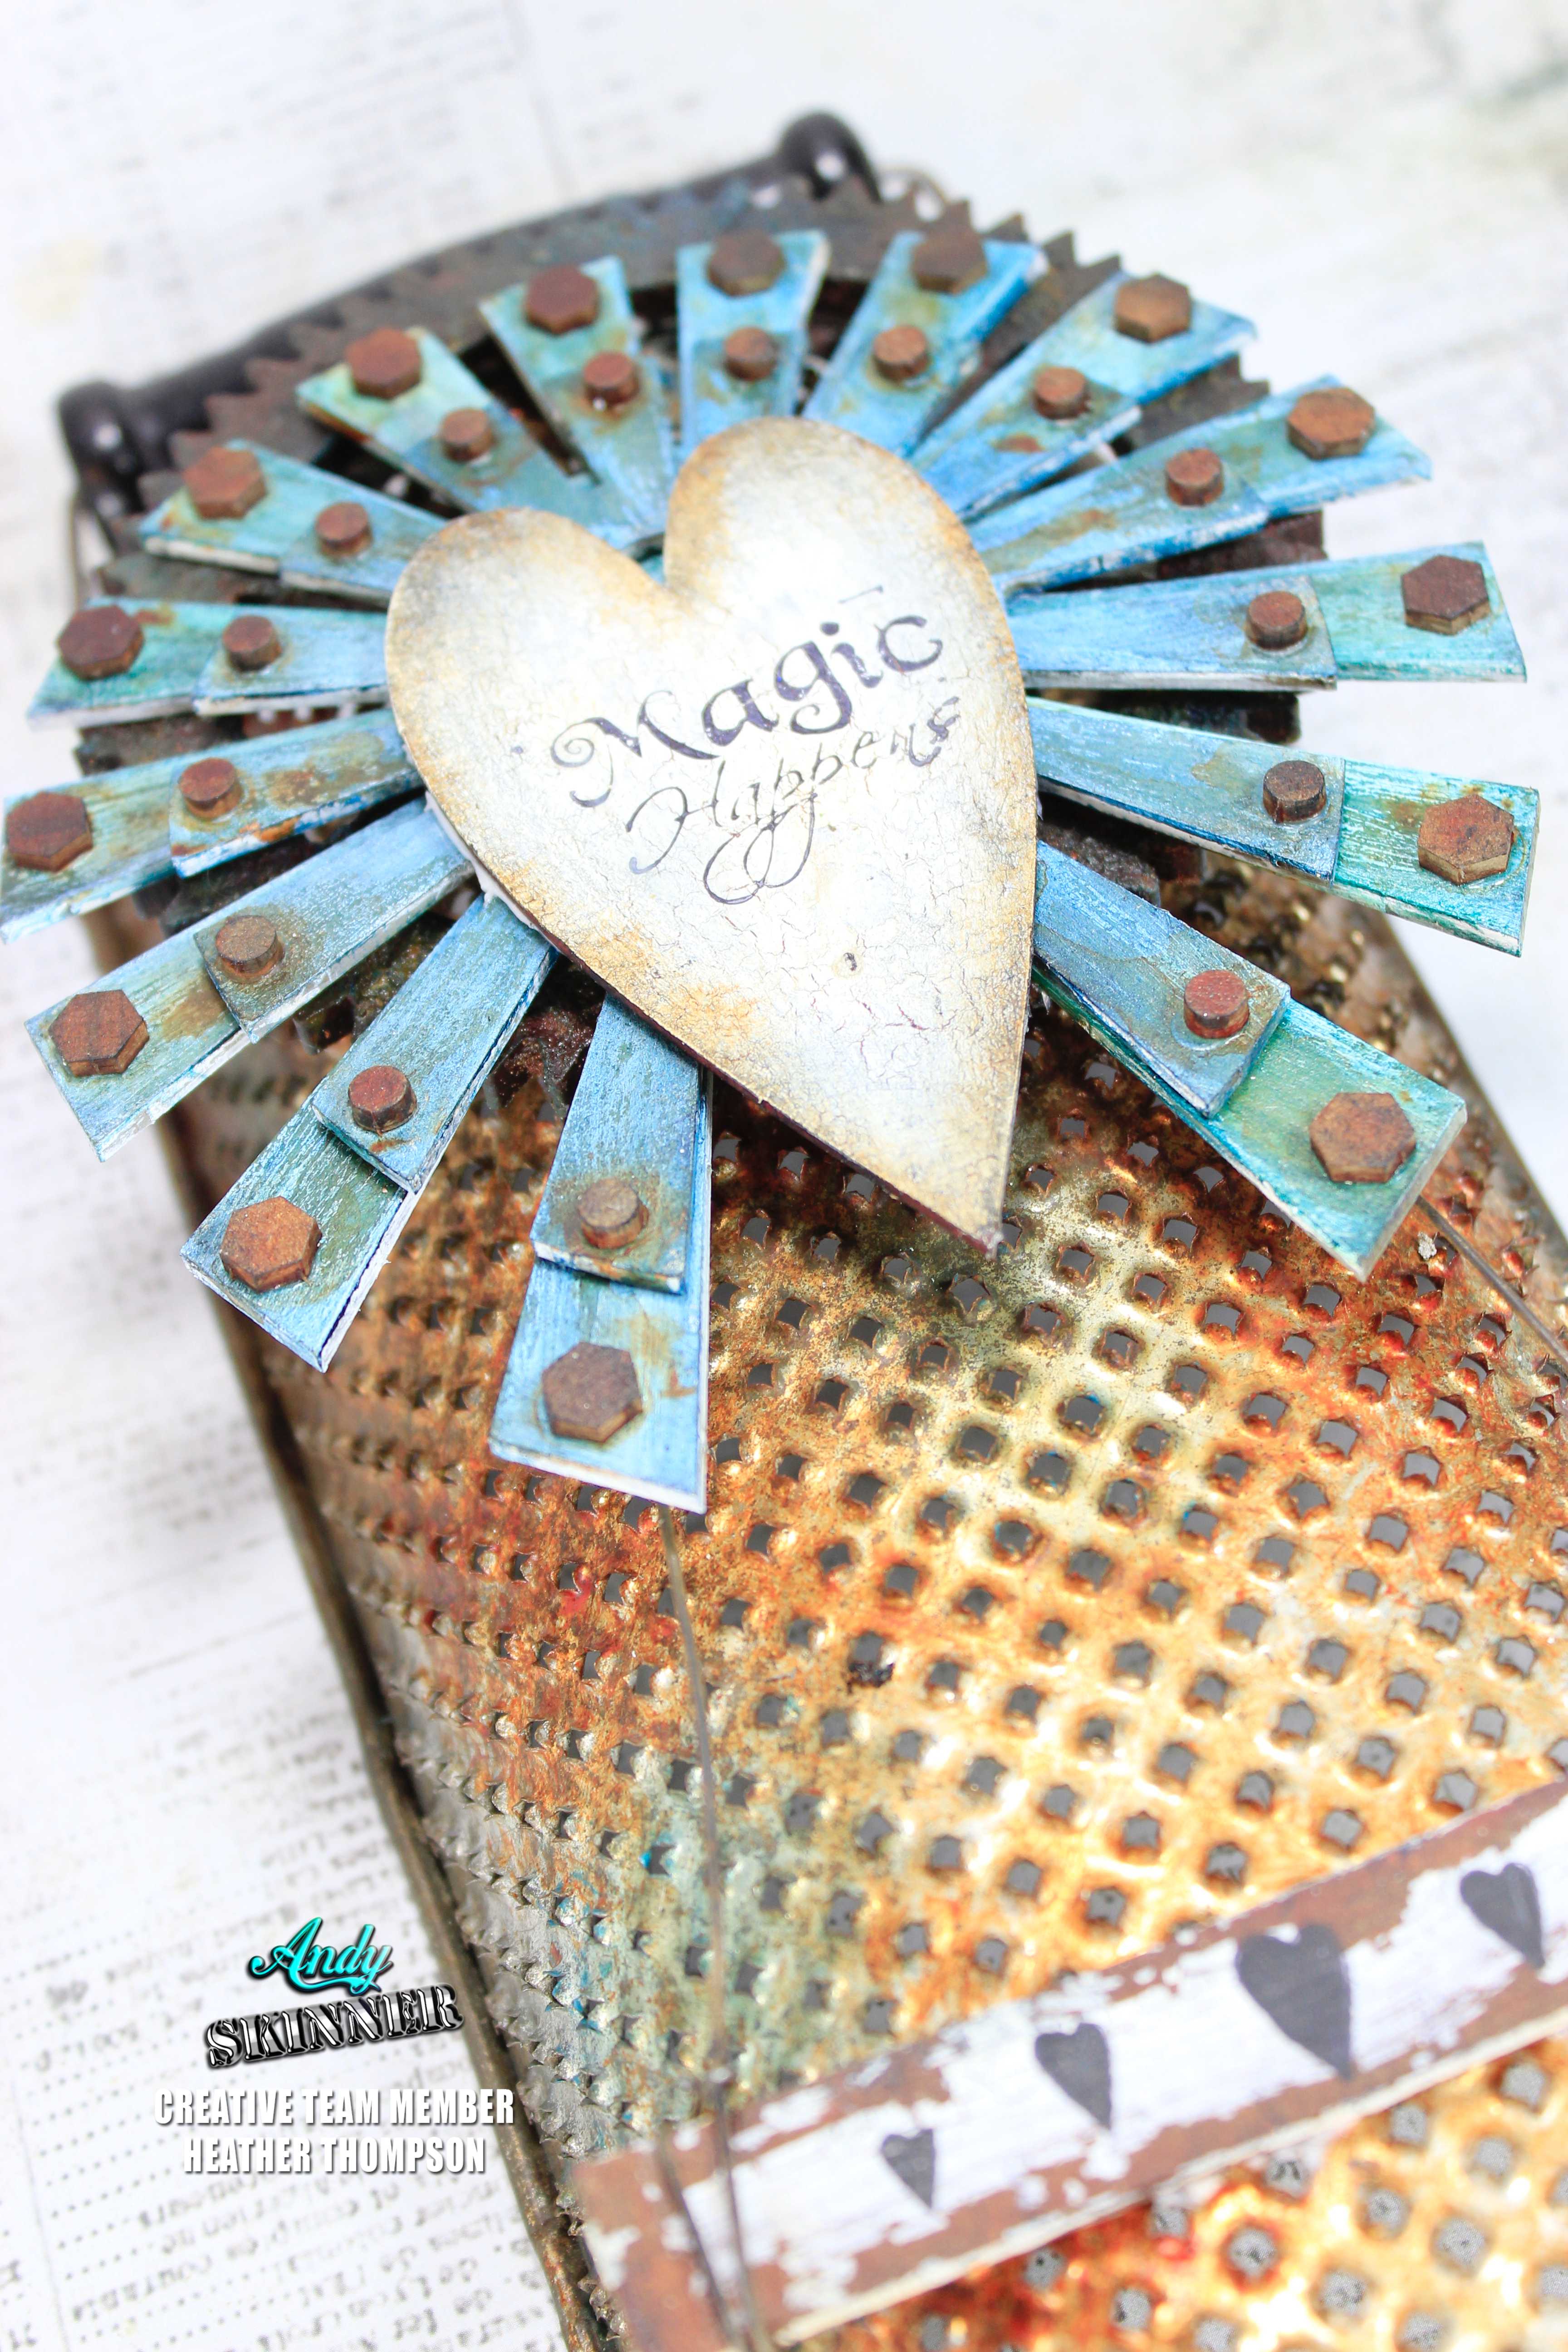
Magic Happens by Heather Thompson

I finally got a new kitchen after years of waiting so patiently, so I am continuing to add art to my second favourite place in the house.  I have found all different vintage gadgets and tools over the years, and have always had plans to alter them in my style and details. 
_MG_4703

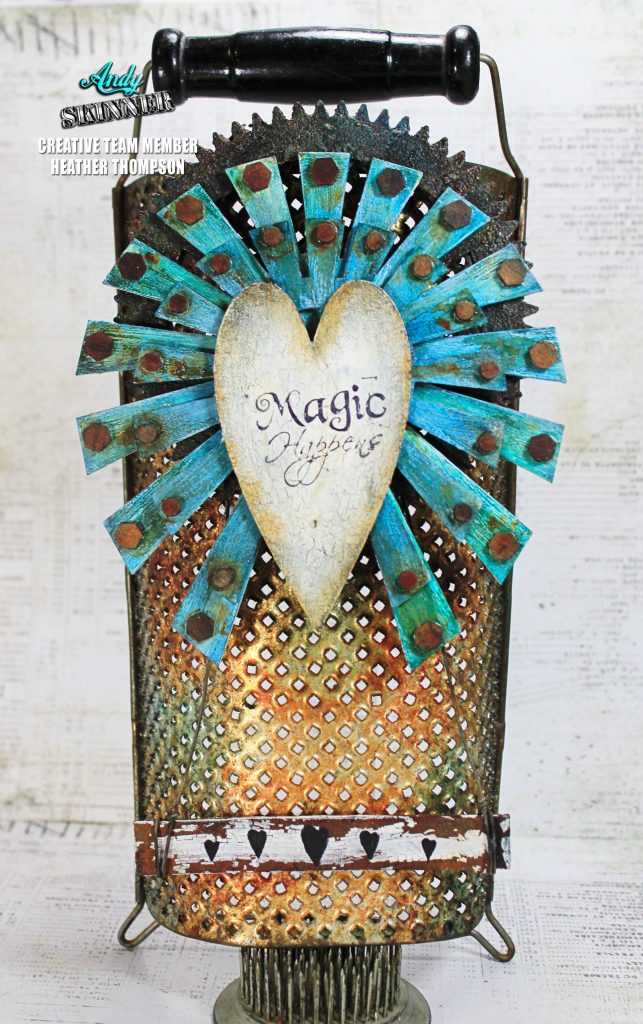
This antique cheese grater was left as it was originally found, I only added some more rust colour and patina.
I used various techniques and products on the projects from rusting to crackle medium, to the pealed paint look. 

_MG_4704
I didn't want to add to much to the grater, I still wanted it to be recognisable to what it was and its use. So I only added a large MDF gear that I textured and rusted for the base. And a set of the Industrial Wings.
_MG_4705
Using stamps from the Perfect Words Collection, I added some mini hearts and the title. I used some Rusty Wire to hang the placard on the grater.
_MG_4706
I love how this adds to all the other elements in my kitchen.
_MG_4708
Thank you for stopping by and have a great creative day.
black and white head shot
Supplies:
AS LOGO
decoartlogo
Sap Green
Paynes Grey
Carbon Black
Ultra Matte Varnish
Colbalt Turquois Hue
Transparent Yellow Iron Oxide
Burnt Umber
Quinacridone Gold
Medium Grey Value 6 Titanium White
Prussian Blue Hue
Americana Decor Crackle Medium
tandologo
Stampendous-Logo
Andy Skinners Industrial ASCRS03

Tuesday, 24 April 2018

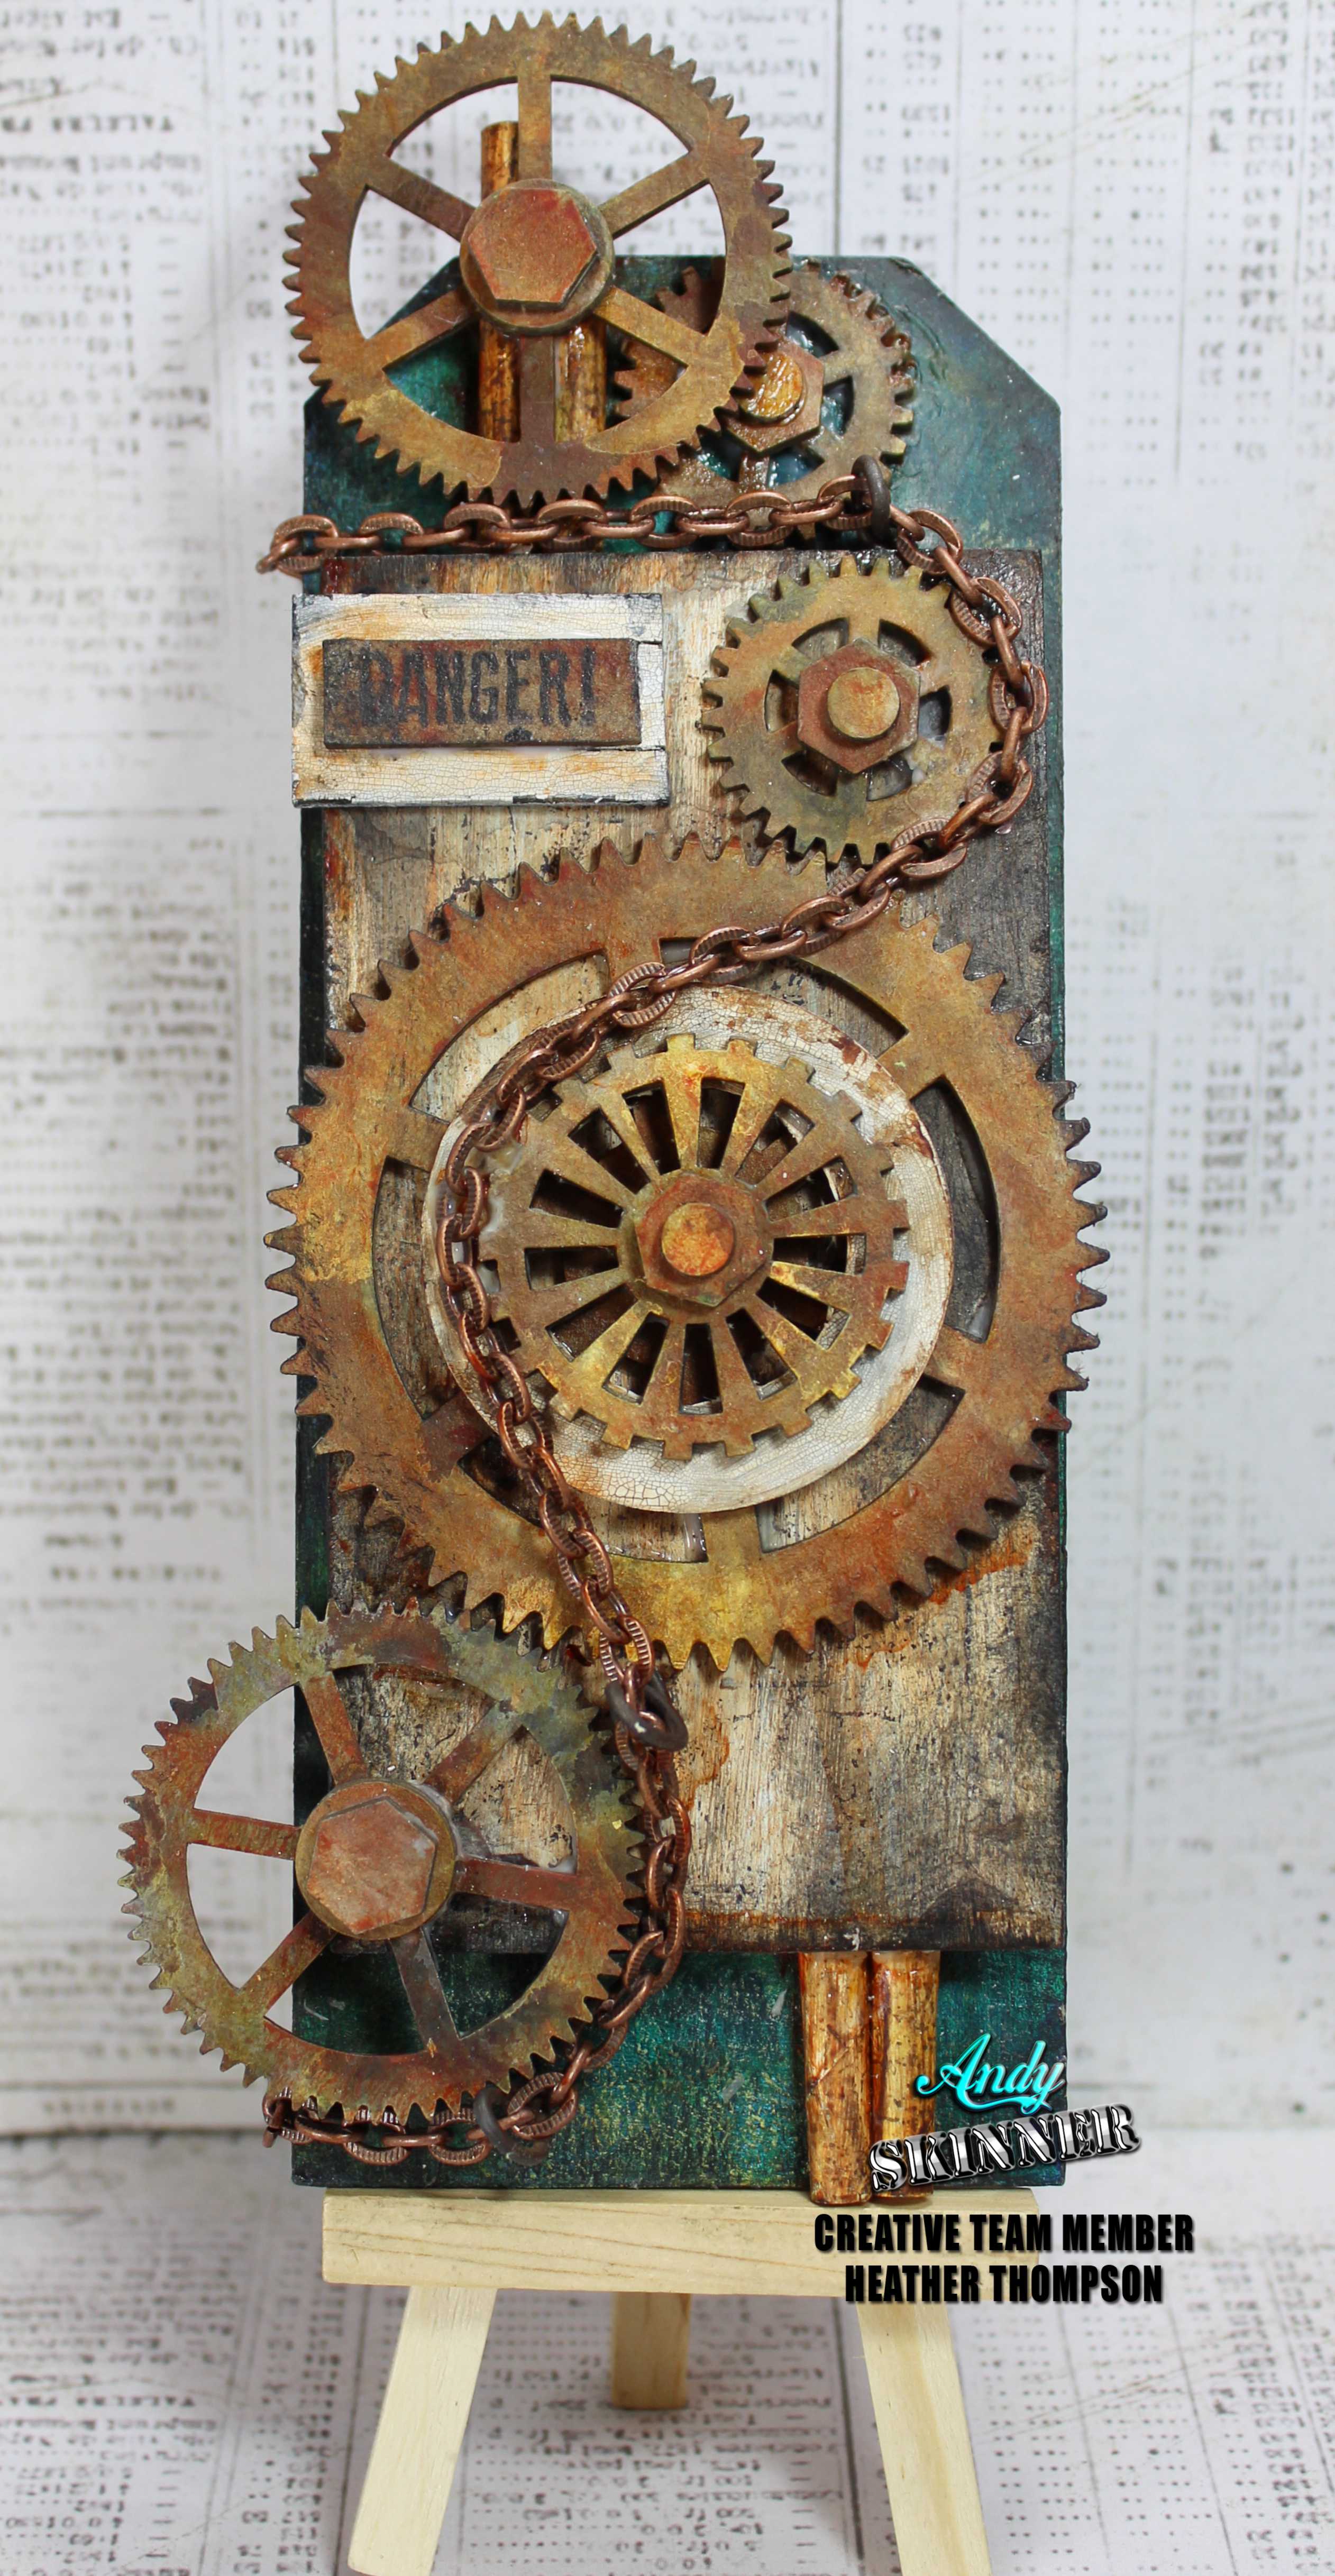
" Chained And Geared" By Heather Thompson

I am back after a fabulous holiday with so many great friends. After a very creative weekend with the crew at Ministry of Mixology, I jumped right in creating when I landed on home soil. 
IMG_3577
I created a gear filled, rusted mechanical assemble, "Chained and Geared" and totally ready to go. 
I  love this tag, I love how it has the illusion of actually working cogs and gears.
IMG_3590
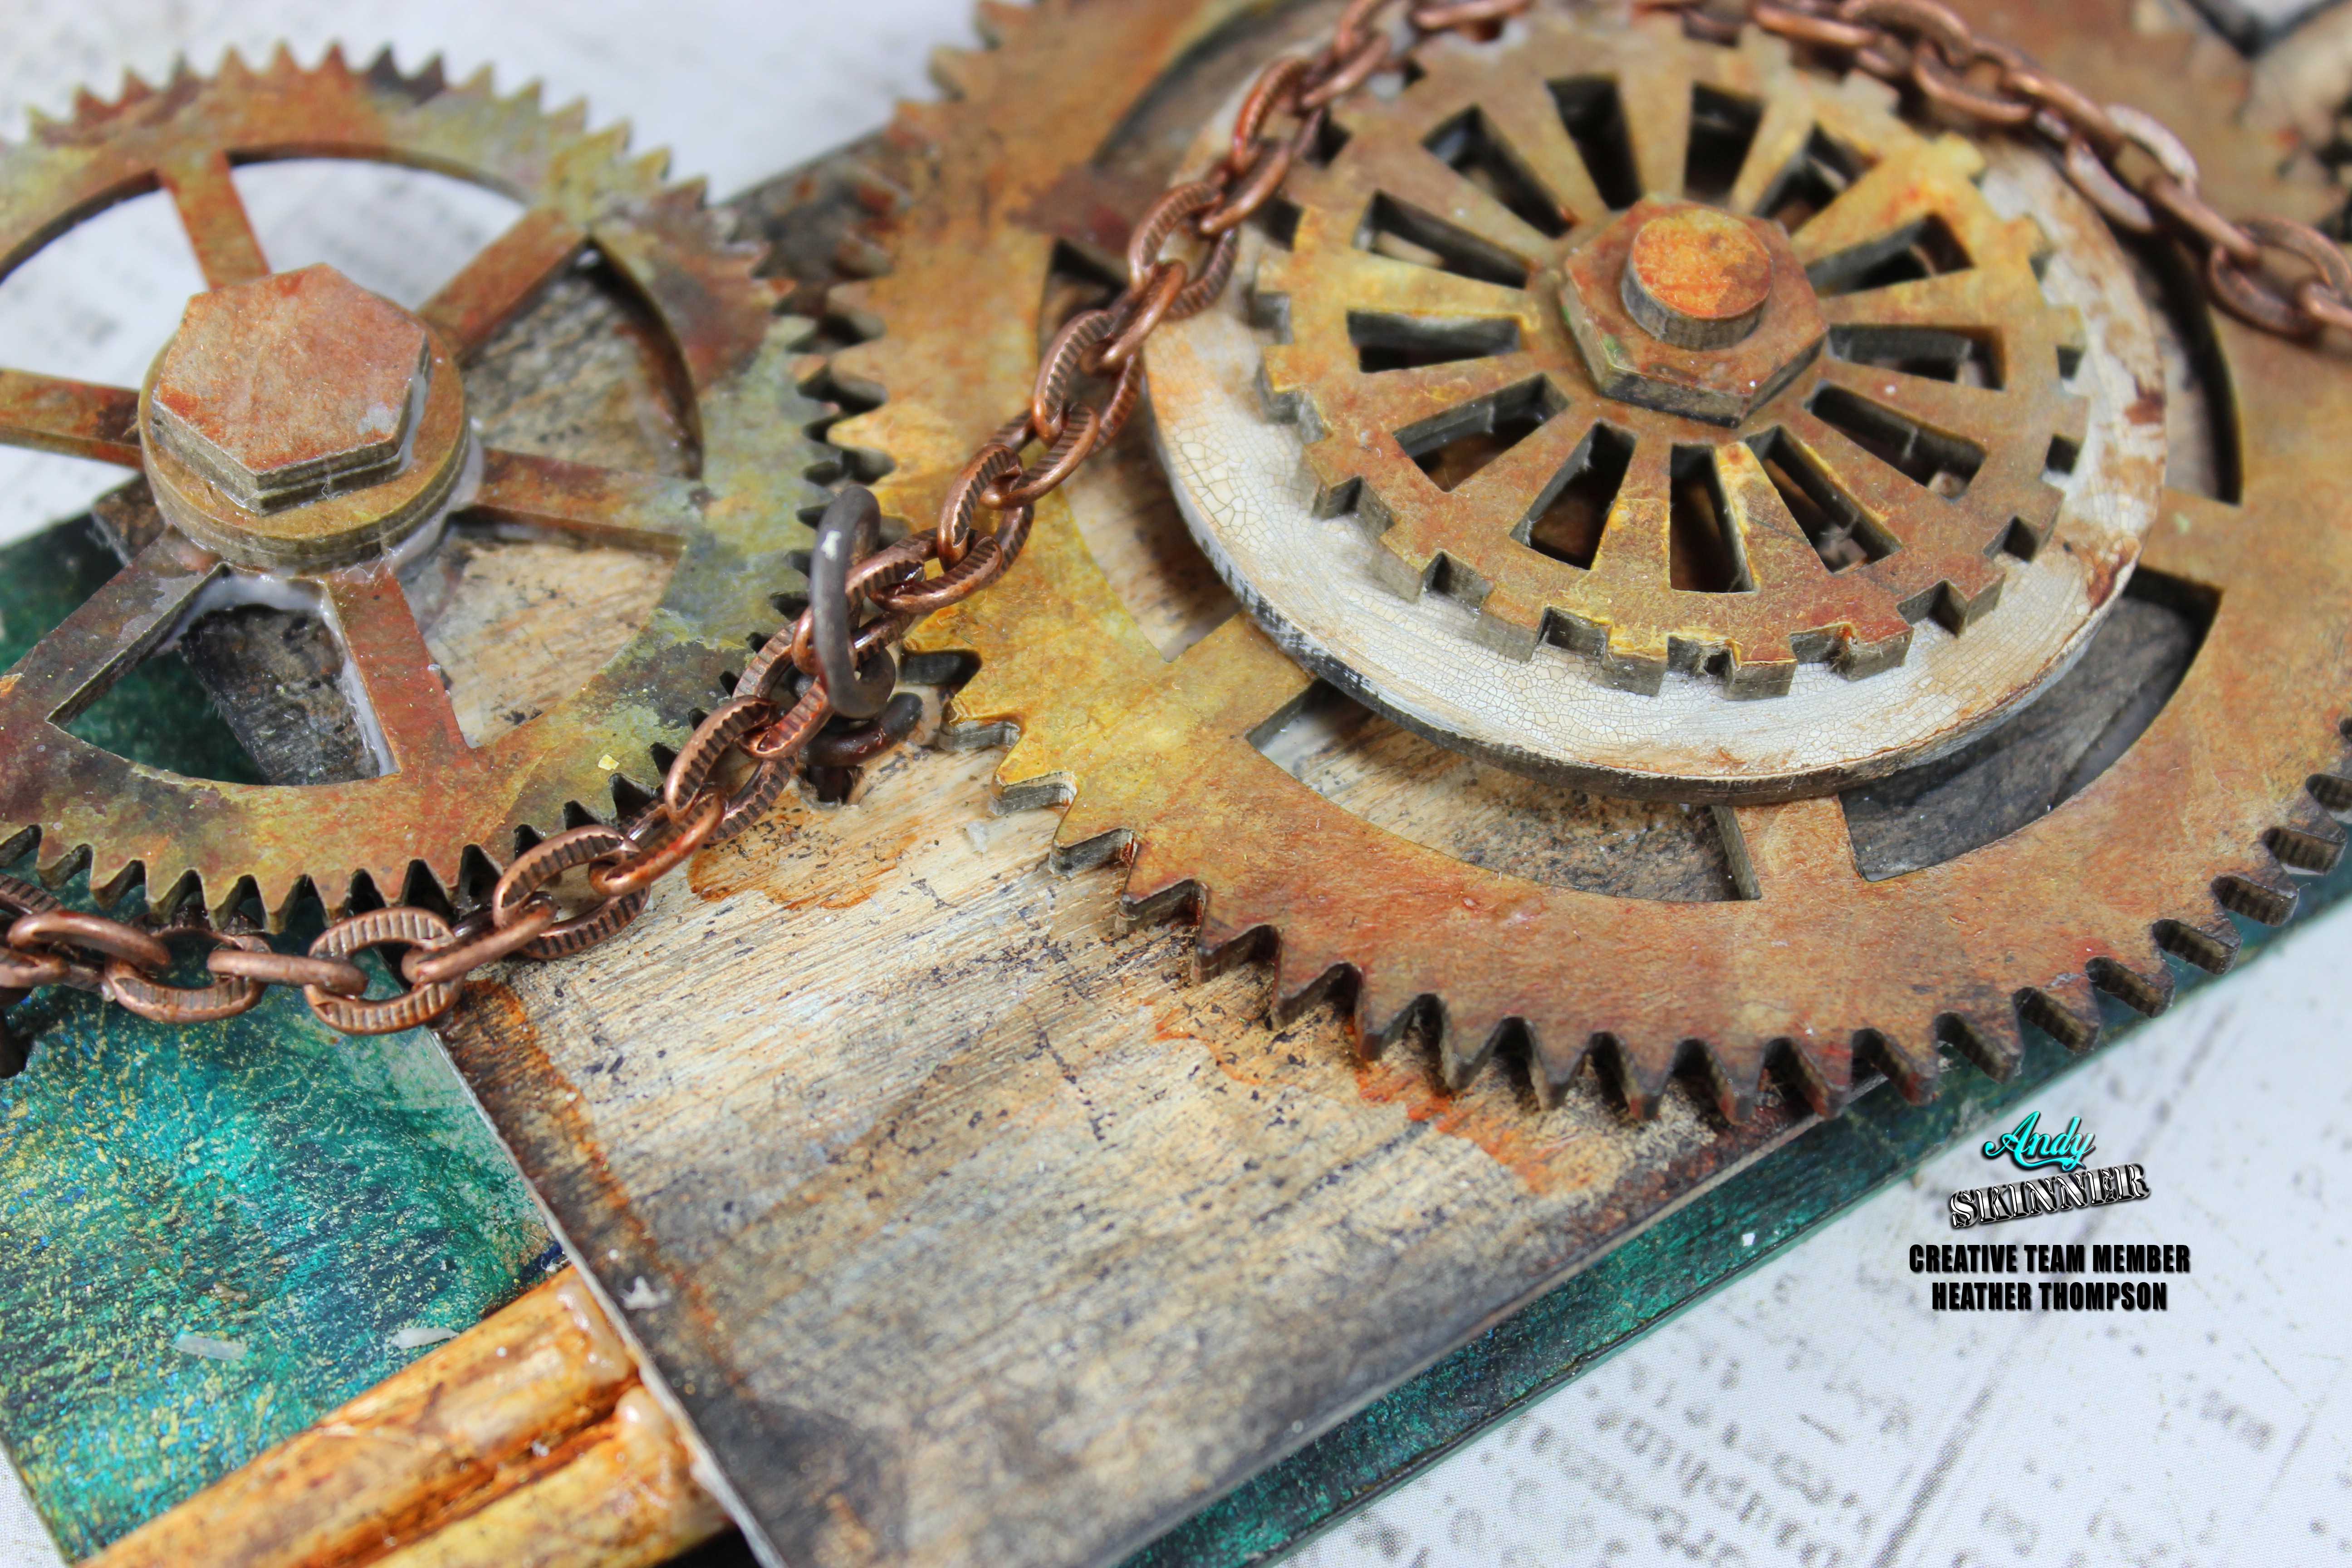
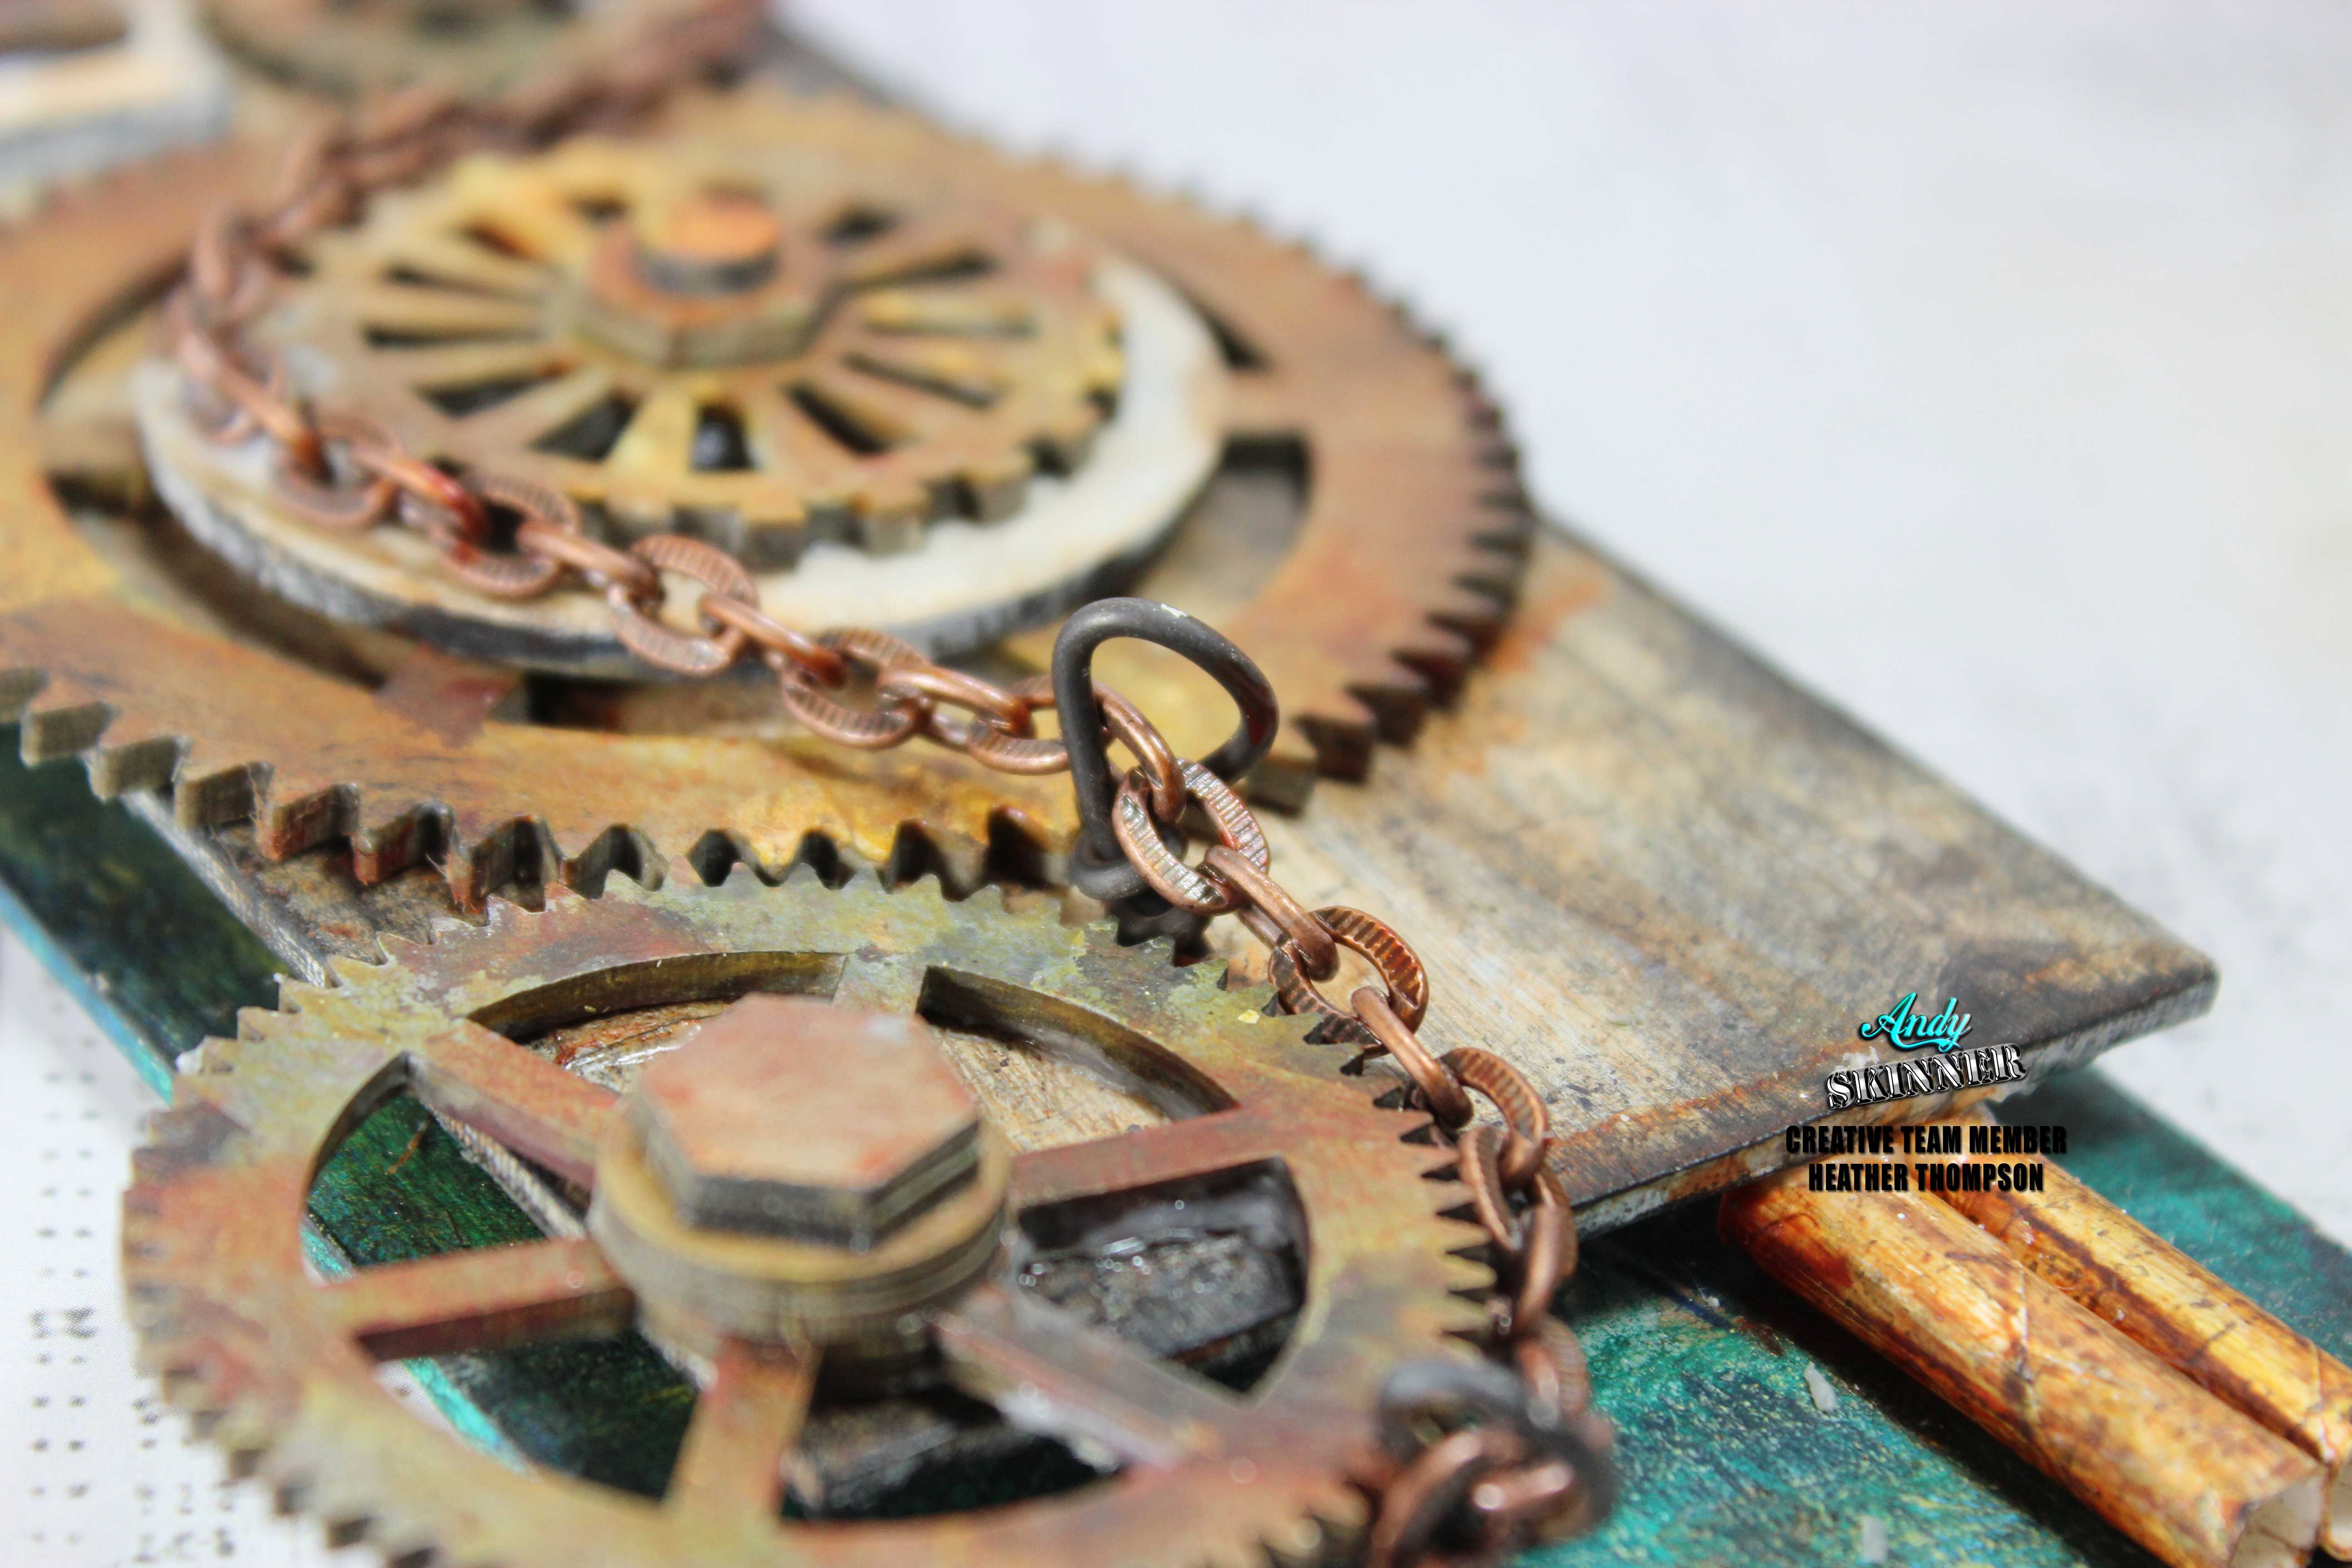
Using rusty wire, I anchored the chain down in order to work around the gears and keep things where they ought to be.
IMG_3587
I have already thought about expanding this tag, and continuing the theme all the way around the backside of the tag. How cool would that be? A 3-D tag.......oh the possibilities.
IMG_3581
Here are a few close ups for you .
IMG_3594
So stay tuned for phase 2 of the evolution of the tag.
 
Have a great creative Day
black and white head shot
Supplies
26685978_10156947111614008_1186625561451155764_o
   
decoartlogo
Titian Buff
Phthalo Green Blue
Cobalt Blue
Titanium White
Quinacridone Gold
Medium Grey Value 6
Transparent Yellow Oxide
Burnt Umber
Paynes Grey
Carbon Black
Ultra Matte Varnish
Tinting Base
   
tandologo
   
Stampendous-Logo
Andy Skinners Industrial ASCR03

Friday, 30 March 2018

Industrial style box by Monika Maksym


Hi !
It's Monika here with my newest project. 
This time I will show you how to create quick and easy industrial box.  For my project I’m using 16x 16 x7cm wooden box.


First step was to apply modeling paste through stencils on the lid and on the front. Then, using strong craft glue I’ve added bolt heads and washer on each corner of the box and small cogs on the front. Make sure the glued elements and modeling paste are fully dry before applying black chalky finish or acrylic paint, then rub on a candle stick over the stencilled areas.


  Before adding  a coat of grey chalky paint I’ve used weathered wood medium in random places on each side of the box.
 Next, using medium grade sanding paper I’ve lightly sanded bolts and stencilled areas revealing black paint underneath.


 Washes of Fluid Acrylics in Paynes Grey ,Quinacridone Gold and Red Oxide helped me achive rusty look around the edges and bolts.


Then I’ve stamped the background using waterproof ink pad and my favourite collection of Tech Trauma and Steampunk stamps.

 As a last step I’ve used matt varnish for ultimate vintage look.


Thank You for stopping by, I hope You like my project.

Monika, x

 Products used:


Decoart Media Fluid Acrylics -  Paynes Grey, English Red Oxide, Quinacridone Gold
Decoart weathered wood medium
Decoart Chalky Finish Paint - Carbon, Revive
Decoart Media Modeling Paste 
Ultra-Matte Varnish


Facebook page:  Love Creations
Instagram: Love Creations

Monday, 15 January 2018

Tagtastic 2 Kit - Valentine Heart

Hi Everyone, it's Brenda here from Bumblebees and Butterflies and I'm really excited to be publishing my first project here on Andy's blog as part of his new Creative Team. Some of you will know that I love Andy's grungy style and have learned masses from him both from his on-line workshops and real life workshops, his teaching has helped me develop my own style over the years I have known him.
I'm calling this look pretty grunge because it incorporates a bit of Andy's style and a lot of mine, to me there's a sort of feel of masculinity about it but plenty of femininity too. So with Valentine's Day coming up I thought I would throw in a heart and some fabric and use some of the red and pink colours in both the DecoArt media acrylics and the chalky finish paints to create background layers and focal elements in what might also be called a shabby style.

The Tando Creative chipboard elements here are from one of Andy's new kits coming out that will be released on the 18th February at the Stitches trade show in Birmingham. I have been lucky enough to have a pre-release play and apart from the fabric, ribbon and arrow everything else is from the kit. If you saw Dee's fabulous post last Friday she used the same set but different elements so you will see it is really versatile. I added some other bits from my supplies like this arrow which shows how you can mix and match with your own collection of embellishments.


Cheesecloth is my favourite go-to item when playing in the shabby style and it fitted in perfectly with the elements and style.


The heart has lots of layers of paints, stenciling and stamping before a coat of clear crackle glaze and don't you just love the cracks that appeared after I rubbed in some white antiquing cream?


Do keep your eye on both this blog for lots of inspiring projects yet to come and also on Andy's Face Book page for more projects and to keep up with all the news.


If you would like to see the process steps of how I put this together then they are all over on my blog.

Have a fabulous week.

hugs Brenda xxx

Check out Andy's new Stamps below!

http://www.andyskinnercrafts.com/store/c10/Illusionary_Artists_Stamps.html


Tagtastic 2 kit - Released 18th February 2018
Stencil - Dot Stream

Stamp sets - Industrial, Shabby Chic, Handle With Care

Mixed Media Acrylics - pyrrole red, quinacridone magenta, titanium white, raw umber
Chalky Finish Paints - romance, relic, everlasting
Medium - white crackle paste, clear crackle glaze

Brenda Brown
Personal blog - http://www.bumblebeesandbutterflies.com/
Facebook Page - https://www.facebook.com/Bumblebutterfly
Pinterest Page - https://www.pinterest.co.uk/bumblebutterfly/

Tuesday, 24 October 2017

THE DOOMSDAY CLOCK

Welcome to your DOOM! ... DOOMSDAY CLOCK, that is!


This clock was created using an 8" x 8" canvas, an assortment of fabulous DecoArt Products, Andy Skinner's wonderful stamps from Stampendous, amazing Greyboard embellishments from Tando Creative and other bits of this and that.

Here are the items needed for this project and then we'll get started on how it all came together!


  • Decoart Media Modeling Paste
  • DecoArt Media Fluid Acrylics Carbon Black
  • DecoArt Media Fluid Acrylics Vermilion
  • DecoArt Media Fluid Acrylics Diarylide Yellow
  • DecoArt Media Fluid Acrylics Titanium White
  • DecoArt Media Fluid Acrylics Metallic Gold
  • DecoArt Media Fluid Acrylics Metallic Silver
  • DecoArt Media Fluid Acrylics Cobalt Teal Hue
  • DecoArt Media Fluid Acrylics Qujinacridone Gold
  • DecoArt Metallic Lustre Champagne Ice
  • DecoArt Metallic Lustre Iced Espresso
  • DecoArt Liquid Glass
  • Andy Skinner Stencil - Alphabet Spaghetti
  • Andy Skinner Stamp - Birds and Bones
  • Andy Skinner Stamp - Toxic
  • Andy Skinner Stamp - Industrial
  • Andy Skinner Stamp - Steampunk
  • Tando Creative Clock Faces - Small
  • Tando Creative Gate - Large Wrought Iron
  • Tando Creative Plate, Gears and Cogs from Andy Skinner's Industrial Elements 
Miscellaneous Supplies
  • Palette Knife
  • Craft Mat
  • Paint Brushes
  • Sponge
  • Paper Towels or items with textured surface
  • Permanent Black Ink
  • Clear Embossing Powder
  • Heat Tool
  • Embossing Ink Pad
  • Small Numerals "13" - in this case, metal
  • Little Metal Hinges
  • Small Brads and Washers (optional)
  • Scrap Piece of Hard Plastic
  • Scrap Chain and Jump Rings
  • Scrap Piece of Black Chipboard
  • Orange and Black Tinsel Garland

Now for the fun part .... CREATING the idea in your head and bringing it to LIFE!


Begin with a black 8" x 8" canvas with thick sides. Lay Andy's Alphabet Spaghetti Stencil over the entire canvas front and wipe DecoArt Media Modeling Paste over the entire surface using a palette knife. Lift the stencil and let the Modeling Paste air dry or gently heat set it. Immediately wash the stencil and the palette knife.


Brush over the entire canvas using DecoArt Media Fluid Acrylics Carbon Black. Let air dry or gently heat set. You can already see the wonderful texture just from the stencil!


Now it'a all about the layers!  Use a sponge or something that provides random texture and stamping. Add DecoArt Media Fluid Acrylics Vermilion randomly over the surface of the front and sides of the canvas. Let air dry or gently heat set. 


Next add a little "pop" with another textured item to apply the paint. In this case, used a patterned paper towel and DecoArt Media Fluid Acrylics Diarylide Yellow Paint randomly pressed onto the canvas top and sides. Let air dry or gently heat set.


Yet another layer of DecoArt Media Fluid Acrylics Paint! This time Titanium White that is simply randomly wiped over the surface of the canvas to really pop those engraved letters. 


And to bring that orange back out, one more layer of Vermilion randomly added to the surface using the sponge again.  The inset picture is what the canvas will look like at this point.


Now let's introduce another layer with Andy Skinner's peeled paint stamp from his Industrial Stamp Set and Steampunk text from his Steampunk Stamp Set. These are such versatile stamps! I love them and use them a lot on backgrounds. I stamped using Permanent Black Ink followed with DecoArt Media Fluid Acrylics Metallic Gold. Be sure to clean you stamp immediately afterwards!  The gold really pops in the light.


I edged the canvas with DecoArt Media Fluid Acrylics Carbon Black using my finger.  This really defines the space and "frames" the canvas for the next steps.


Brush all of the Tando Creative Greyboard pieces with DecoArt Media Fluid Acrylics Metallic Gold. Let dry or gently heat set.


To give them more of a sheen and metallic looking surface, use your finger and randomly apply first Metallic Lustre Champagne Ice then the darker Espresso Ice over the Metallic Gold. Notice the difference in this photo when just the lighter Champagne Ice has been added?  Buff out the pieces.


Pat an Embossing Ink Pad over the entire surface of the pieces. Add Clear Embossing Powder over the surface.  Remove the excess powder and heat set until the surface becomes shiny and lifts up a little bit.  Let the pieces cool down before the next step.


Using Andy's peeled paint stamp again, randomly stamp the image over all of the clear embossed pieces using Black Permanent Ink.  Gently heat set.


Also add a little shadowing and "age" to the pieces using your finger and gently wiping DecoArt Media Fluid Acrylics Carbon Black over the surfaces and around the edges to better define them.  Glue the "13" in place using DecoArt Liquid Glass.


Measure down about 2 1/4" from the top of the canvas and attach a metal hinge on each side of the canvas.  These will hold the Tando Creative Wrought Iron Gate in place so that it can swing open and shut. I temporarily attached the gates with Double Sided Tape but then hot glued them permanently in place. (The Wrought Iron Gate is one piece so it also have to be cut up the middle to allow for two gates).


I computer generated the word "DOOMSDAY" to fit inside of the "metal" plate. Then I glued it in place using DecoArt Liquid Glass.  Next I filled the center of the plate with the Liquid Glass which dries clear, leaving an old window appearance over the word. The plate and bolts were left over pieces from Andy Skinner's Industrial Elements set.


Stamp the skeleton and the words "TOXIC and CAUTION and the Hazard Sign onto a piece of White Stamping Paper using Black Permanent Ink. I stamped the words again and the skeleton arms and head twice. I used the extra heads on the skeleton's chains. The arms were cut so that I could joint them onto the body and the words were used to make danger signs for the inside and outside of the gates. Next I patted them completely with the Embossing Ink Pad, sprinkled them with Clear Embossing Powder and gently heat set them to make them shiny and more sturdy.


Now for the clock "guts" for the reverse side of the canvas!  I first painted each of these gears with DecoArt Media Fluid Acrylics Metallic Gold, followed by random additions of Metallic Silver, then Quinacridone Gold for a rusty look followed by Cobalt Teal Hue for a bit of a patina look.  Finally, I edged them all with Carbon Black using my finger for a bit more depth and "age".


The were arranged onto a piece of clear sturdy plastic and glued in place using DecoArt Liquid Glass.  It dries clear!  Next I attached the plastic piece onto the back side of the canvas using DecoArt Liquid Glass.


I added a piece of orange and black tinsel garland around the perimeter of the plastic to finish off the back of the clock. 


I jointed the skeleton's arms to the body so that they could move as clock hands would move. Next I added Jump Rings and chains to his arms.  On the bottom jump rings, I attached the stamped skeleton heads. You can see those in the final pictures.  Notice how the "DOOMSDAY" window dried clear in the plate? Love that Liquid Glass!


The words were cut out and added to a piece of black chipboard. They were glued in place using DecoArt Liquid Glass. Here is the finished clock with the gates closed.


And here is is with the gates open!

Thanks so much for stopping by! I hope this has inspired you to do some last minute holiday creating!  SO MUCH FUN with these outstanding products! 

Happy Halloween Everyone!


About the Artist:  Candy Colwell
Blog: http://candycreates.blogspot.com
Facebook:  https://www.facebook.com/candy.colwell.9
Twitter:  https://twitter.com/rindacelly
Instrgram:  https://www.instagram.com/candy.colwell/