Sorry to all feed subscribers for the test message sent yesterday, Feedburner had stopped Emailing my feeds and this took me a while to work out the problem, all does seems to be working now.
The post that was missed can be found
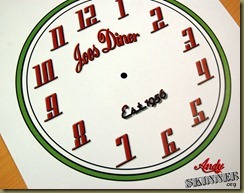
hereOk so here is the Retro Clock I have just made for my friend Joe, I will attempt to roughly guide you through it!
Click on pictures for larger view


I designed the clock face using Photoshop and printed it onto bog standard plain printing paper, I would have used better quality paper but there was none to hand.
Just to let you know I have placed these designs in my Picasa drop box to share with you, one with, and one without the name so you could add your own like Mums diner etc.. I have had to cut the resolution a little but they should be fine.
The font I have used is called Lokicola which you should be able to find on the web if you wish to use it. They are sized exactly for the clock blank I have used.
Here is a link to the images Dropbox
The substrate I decided to use for the Clock is a bisque clock blank available from the craft barn. view it .
On one side of the clock it has raised numbers as picture below, on the other it's flat so that you can alter it to your hearts content! You could decorate both sides and simply turn the clock to suit your mood!
Here is a painted sample of the numbered side.

Here is a link to a pdf tutorial for this clock…My I’m being generous today 
Ok where was I? Ah yes, I sealed the surface of the bisque with Decoart multi surface sealer and allowed it to dry. While drying I cut out my clock face out with scissors.
I then glued the paper clock face onto the surface of the bisque using Americana matte decoupage glue, you could also use Ranger glue & seal.
Once dry I aged the surface with Versa Magic chalk ink and a blending tool. Note; Do not use Distress inks if you are going to use a liquid sealer on top, they will fade & smudge, there is a way to do it with distress inks but its long winded and I will leave that how to for another day.
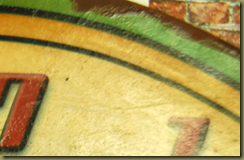
Next I sealed the surface with Duraclear Polyurethane satin varnish, once dry I added Decoart 2 step perfect crackle to small random areas on the surface.
Once this had dried, I watered down a little Americana Burnt Umber and wiped this into the crackle glaze to accentuate the cracks.

Finally rust was added to the edges and a clock mechanism fitted.
THE END
Take care,
Andy


