
I hope everyone had a very Merry Christmas and that your 2019 will be filled with joy, happiness and a love for exploring your creative self!
As my last piece for 2018, I decided to create a cover for a journal using Andy's fabulous stencils, DecoArt Media Line Products and Tando Creative's very cool laser cut greyboard images.

This is a fairly simple journal cover to create but the images really pack the "WOW" factor!
This piece started out using one 12"X12" piece of heavy chipboard. I cut two 5"X7" pieces for the covers and that left a 2" spine.
This project is all about layers, Layers, LAYERS! They build up the base, add lots and lots of texture and color and simply make your project more interesting!

I started with Andy's DecoArt Tornado Stencil and DecoArt Media Modeling Paste. I taped the stencil in place on the cover (leaving an 1/2" margin on the inside edge of the chipboard to attach material for the spine later. I used a palette knife to add the Modeling Paste.

While still wet and the stencil was still in place, I used the palette knife to add another layer of DecoArt Media Crackle Paste over the Modeling Paste to build up the layers on the front cover. Then I removed the stencil and repeated this process on the back cover. I then removed the stencil and washed it immediately and let the covers air dry so that the crackling process would work properly. Once dry, I painted over both outside covers with DecoArt Media Fluid Acrylics Titan Buff ... a rich creamy color.

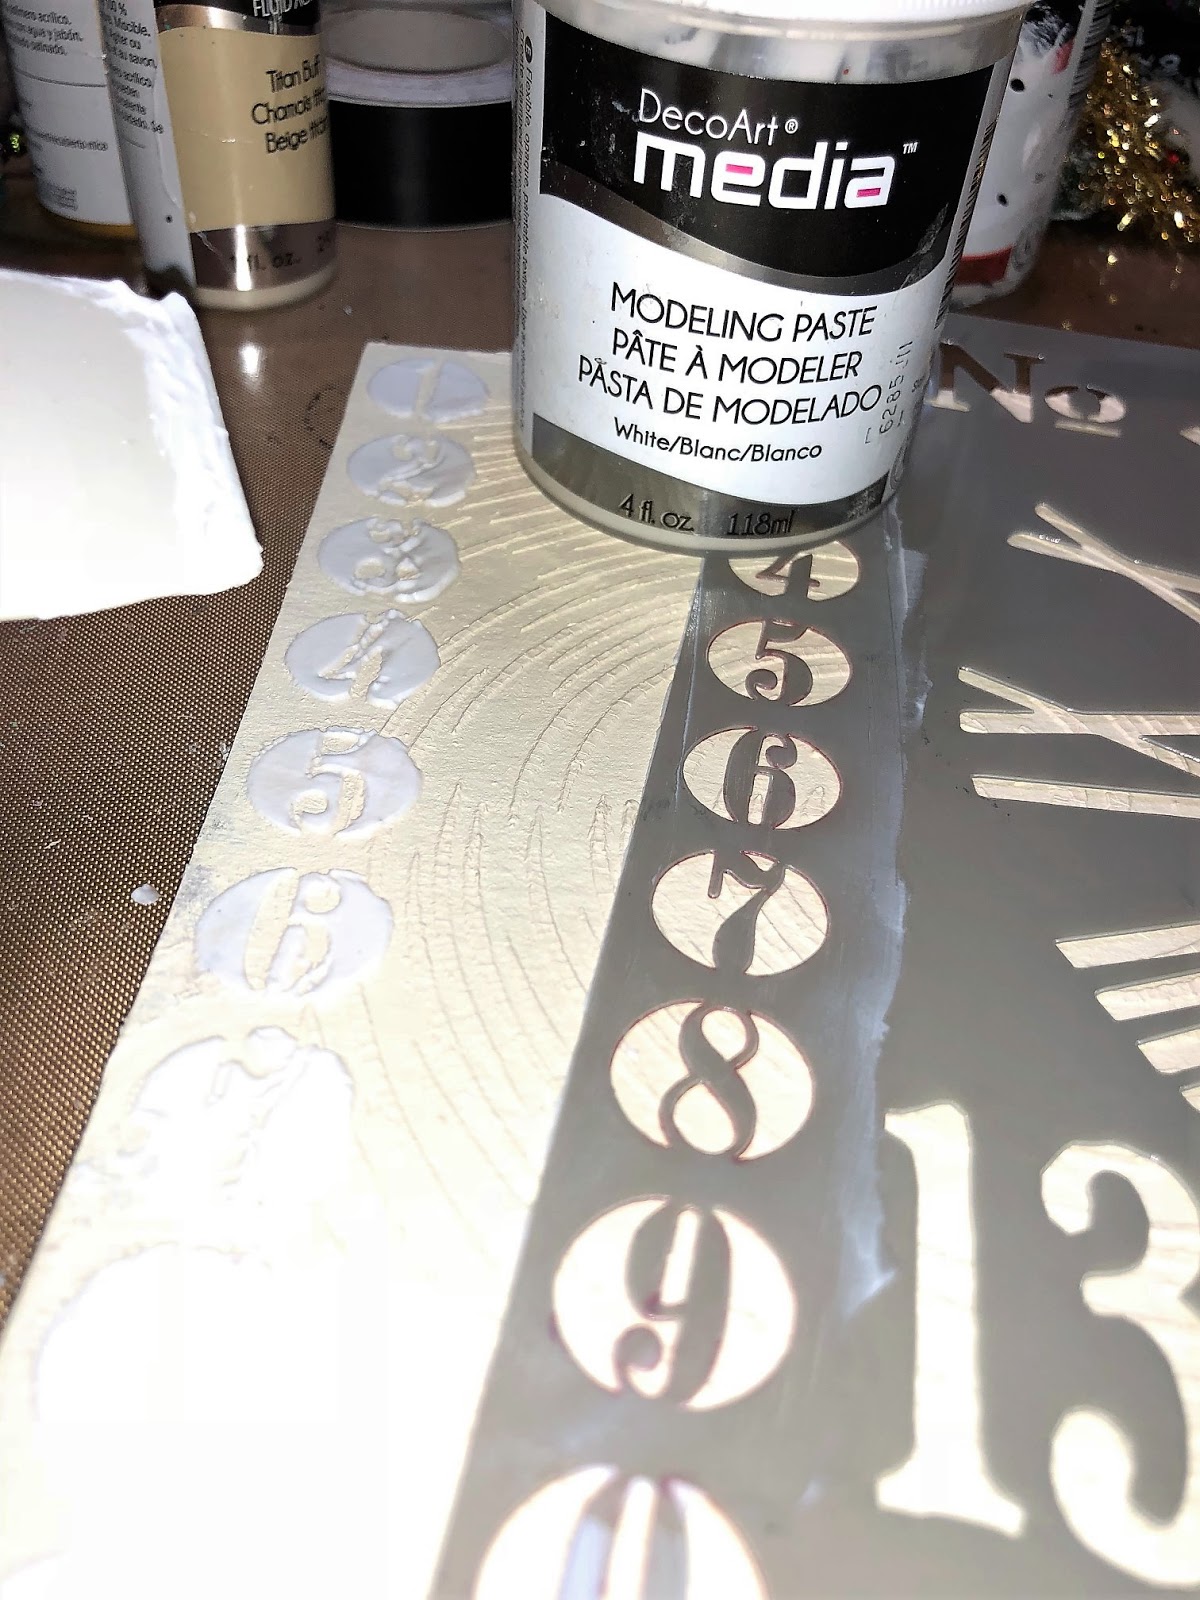
While the covers were drying, I measured some 1" strips of chipboard to words on Andy's Industrial Elements stencil. I then painted over the strips with either DecoArt Media Black or White Gesso.
Next I added a layer of DecoArt Media Fluid Acrylics Quinacridone Gold paint. It gives such a lovely rust appearance.

Remember ... layers, layers, layers!! Next I added DecoArt Media Fluid Acrylics Black Carbon that had been diluted with water. I used an old toothbrush that I swished through the watery black paint and then flicked the toothbrush over the tops of the painted 1" chipboard strips. This gave them an even more worn rusty look. Next, I added an aged patina effect but mixing two of my favorite "patina-ish" colors; Fluid Acrylics Cobalt Teal Hue and Blue Green Light with water. Then I repeated the flicking of the toothbrush process over the chipboard strips. I repeated these steps until I had achieved the layering I wanted. Heat set to dry.

Now to add the words I had specifically cut the strips to fit from Andy's Industrial Elements stencil! I taped the stencils in place over the strips and using a small stencil brush, I patted DecoArt Media Fluid Acrylics Titan Buff over the stencil until I achieved a more opaque cream letter. I encourage you to go lightly on the paint and continue to layer it when tapping it through the stencil. If you use a lot of paint on the brush, it may run underneath the stencil and blur your letters. Heat set when finished and wash the stencils!

For the front of the cover, I chose Andy's Tando Creative Industrial Clock Face. I love this clock face! I brushed over it entirely using DecoArt Media Fluid Acrylics Carbon Black for the base. Then using my fingers, I added random touches of DecoArt Media Fluid Acrylics Metallic Silver then Gold.

For a more patina, worn and weathered look, I added a layer of DecoArt Media Fluid Acrylics Quinacridone Gold followed by a combination of Titan Buff and Blue Green Light (that created a thicker patina effect). I repeated these layers until I achieved the look I was going for.

For the inside of the covers, I simply found a couple of different tissue papers I loved and glued them in place on the interior covers using DecoArt's Media Matte Medium. This dries clear and works beautifully as a glue and a sealer. First I glued the typed tissue image in place and then added torn bits of the old world map images on top using more of the Matte Medium to glue and seal them. I then brushed over all of the covers to seal the tissue and then trimmed off the excess. This can air dry or be heat set.

I added another torn piece of the typed image tissue to the center front of the journal cover using the Matte Medium.
I added another stenciled image from Andy's Made to Measure stencil. It was a great border for the back cover of the journal. I taped the stencil in place and added the DecoArt Media Modeling Paste just as I had done on the front covers. Heat set to dry. Then I brushed over it with DecoArt Media Fluid Acrylics Titan Buff.

Now for another of my favorite DecoArt products to play with ... Antiquing Cream! I love to work with my fingers rather than paint brushes! So for this step, I squirt some DecoArt Media Raw Umber Antiquing Cream on the outside covers and moved it around and worked it in using my fingers. Then I wiped off the excess using a paper towel or a baby wipe. Repeat this step until you are happy with your results.
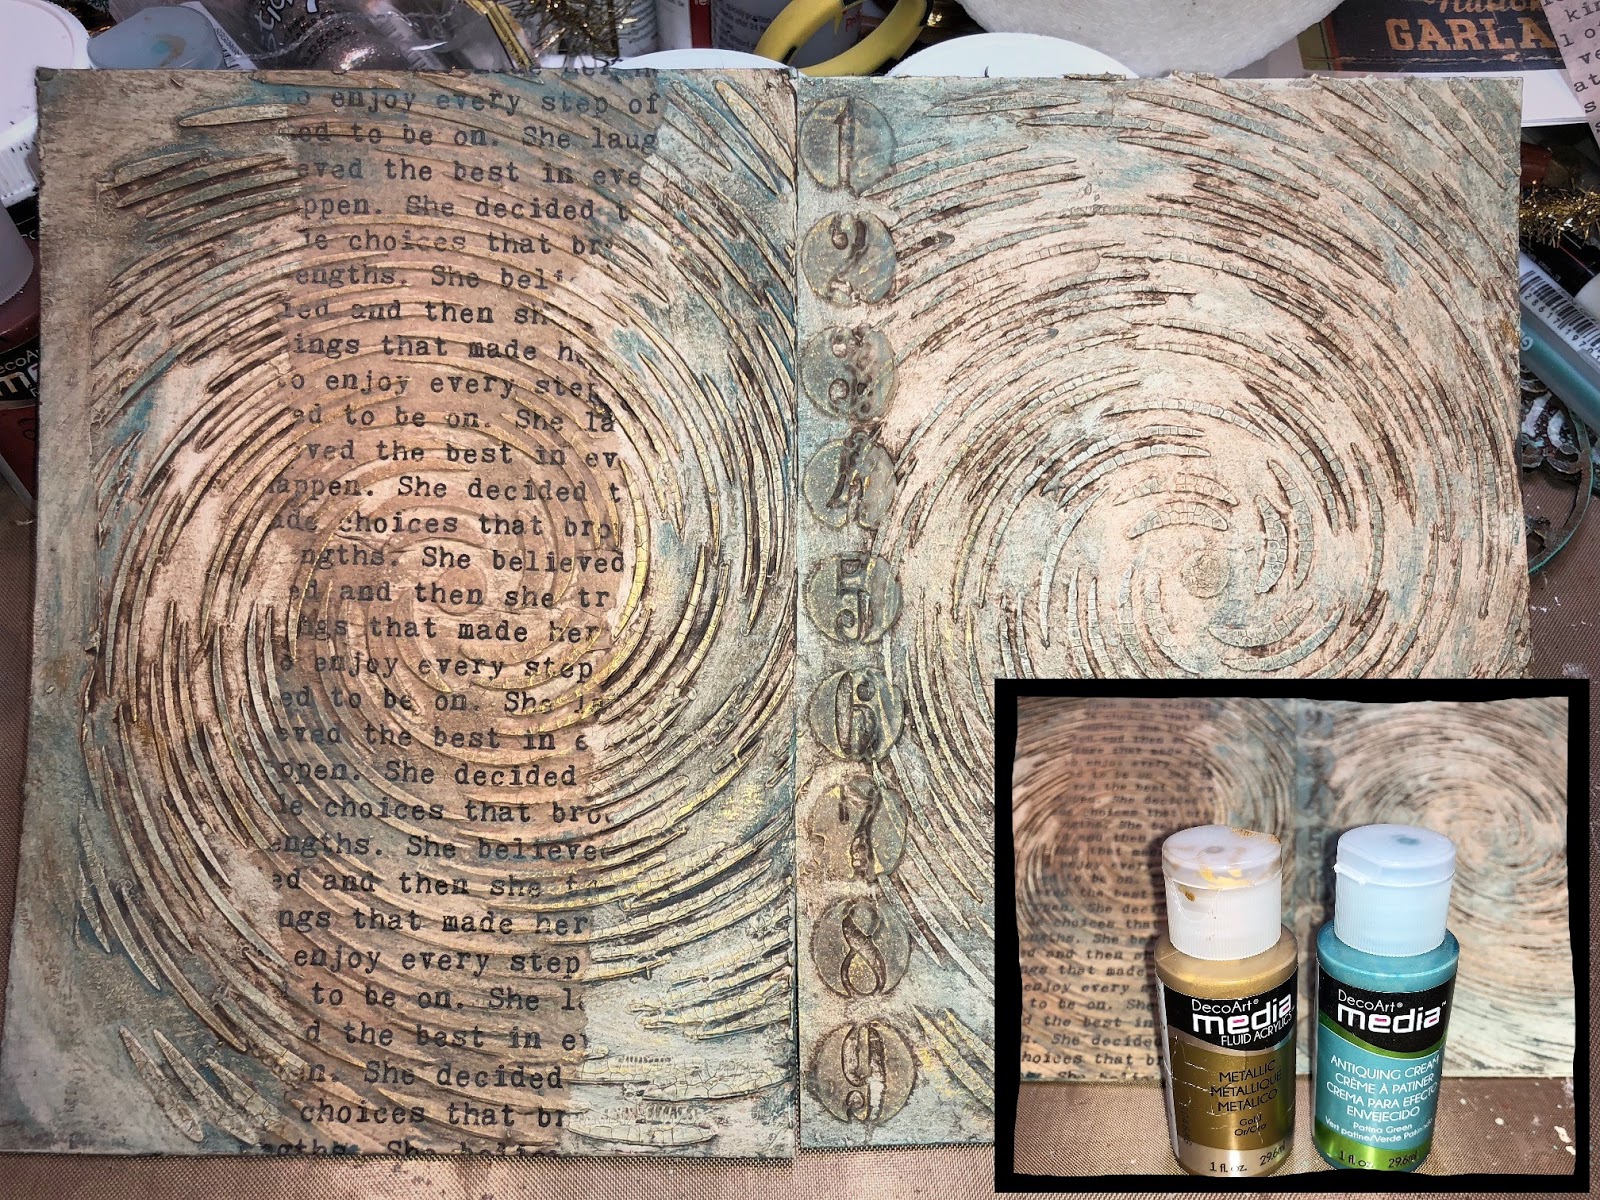
Next I added the Patina DecoArt Media Antiquing Cream using the same technique at the Raw Umber. Then I sprayed the outside covers with a sealer so that anything else I did to the covers would not affect the antiquing that I had achieved. I added touches of Metallic Gold to the raised areas of the outside covers to add interest and contrast.

Using small adhesive pop dots, I positioned the clock face in place so that it would be raised. The "Journey" strip was also raised on top of the clock face giving this cover some dimension. I also placed the "No 152" strip on the lower right hand corner of the front using pop dots. Finally, I added pop dots to the "Ticket No. 337" strip I added to the back cover.

I added pieces of fabric over the 2" chipboard strip that would become the spine for the journal. Using double sided 1/2" Scor Tape makes applying the fabric to the spine and then the spine to the book covers simple. The fabric has already been added to the outside covers. The top and bottom ends of fabric still need to be folded up into the inside and another piece of double sided tape applied over them. This is a look at the construction from the inside covers side. Simply place the fabric over the spine and press in place.

Here is a look at the outside spine with the fabric added. The only thing left to do is add something over the raw edge of fabric to hide that.

I added a small chain running from the inside journal covers, around the outside and back to the inside to complete the look of this journal's appearance. The chain is held in place using a strong clear drying glue. This is the outside of the journal.


And here is the inside of the journal covers. Pages can be added by sewing in signatures or simply added elastic bands around the spine and slipping signatures into the bands.
Fun and really simple to create! Here are the products you'll need for this type of project:

Fun and really simple to create! Here are the products you'll need for this type of project:

- Andy Skinner Tornado Stencil (DecoArt)
- Andy Skinner Made To Measure Stencil (DecoArt)
- Andy Skinner Industrial Elements Stencil (DecoArt)

- Media Fluid Acrylics Titan Buff
- Media Fluid Acrylics Quinacridone Gold
- Media Fluid Acrylics Carbon Black
- Media Fluid Acrylics Cobalt Teal Hue
- Media Fluid Acrylics Blue Green Light
- Media Raw Umber Antiquing Cream
- Media Patina Green Antiquing Cream
- Media Matte Medium
- Media Modeling Paste
- Media Black Gesso
- Media White Gesso
- Media Crackle Paste

Miscellaneous Items
- Chipboard Pieces
- Paint Brushes
- Palette Knife
- Paper Towel or Baby Wipes
- Metal Chain (for cover trim)
- Masking Tape
- Double Sided Tape
- Fabric Scraps
- Pop Dots
- Old Toothbrush (for flicking paint)
- Tissue Paper Scraps
About the Artist: Candy Colwell
Instagram www.instagram.com/candy.colwell
Twitter www.twitter.com/rindacelly
Pinterest www.pinterest.com/mimicandy
Candy, you never fail to impress! I love the way the tornado stencilling draws the eye in, the tissue paper is gorgeous and the patina on the clock face is just beautiful. The fabric binding is just the icing on the cake. A wonderful project all round! xx
ReplyDeleteWOWsers! Great journal covers! I love the texture, colors and embellies. Thanks so much for this inspiration.
ReplyDeleteA fabulous project Candy, brilliantly designed and put together xxx
ReplyDeleteGreat blog you have hhere
ReplyDelete