Showing posts with label Clocks. Show all posts

Wednesday, 9 October 2013

Decoart International Design Team

Hi everyone,

Before I share the past couple of weeks stuff with you I would just like to announce the formation of the Decoart International Design Team.
The team has been put together with six very talented individuals and myself.  
For the moment the focus is on bringing you in-depth tutorials related to mixed media and altered, we already have a good few to share with you too!  They can all be found at our new home http://decoart.com/andyskinner/ along with bio's of the new design team members.
Much thought and work goes into these tutorials so I hope you enjoy them.


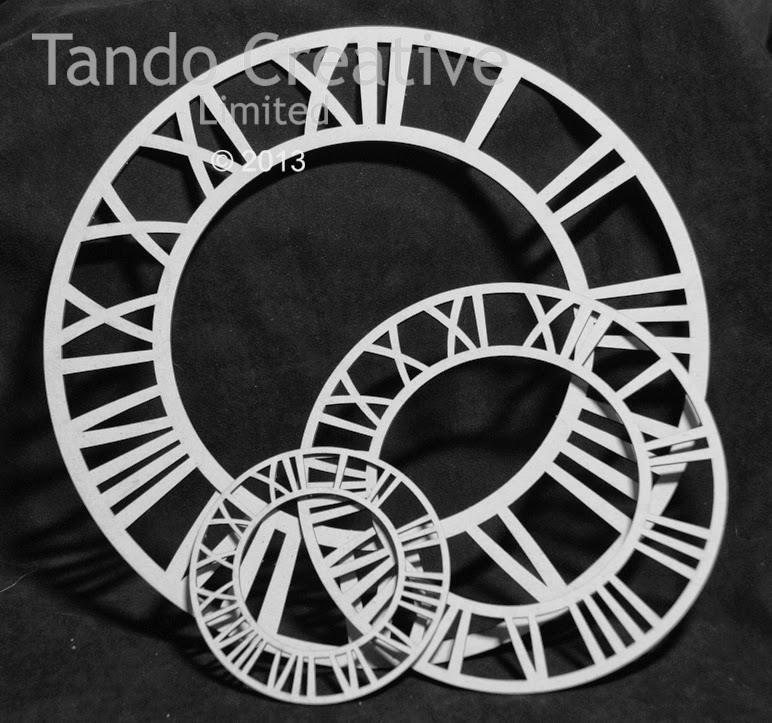
Last post I promised free printable clock face designs for you to download and use on my reversible clocks, these are now online and ready for download here http://www.andyskinnercrafts.com/printables.html


While I was at it I also uploaded lots of vector threshold pictures that you can use in your artwork, these can be found here http://www.andyskinnercrafts.com/threshold-printables.html

Here are a few examples.


Ok finally two pieces, the first is a steampunk version of my reversible clock using Decoart Metallic Lustres.


Andy finally my Voodoo for Dummies Book with secret draw using a threshold image transfer, got into allot of trouble with this one ;)


Thanks for reading.

Andy

Thursday, 26 September 2013

New Stencil and Chipboard Releases!

Hi everyone,

I am very excited to announce some new product releases launched today with Tando Creative.

First up is my venture into chipboard and I wanted to design something decorative which also had a functional use.


Can you guess what it is yet??

Its a Reversible Retro Clock.
I saw this type of style which looks like old American number plates years ago on a framed mirror and clock and fell in love with them.


This clock is 29.4 cm x 29.4 cm approximately in diameter and consists of a round backplate, 12 segments which can be decorated individually and placed onto the backplate, an inner round plate, a clock mech and some very very cool retro numbers.


Whats more, because the clock has been designed to the same diameter as the largest 3 clocks in 1 pack from Tando pictured above, it also includes the larger clock ring which can be used on the reverse of the clock to give you two clocks in one!  You can turn the clock to suit either your room or your mood!


I have also designed a mini version which is approximately 18 cm in diameter (not too mini)


This kit includes everything that the larger version has apart from the clock ring. 
It is designed to have the same diameter as the medium size 3 clocks in one ring so it is still an option.
The back is ideal for decorating with card-stock, image transfers or paint to design the perfect opposite side.

Here are a few examples of my image transfer versions.


I will be putting a collection of image transfer sheets which I have designed on my website in the next few days, these will print to the exact size for the clocks and will also be free downloads, I will let everyone know via social media where to find them soon.

Finally I have released two limited edition stencils before my main release in February 2014.
These stencils are for my darker friends :)  They are 6x6" and will be available only until the end of this year December 2013.

First up is The Reaper.


The second is for all the Doll lovers out there........ Heeeeere's Dollface lol!


Andy Wardoll


New Tando Mixed Media Cards

These new mixed media cards from Tando are fantastic, they are great for practice and for sharing art with friends, a bit like a mixed media ATC but bigger and can hold lot's of product


Please do not ask me where you can purchase these as I myself have no idea yet as they have only been released today, hopefully shops that stock my products will have them on the shelves soon :)

Thank you so much for reading,

Andy

Tuesday, 29 November 2011

New Stamps and Stuff!

Hi everyone,
Well back from my weekend at the Papeterie in Aberdeen where both myself and Lindsay Mason were demoing and running workshops so a quick thank you to Charlotte and all the staff for looking after us,  also a big thank you to everyone attending the workshops, what a lovely bunch and so well behaved!! :)
I spent the day yesterday with my phone switched off putting the finishing touches to my new stamp designs which will hopefully be launched at the Craft Hobby & Stitch International Show (Trade) in february 2012.

I will be at the Craft Barn in Lingfield this coming weekend demoing on Saturday and holding an Altered reversible bisque clock workshop on Sunday using a new to the "Craft Barn" Decoart acrylic paint and technique…exciting!  I am hoping this yucky cold I have has cleared up before then as it's not nice… and obviously as you all well know, us men suffer far worse when it comes to colds ;)

Here is a peak at what delegates are going to make this weekend.
Clock Face Side One
This side is quite a simple faux chipped enamel technique to enable delegates to understand how the new paint behaves.
Clock Face Side Two
On the reverse we will be using one of my favourite Decoart products - Modeling Paste along with the new paints and technique.

Before I go I just wanted to apologise to everyone booked in for the next Evil Elixir Mixer online course for not sending the information on the two secret products yet, the reason for this is  that they are currently on their way from the states and not yet in stock. I am checking this everyday and will send you the info as soon as they are here. we do still have 39 days left until launch and that means still 30 days in which you can book on. here is a link to the workshop information .

I am currently working hard on the promised new online workshop for early next year where I am going to share lots of fantastic techniques most of which I do not use on day workshops because of the time limits.
I have also set up a new blog just for the online workshops, I will post all details there when I have it finished.
Bye for now,
Andy

Sunday, 6 November 2011

Coming Up For Air!

Hi all,
I have a day at home today at last to catch up on emails and finish a few outstanding design jobs,  so thought I would do a quick blog update before I start..
I had a busy week running at intensive pottery painting workshop which started last Tuesday and finished Friday, It was then straight to the car to travel down to Lingfield in preparation for the Craft Barn Minifest Yesterday.

Below is a clock which I made yesterday from one of the bisque clock blanks in stock at the Craft Barn.

altered clock1
I also covered a Bisque box with embossed cardstock using the Tim Holtz Texture Fades Embossing Folders: Merry Christmas, vintage holiday,  December calendar & holiday words....Spot the mistake? :)

DSC_0716

DSC_0715
I travelled back home last night hoping to get a few jobs done but made the deadly mistake of sitting down to watch a little TV first…..that unfortunately is where I remained for the rest of the night!
Ok must get back to it but before I do I just wanted to say a big thank you to everyone who has liked my Facebook Page over the past couple of weeks, and also those of you who have subscribed to my YouTube Chanel, I have just checked the video stats and I am nearly up to 20,000 views which is fantastic!

Enjoy your Sunday everyone,

Andy

Saturday, 21 May 2011

How to Retro Clock

Sorry to all feed subscribers for the test message sent yesterday, Feedburner had stopped Emailing my feeds and this took me a while to work out the problem, all does seems to be working now.
The post that was missed can be found here

Ok so here is the Retro Clock I have just made for my friend Joe, I will attempt to roughly guide you through it!

Click on pictures for larger view

Andy Skinner Retro Clock close1Andy Skinner Retro Clock2

I designed the clock face using Photoshop and printed it onto bog standard plain printing paper, I would have used better quality paper but there was none to hand.
Just to let you know I have placed these designs in my Picasa drop box to share with you, one with, and one without the name so you could add your own like Mums diner etc.. I have had to cut the resolution a little but they should be fine.
The font I have used is called Lokicola which you should be able to find on the web if you wish to use it. They are sized exactly for the clock blank I have used.
Here is a link to the images Dropbox

The substrate I decided to use for the Clock is a bisque clock blank available from the craft barn. view it .
On one side of the clock it has raised numbers as picture below, on the other it's flat so that you can alter it to your hearts content! You could decorate both sides and simply turn the clock to suit your mood!
Here is a painted sample of the numbered side.

image

Here is a link to a pdf tutorial for this clock…My I’m being generous today Smile

Ok where was I? Ah yes, I sealed the surface of the bisque with Decoart multi surface sealer and allowed it to dry. While drying I cut out my clock face out with scissors.

Andy Skinner Retro Clock temp

I then glued the paper clock face onto the surface of the bisque using Americana matte decoupage glue, you could also use Ranger glue & seal.
Once dry I aged the surface with Versa Magic chalk ink and a blending tool. Note; Do not use Distress inks if you are going to use a liquid sealer on top, they will fade & smudge, there is a way to do it with distress inks but its long winded and I will leave that how to for another day.
Next I sealed the surface with Duraclear Polyurethane satin varnish, once dry I added Decoart 2 step perfect crackle to small random areas on the surface.
Once this had dried, I watered down a little Americana Burnt Umber and wiped this into the crackle glaze to accentuate the cracks.

image

Finally rust was added to the edges and a clock mechanism fitted.
image

THE END

Take care,

Andy

Saturday, 13 November 2010

I Have No Idea

Where this came from and what its all about I have no idea!
It started out as an image transfer on a tile that went horribly wrong so rather than bin it I started doodling with different media and went along with it for the ride!
Mediums used include gesso, plaster, paper, enamelling, silicone, Distress ink, Versa magic ink, Stazon, Alcohol ink, Americana acrylic, paper, glass stains and Triple thick…Am I boring you yet!
Smile
The photo is not the best and the white dots you can see are Triple Thick acrylic glaze applied to look like rain drops when it catches the light.
Not sure what to do with it now though!


Have a good day,
Andy

Thursday, 11 November 2010

Tick Tock Make Your Own Clock

Hello all,
Clocks make great gifts and really are not that expensive to produce.
These 20cm x 20cm bisque tiles make such wonderful clock faces so today I decided to make a few using Inks, image transfer and acrylic paint.

First of all I designed a few clock templates in Photoshop which I could then print as a mirror image and transfer onto the tiles.
Here are the templates.
Templates now uploaded here.

For the first clock I simply sprayed my laser printed image with Americana Gloss spray sealer and transferred the image onto the tile. Black ink works great with this method. If you missed the tutorial on this technique look under image transfer on this blog.
I then coloured in the design with a brush using Versa inks mixed with a little water. I have never used Pro Markers but I’m sure they would work great for this, they are next on my shopping list!  The design in the corners was stamped using Stazon Jet Black ink. I then fitted the clock mechanism.
The frame was base coated in Dazzling Metallic Emperors Gold, once dry I stamped the frame with embossing ink and lightly dusted with Gold Perfect Pearls.
Click On Pictures For Larger Views


The same method has been used for this clock other than the frame which I applied a walnut effect to using Americana acrylics.


I love this British Grunge clock, this ones coming home with me!! 
I have used the Duraclear Matte image transfer method for this clock which is also explained in a tutorial on this blog.


Take care,
Andy

Saturday, 2 October 2010

More of my samples from Trade Day

I will try to explain briefly the process I have used but it can be somewhat difficult without pictures, I am busy preparing for an event on Monday and a little pushed for time at the moment so next week I will start posting a few step by step picture tutorials.
Here are a few more pictures of the bisque displayed on Wednesday.
The vase below has been coated inside with Decoart Patio paint to make it waterproof and weather resistant.
The outside has Americana acrylic paint applied using a walnut effect. It was then stamped with embossing ink and a script stamp, Gold Perfect Pearls were then dusted on. The birds have been stamped using Light buttermilk Americana acrylic paint. When stamping with acrylic I like to add a little drying extender to the paint, this will slow the drying process of the acrylic and the  paint will wash of the stamps with ease.
Once dry the vase was finished with Americana gloss spray varnish for a glaze like appearance.


The clock was made from a 20cm x 20cm bisque tile. I drilled a 10mm hole in the centre for the clock mechanism. Bisque drills with ease. I have a step by step pdf tutorial on my website for this process. PDF Tutorial
The clock face was stamped with Black Stazon. Gesso was then applied and allowed to dry briefly. I then stamped into the gesso using numerous stamps, misting each stamp with water first to avoid it sticking to the gesso.
While the gesso was drying I painted the frame with Americana acrylics using the walnut effect. I will post a tutorial on this technique next week.
Once the gesso was dry I chose my pallet of colours and built them up gradually finishing of with dry brushing. Detail around the clock face was added using Americana 3d writers. The clock face was then filled with triple thick varnish to give a glass like appearance.
Once dry the clock mechanism was added and the tile was fixed into the frame.