Showing posts with label Andy Skinner Creative Expressions Cosmic Shimmer Paints. Show all posts

Saturday, 19 March 2022

Altered Book Cover March Challenge with Heather Thompson


Welcome back, I am sharing a fun altered book Cover I made for Andy Skinner Altered Book Challenge Made with tons of Creative Embellishment products and I just sat and painted and blended trying to get some relaxation in.


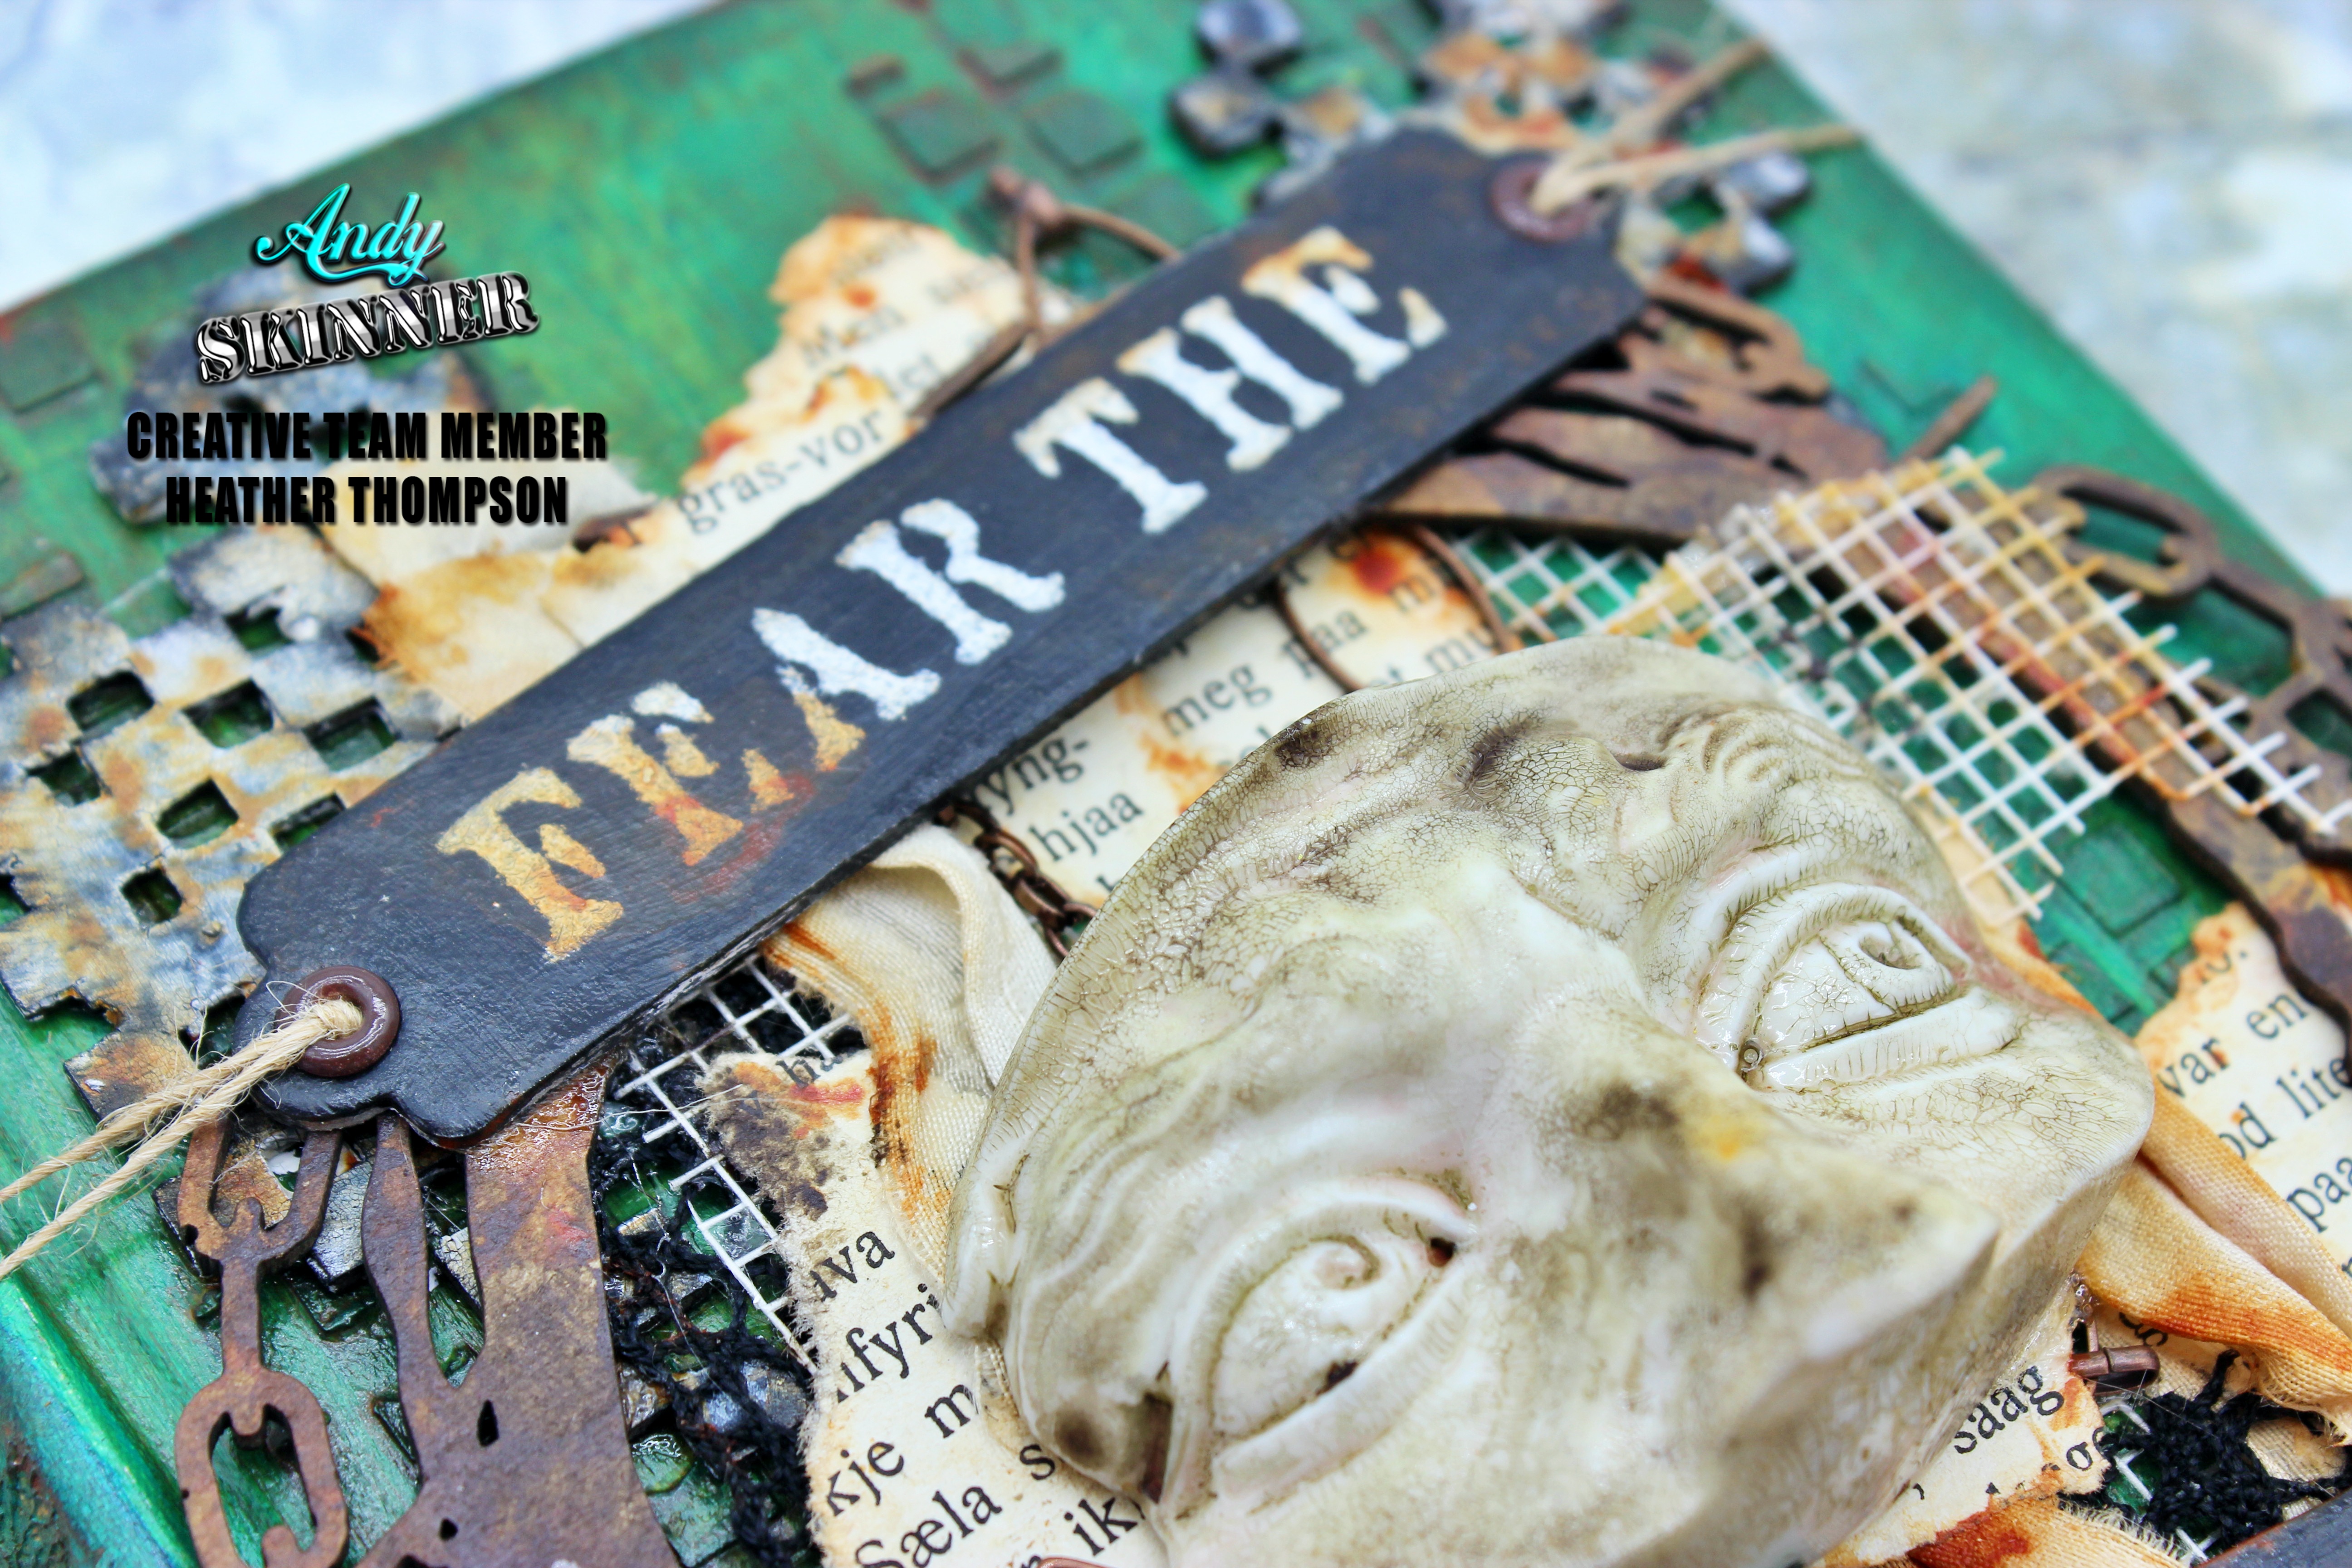
I made a short video of the creative flow of this project, sometimes I don't ever know where it is going to go. But I first started out with a focal point, which was the face. I did try and find something a little creepy and dark. I love these eyes they are so mysterious.


I have a ton of old books. I love anything old, rugged and worn, I originally started with some white gesso. Once gesso was applied I stamped the background with the Distress Type stamp and the Andy's cracked up stamp.

I noticed the red of the old ink was bleeding through so I applied a Layer of clear gesso due to the bleeding of the ink from the old cover. Then repainted with white to hopefully stop the bleed.

Using the distress checkered stencil, I add more texture to the background. On the binding of the book I stencilled the Barbed Wire stencil. This helps pull in the frame I decided to use later.
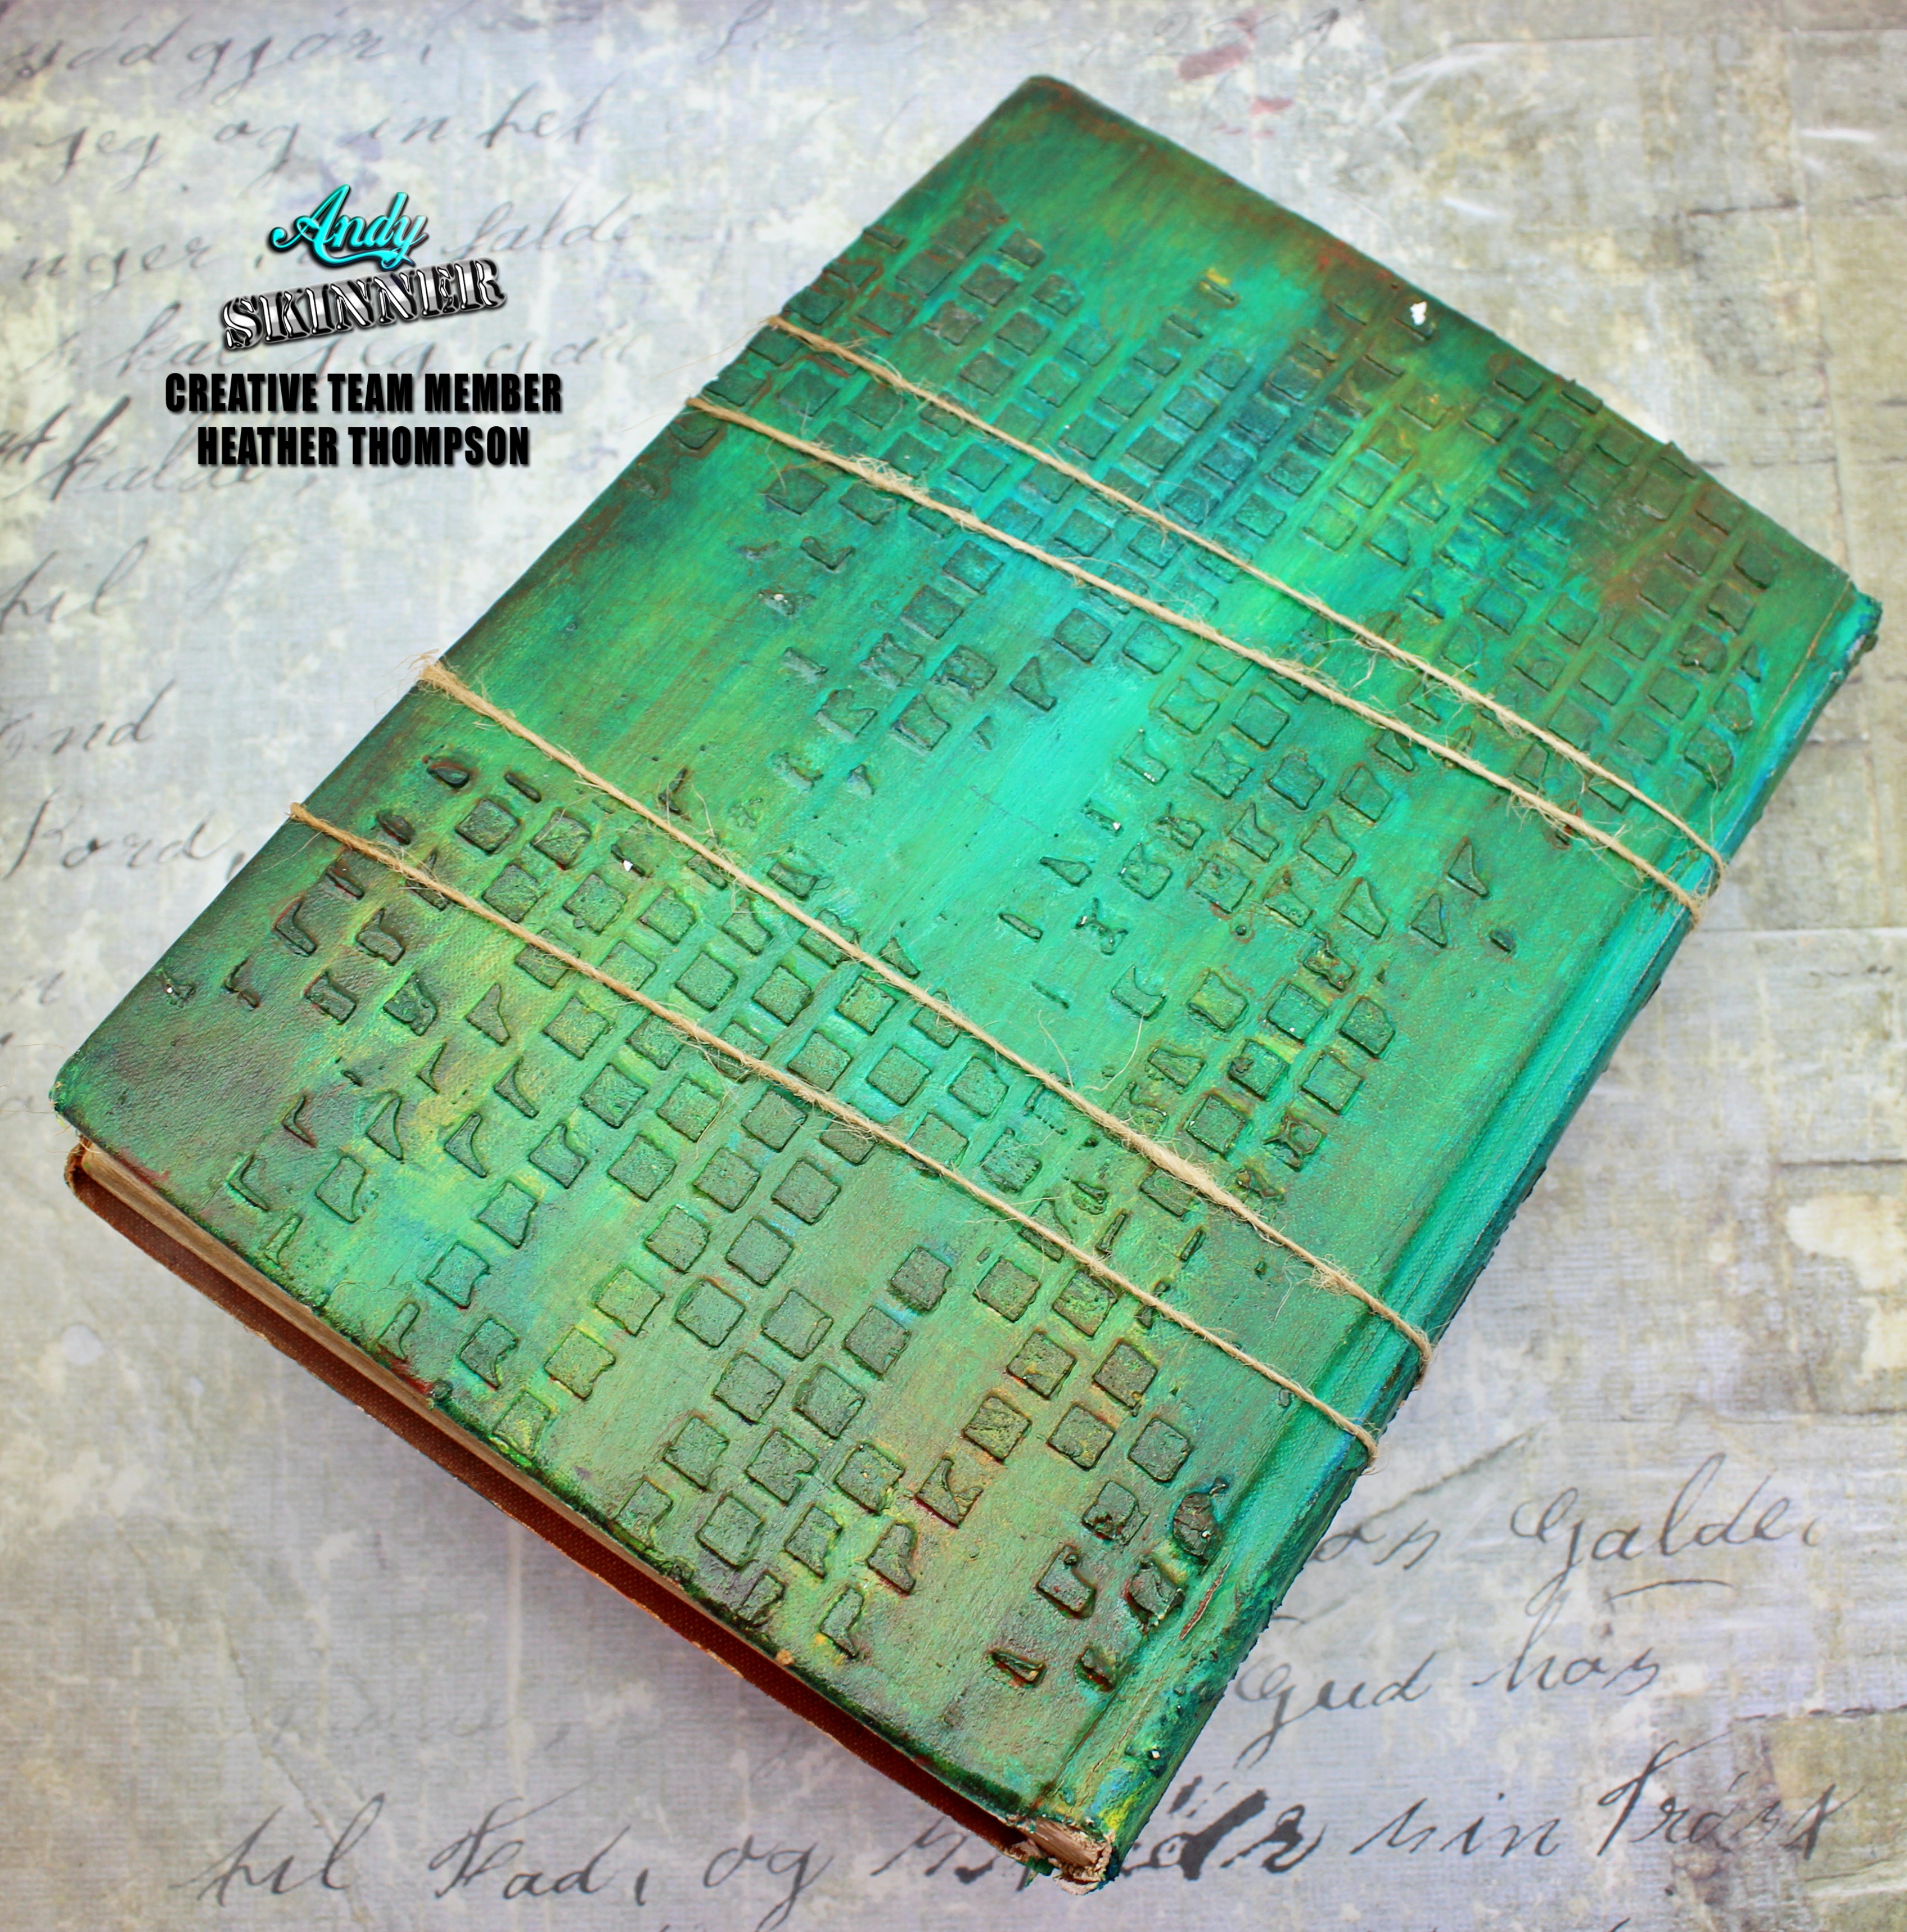
After that was all dry, I started to blend with primary blue, primary yellow and some cobalt teal. Blending until I get a bold background I like.

I added a little crackle to the face, set aside to dry and then started blending some quinnacridone gold on the background to grunge it up some. Then when the face was dried, I added a "dirty wash" to the face to highlight the cracks.


I find the banners out of my stash to add a title and pull the grunge circle frame from CE to frame the face. Using the Quinn Gold, Transparent Yellow Oxide and Burnt Umber to paint the frame.

I dry brush the banners with the rendition stencil. I touch up the white, I know they aren't straight but I don't mind. I will just layer them with ribbon, tape, binding, metal chains and old Norwegian paper. Them being offset with be hardly noticeable.

Once the frame is glued on and the layers are glued on, I add some paint to pull the whole over all look together and then glue the frame on. I add twine to the title and adhere them.
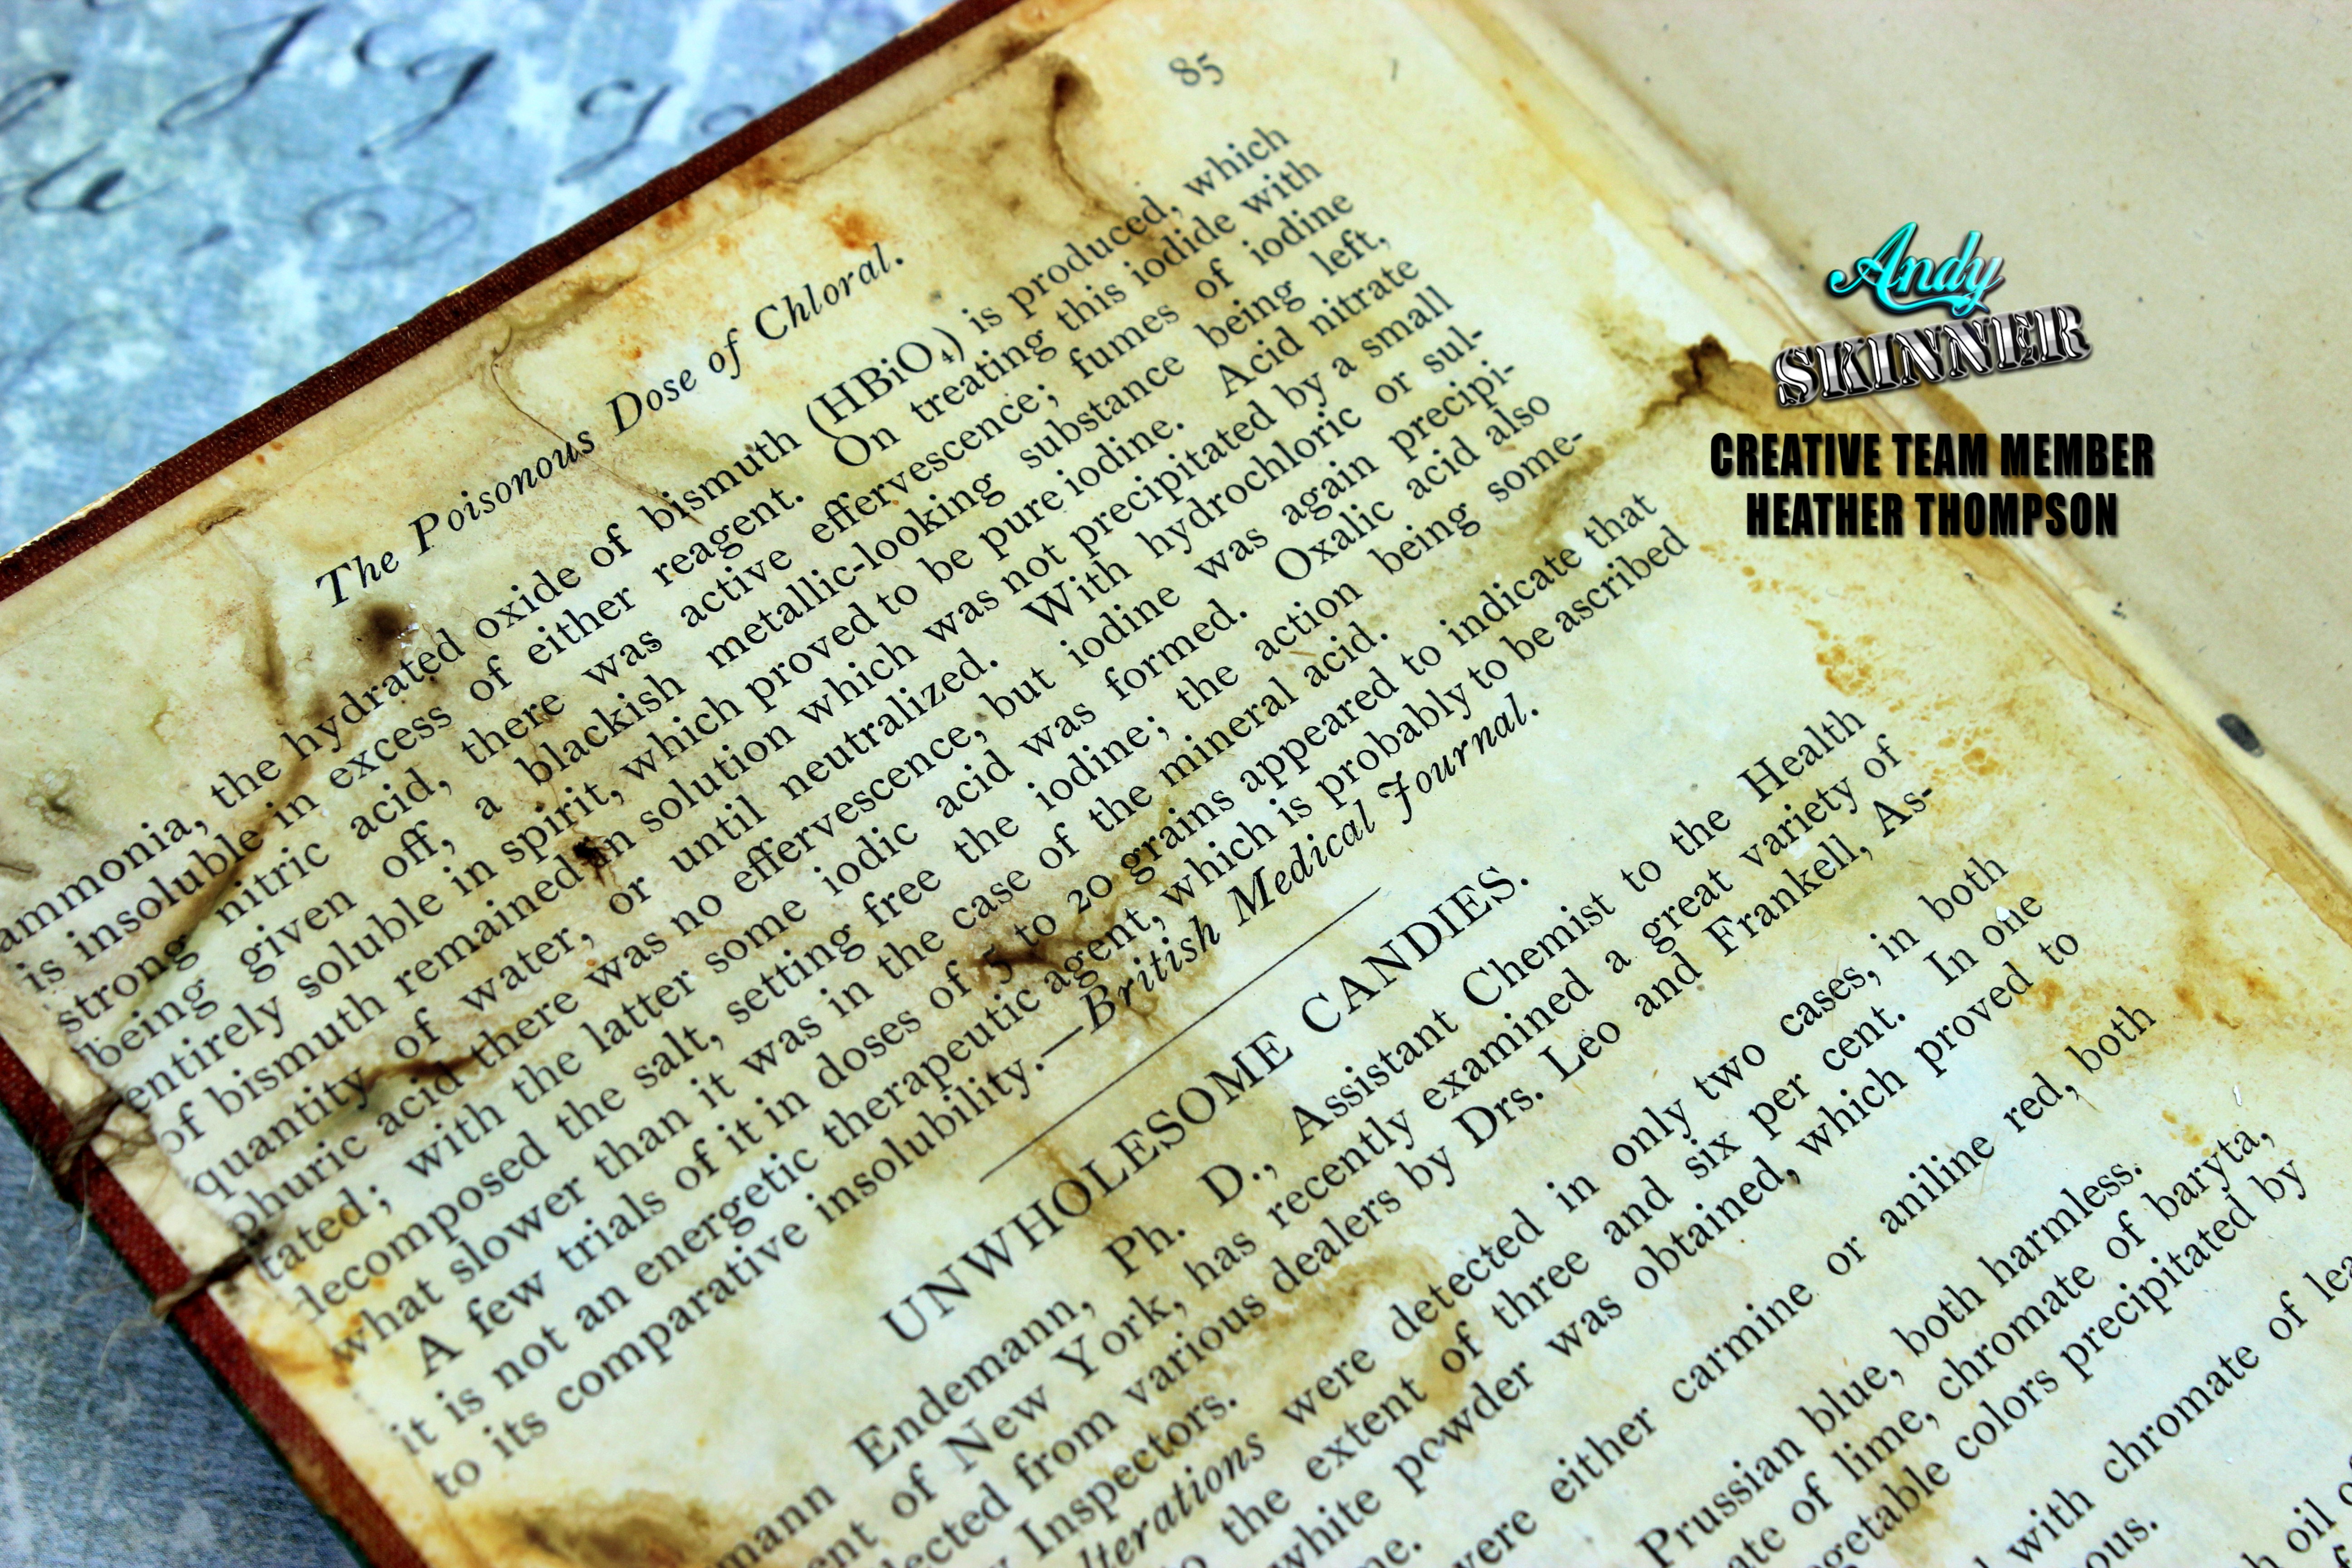
I need to cover the inside of the book, I find some old morbid paper from the late 1800's. Using Matte Vanish I decoupage the inside covers of the front and back of the
This turned out pretty neat, maybe not so dark, with the bold background but the face does make a person fear the unknown.    

Thank you for stopping by today, I hope to see some entires in the March challenge. Don't for get to hashtag #marchchallenge


Dont forget to join the Facebook Group the Darker Side

Heather 


CE Andy Skinner Cosmic Shimmer Super Matt Varnish

CS Andy Skinner Structure Paste

CE 4.5X3 Stamp By Andy Skinner Cracked Up

Paint


Sunday, 14 February 2021

''True LOVE is like a DIAMOND''
last for ever
clay mixed media notebook

Hello from Greece
Maria here wishing you all  stay safe and creative
Happy Valentine's day


...so because of the day ..i was thinking of transforming an old but unused notebook..
 I covered it with several pieces of book pages

My first inspiration was to compine 

a mold diamond heart from plaster with clay amd mit_castings embellishments..

First i create a clay tile and i press on it when the clay was wet Andy's stamp Memories in India and let it dry naturally
Up to notebook  i put with palet knife Andy's structure paste on some parts
edges and center
i put also structure paste on the mitform_casting embellishments and after that when the clay tile dried i paint one layer of gesso or primer..same thing to  embellishments .Also paint the diamond heart with primary magenta and the notebook with Andy's chalk paint "London Brick"

with my pallete knife some area aplied gesso of decoart media to make extra texture 

washes with the  primary magenta on the notebook  ..

then i continued with  payen'sgrey and quingold paint..

and i took out the colour with babe wipe in a few places...as the result was ok by me..

i paint with the same technique the clay tile but i used different colours..cobalt teal payen's grey ,prussian blue and quingold paints  .

i make a rust effect with the acrylics also to the embellishments


Then i decided to use  lava paste with a stiff brush on the side of the book..i dried right away with a heat gun and the amazing result showed up..i paint it with a quingold paint and after that ..dry brush with white paint.
I used a plastic card to make some vertical and horizontal lines with silver paint.
On the back side of the notebook i liked to use first some stamps to edges[mandala and circle of thoms]


I adore so much Mandala stencil  and i was so happy to put it to the back side above all the techniques

hope you like it 


i painted  with payne's grey the embellishment ''family ''   and after that with a stiff brush made a little touch of white acrylic


I made the  edged of the notebok rusty  and some parts on  sides of the heart.
 I stuck all the parts  with the  quick grab glue ..
 put one layer of a glossy varnish on the heart to shine
 and connect the metal arrow with a rusty wire..


i enjoy so much this mixedmedia renovation
love the result
hope you feel the same with me
take care of yourselves
dream big
and love without limits
thank you so much 

Maria Kantzali


 Matierials
https://www.creative-expressions.uk.com/products/csasapppru/
https://www.creative-expressions.uk.com/products/csasappgrey/
https://www.creative-expressions.uk.com/products/csasappquin/
https://www.creative-expressions.uk.com/products/csasappumber/
https://www.creative-expressions.uk.com/products/csasappyel/
https://www.creative-expressions.uk.com/products/csaslava/
https://www.creative-expressions.uk.com/products/cosmic-shimmer-andy-skinner-structure-paste/
https://www.creative-expressions.uk.com/products/cosmic-shimmer-andy-skinner-artist-pigment-paint-primary-magenta/
https://www.creative-expressions.uk.com/products/csasappteal/
https://www.creative-expressions.uk.com/products/cosmic-shimmer-andy-skinner-matt-chalk-paint-london-brick/
https://www.creative-expressions.uk.com/products/creative-expressions-andy-skinner-mandala/
https://www.creative-expressions.uk.com/products/creative-expressions-andy-skinner-memories-of-india-4-in-x-2-8-in-rubber-stamp/
http://www.mitform.com/


Monday, 8 February 2021

Love You To Pieces - Grunge Valentine's Day Cards, by Natassa Blazaki

Hi all! Natassa here.

Hope you're doing well and keeping safe. We've lost touch for quite some time, but 2021 started with so much going on. I really wish the whole situation cools down soon, cause I'm sure we all need a break!

Anyways, today I'm here to share with you a project quite unusual for my standards, since I'm not a card maker and also I never make Valentine themed projects.😁 However, Andy's stamp designs are always so inspiring to me and I decided to use them in order to create some grunge style Valentine's cards. I kept them simple and what I focused on was the combination of different stamps, in order to alter the style and look of every card, keeping the CE Heart Rubber Stamp as my focal point. All of my cards measure 4 1/4 x 6 inches and I used precut black cardstock bases. Of course, you can use any cardstock you may have available.


So for the first card, I wanted to create a background full of hearts and then have one of them stand out. I took a piece of thin white wrapping paper and stamped a few rows of hearts. Because the paper was semi-transparent, I stamped every other row on the backside, so that it looked like I did mirror stamping.


Then, I took a piece of light cream cardstock and collaged a page from an old book on it. On top of that, I glued the piece with the stamped hearts, and this way the text from the book page picked through. I stamped with red ink a heart, which I fussy cut and glued on top of the middle heart on my card. I handwrote the sentiment on a piece of black cardstock.


For the second card, I used the CE Circuitree Rubber Stamp and stamped around the heart. I also used the CE Enigma Rubber Stamp to fill the empty space on the top, bottom, and sides of the design. Then, I stamped with teal ink and fussy cut a heart that I glued in the middle of the design. Also, I used some Cobalt Teal and Yellow Iron Oxide  CS Artist Pigment Paint, to tone down the brightness of the paper.


Lastly, for the third card, I went for a dark chic look. First, I stamped the card base with white pigment ink and used the CE Vintage Background Rubber Stamp. This gave me a very subtle background effect. On another piece of black cardstock, I stamped with gold pigment ink and used the CE Winter Trees Rubber Stamp. I wanted to make it as if the trees grew from the heart. I fussy cut the whole design and matted it with craft cardstock. Then, I glued it on my card.


These are really quick and simple cards to make and I'm sure you'll find they are much different than the classic Valentine's cards. Also, I think the designs are suitable for masculine cards, so you can make them and give them to your boyfriends, hubbies, or just your loving guys!

I truly hope you like this project and get inspired
Sending big hugs from Greece
Natassa
💖💖💖

Tuesday, 27 October 2020

Scary Skull Bingo Card

Happy Halloween! 

Only a few days away, it's time to share my vintage style Scary Skull Bingo Card created just for Andy.  I love dimensional pieces and this witch hat and netting does just the trick.

This is the last week for sharing our Halloween Spooktober with you.  This week's theme is 

"THE WITCHING HOUR". Consider this skull a witch's skull! After all, she IS wearing her hat!


Such a fun little project!  

Let's get right to the instructions as to how to create this and then I will provide the every essential supply list of Andy Skinner and Creative Expression's fabulous products!


The inspiration for this piece is Andy's Sugar Skull stamp from Creative Expressions. I stamped it onto a piece of specialty stamping paper using Black Permanent Ink.  Then I fussy cut around it. 


I used the skull to create a witch's hat our of black construction paper.  After cutting out the pieces from my plain cardstock pattern, I cut it out of the black construction paper; slit the back of the hat brim and cut a slit across part of the center of the oval brim so that the skull top would slip into it (slit in the back of the brim to the back of the skull). Next I cut out the cone shape of the hat, rolled it a little and pressed the tabs left on either side to the back so that I could glue it onto the Bingo card base.


I used a Halloween Bingo card from one of my many computer files of things found online. Next I brushed Andy's Cosmic Shimmer Super Matte Varnish over the paper Halloween Bingo card.  Heat set it dry and then mixed Andy's Cosmic Shimmer Artist Pigment Paints in Primary Yellow and Primary Magenta with a little water to create a wash. I quickly brushed over the Bingo card base with the orange mixture and heat set it dry before it could buckle the paper Bingo card. Then I dabbed a paper towel into the paint mixture and randomly dotted it over the Bingo card and heat set it to dry.


Again, I added a topcoat of the Super Matte Varnish to seal it. It leaves a soft finish that is still feels like the paper; no shine or shimmer.


I had stamped several of the Sugar Skulls in order to experiment with colors of green for the base of the skull.  This is a witch's skull after all!  Using Andy's Cosmic Shimmer Matte Chalk Paint colors of Olive Grove and Mustard Seed with a little water, I made four different color combinations and finally decided on my favorite; a bit more green than the yellow base. 


After creating the base color I really liked, I used a very small detail brush to fill in all of the wonder details on the Sugar Skull.  More like a Cinco Di Mayo skull style, I added shades of orange and green to fill in all of the flower petals, leaves and decorative additions.  There are also little touches of white in the eyes to make them pop.


After the skull is complete, I added the witch's hat using glue to the backside of the skull.  


Here is the closer look at the witch's skull with the hat in place (before I added the vintage soft black netting to the brim. I also "cleaned up" the teeth using a small permanent black ink pen to make the dark lines on the teeth completely black again.


It's amazing how a little piece of  netting can completely finish a piece!  I love it! I mounted the Bingo card on a piece of 5 1/4" x 4 1/4" black cardstock. Done!

#cespooktober

Supply List


About the Artist:


Thursday, 8 October 2020

DEAD MAN'S HAND

 Hello Everyone!


Welcome back and thanks for stopping by! Today I am sharing a 5" x 7" canvas created especially for a Spooktober Challenge from Andy Skinner and Traci McLean of Creative Expressions. Week one; October 4th - 10th is themed "Skulls".

If you are a poker player, you've heard of a "Dead Man's Hand" that consists of aces and eights. Andy's Skull of Spades and Stonewash stamps with a transfer black spider from Horror Mixed Media Transfers from Creative Expressions provide the PERFECT combination for this idea.


This was a fun and easy Halloween project to create especially with all of the wonderful products from Andy and Creative Expressions!


I began with a piece of speciality stamping paper (has a bit of a slick finish and is almost like a cardstock feel). Using permanent black ink, I stamped the skull ace image.  Then I cut out around it to make it look like a 4 3/4" x 3 1/4" playing card.  I rounded the edges with a corner punch. Next I used the permanent black ink and ramdonly stamped partial images from the Stonewash stamp to give a weathered, rough feeling to the card. Heat set. Aren't these great stamps?


I used a bit of Andy's Cosmic Shimmer Yellow Artist Pigment Paint mixed with a bit of water to create a wash effect and brushed it onto the card. I wiped away excess color. Heat set. Next was a light wash using Quinacridone Gold Artist Pigment Paint and wiped the excess. Heat set. Finally a touch of Payne's Grey Artist Pigment Paint wash around the edges of the card. Using a ruler, I drew a straight line 1/4" from the edges around the card and rounded the line ad the rounded edges of the card using a permanent black ink pen to frame the card. Heat set. I then rubbed the scary black spider from Andy's Horror Mixed Media Image Transfers onto the left side of the card.


This ghoulish ghost is perfect for coming out around the back corner of the card. This is a transfer from Andy's Horror Mixed Media Transfer images.  I also added a top hat from his buddy who is also on the Horror Mixed Media Transfer Sheet.  I transferred these two images onto a piece of white computer paper and fussy cut them out. I cut the hat our and added it to the ghost's head to make him look more like a gambler ghost.


I added Andy's Cosmic Shimmer Lava Paste to a metallic number "8" and heat set it. The heat activates the Lava Paste and turns it into some amazing bubbly texture as you see in the inset. When cool, I painted the eight with Black Acrylic paint followed by Quinacridone Red Acrylic Paint around the bottom as if the eight is bleeding out.


Now for the canvas base!  First I added Andy's beautiful Rice Paper image from his Tiles collection. This was done using Matte Medium generously brushed onto the canvas. I laid the Rice Paper in the center of the canvas over the Matte Medium and then burnished it to remove all wrinkles and air bubbles. Then a coat of Matte Medium brushed over the Rice Paper to seal it.  Heat set. Next, using my finger, I added Andy's Cosmic Shimmer Strata Paste on either side of the canvas (to hide where the Rice Paper did not cover).  Heat set. This Strata Paste gives such a tactile edging!  I LOVE IT! 

I painted the edging using Andy's Payne's Grey Cosmic Simmer Artist Pigment Paint. Look how beautifully it adds to the tile Rice Paper.


Still using the Cosmic Shimmer :Payne's Grey Artist Pigment Paint, I stenciled all of the letters I would need to create the "DEAD MANS HAND" tiles for the canvas.  This was done on a piece of creme card stock and using Andy's Redemption Stencil. I cut out around the letters, added a light touch using a cotton ball with a hint of Cosmic Shimmer Yellow and water wash then edges with my finger and a touch of Payne's Grey Artist Pigment Paint. Now it's time to assemble everything and glue it into place!


The letter are glued in place using a small adhesive pad under each one. I also added adhesive pads underneath the "8" and the gambler ghost to give the canvas more dimension. Also a little scrap of black netting was glued underneath the Ace for added interest.  

Add a little "blood" using Quinacridone Red Acrylic Paint to the "8" and let it run down onto the letter tiles. Wha-lah! You have a fun Halloween decor piece!  Be sure to check out all of Andy's products at Creative Expressions website.  Links are listed below! #spooktober

Here is a list of all of the items you will need to create this fun project:


MISCELLANEOUS SUPPLIES

  • 5" X 7" Canvas

  • Permanent Ink Pad Black
  • Permanent Ink Pen Black 
  • Metallic "8" (Tim Holtz)
  • Black Acrylic Paint
  • Quinacridone Red Acrylic Paint
  • Paint Brushes
  • Matte Medium
  • Adhesive Pads
  • Glue


About the Artist: