Showing posts with label Andy Skinner Creative Expressions Stamps. Show all posts

Sunday, 14 February 2021

''True LOVE is like a DIAMOND''
last for ever
clay mixed media notebook

Hello from Greece
Maria here wishing you all  stay safe and creative
Happy Valentine's day


...so because of the day ..i was thinking of transforming an old but unused notebook..
 I covered it with several pieces of book pages

My first inspiration was to compine 

a mold diamond heart from plaster with clay amd mit_castings embellishments..

First i create a clay tile and i press on it when the clay was wet Andy's stamp Memories in India and let it dry naturally
Up to notebook  i put with palet knife Andy's structure paste on some parts
edges and center
i put also structure paste on the mitform_casting embellishments and after that when the clay tile dried i paint one layer of gesso or primer..same thing to  embellishments .Also paint the diamond heart with primary magenta and the notebook with Andy's chalk paint "London Brick"

with my pallete knife some area aplied gesso of decoart media to make extra texture 

washes with the  primary magenta on the notebook  ..

then i continued with  payen'sgrey and quingold paint..

and i took out the colour with babe wipe in a few places...as the result was ok by me..

i paint with the same technique the clay tile but i used different colours..cobalt teal payen's grey ,prussian blue and quingold paints  .

i make a rust effect with the acrylics also to the embellishments


Then i decided to use  lava paste with a stiff brush on the side of the book..i dried right away with a heat gun and the amazing result showed up..i paint it with a quingold paint and after that ..dry brush with white paint.
I used a plastic card to make some vertical and horizontal lines with silver paint.
On the back side of the notebook i liked to use first some stamps to edges[mandala and circle of thoms]


I adore so much Mandala stencil  and i was so happy to put it to the back side above all the techniques

hope you like it 


i painted  with payne's grey the embellishment ''family ''   and after that with a stiff brush made a little touch of white acrylic


I made the  edged of the notebok rusty  and some parts on  sides of the heart.
 I stuck all the parts  with the  quick grab glue ..
 put one layer of a glossy varnish on the heart to shine
 and connect the metal arrow with a rusty wire..


i enjoy so much this mixedmedia renovation
love the result
hope you feel the same with me
take care of yourselves
dream big
and love without limits
thank you so much 

Maria Kantzali


 Matierials
https://www.creative-expressions.uk.com/products/csasapppru/
https://www.creative-expressions.uk.com/products/csasappgrey/
https://www.creative-expressions.uk.com/products/csasappquin/
https://www.creative-expressions.uk.com/products/csasappumber/
https://www.creative-expressions.uk.com/products/csasappyel/
https://www.creative-expressions.uk.com/products/csaslava/
https://www.creative-expressions.uk.com/products/cosmic-shimmer-andy-skinner-structure-paste/
https://www.creative-expressions.uk.com/products/cosmic-shimmer-andy-skinner-artist-pigment-paint-primary-magenta/
https://www.creative-expressions.uk.com/products/csasappteal/
https://www.creative-expressions.uk.com/products/cosmic-shimmer-andy-skinner-matt-chalk-paint-london-brick/
https://www.creative-expressions.uk.com/products/creative-expressions-andy-skinner-mandala/
https://www.creative-expressions.uk.com/products/creative-expressions-andy-skinner-memories-of-india-4-in-x-2-8-in-rubber-stamp/
http://www.mitform.com/


Wednesday, 2 September 2020

Sugar Skull Jewellery - by Nikki K

 Morning everyone, 

It's been a while since I posted, but wanted to share these fun necklaces with you using Andy's fab Sugar Skull stamp, which is a great size for cards and art, but also for jewellery, it makes a large necklace easily.  It's also great for coming Halloween, to make your own decorations!

I used some of Andy's Rice Papers, and stamped the skull out in different places.  This is fun as you can use any of the rice papers and get a fab different pattern on each skull.

The next bit is tricky, you need to leave the skulls on the paper, and wind some wire, probably 18 to 20 guage (it's slightly more pliable), around the skull.  I cut a long piece, then start at the bottom of the skull, and work my way up both sides.  Keep it flat on the paper, and glue with strong glue as you go.  You will need to hold this for longer than you think, and get sticky fingers.. lol.  Don't hold it down with anything other than your fingers as the paper has a chance of sticking and ripping.

When you get to the top, bend one piece of wire straight (90%) and make a large loop (like making an earring).  I would cut the wire a bit shorter for this step, but not so short that it can't be hidden.  Take the other end of the wire, and wrap around the loop to hold and secure.  Only when this has completely dried, did I cut out close to the wire on the outside.

Once you have this done, cover the whole of the front of the pendant with glue (pva) is fine.  Do this 2 or 3 times, making sure there are no gaps between the edges of the wire and the paper.  You are making a bezel to hold resin.  If you don't have resin, you could use melted UTEE, or another 3d Glaze.

When completely dry from the glue, you can add your resin or glaze, according to manufacturer's instructions.

You don't need to coat the back of the necklace, it has a rough texture but is sealed from the layers of glue anyway.  I like it this way as it shows it is handmade.


Hope you like them, 

Have fun making. xx

Nikki K.

xx

Products Used:
Andy Skinner Creative Expressions Sugar Skull Stamp
Andy Skinner Creative Expressions Rice Papers,
Andy Skinner Quick Grab Glue.

Other items: Versafine, Resin, jewellery wire & findings.

Monday, 6 July 2020

It's all Black and White-Fiona Randall


Morning all Fiona here with a project using some of Andy's New and older released stamps from Creative Expressions and  grey board substrates from Tando Creative.
 
With the current situation that is amongst us worldwide the title of this project was very apt and the message clear. Stay Safe my friends.


Thanks for stopping by today.
Hugs Fiona x
 
 
Products Used.


Cosmic Shimmer Chalk Paint Warm White


Personal Stash.
 
Ranger Archival Ink Pad- Black
 
Black Chalk Paint
 
Home Made Sunray Stencil
 
Posca Paint Pen- White.


Monday, 1 June 2020

BIRD OF HOPE ... THERE'S ALWAYS HOPE

Hello all of you mixed media art lovers!

Exciting News! Andy recently had a brand new release with Creative Expressions. In this release are fabulous brand new stamp and stencils that I could not wait to share with you!


I was very pleased with the way this 8" x 10" canvas board finished out.  This could just as easily been an art journal page.  I love the lush vivid colors of Andy's Cosmic Shimmer Artist Pigment Paints through Creative Expressions.  They really work well to cover any surface and blend beautifully.


I began by using a large palette knife and covering the canvas board with White Gesso.  I heat set that and then dropped several random dots of Andy's Cosmic Shimmer Primary Yellow and Primary Blue Artist Pigment Paints on the canvas.  I spread the paints with a roller and then heat set the paint. I has some random spots of paint on the canvas so that is what you might see bleeding through the yellow and blue.


I combined Andy's Cosmic Shimmer Primary Magenta with an acrylic Titanium White paint to make a pretty shade of bright pink.  Then, using a straight edge (if doesn't matter what type of straight edge you use), I basically stamped the straight edge into the paint and then  randomly pressed it onto the canvas.  I then spritzed the stamped paint with water and stood the canvas board upright so that the paint would run down the canvas.  You can control the amount of drippage by tilting the canvas up or laying it flat and heat setting the watery paint.  I also repeated this process using the Titanium White acrylic paint and a library card edge that I just ripped to create a smaller straight edge.  


Upon completion of randomly straight edge stamping the canvas, I began adding little strips of fabric using Matte Medium to glue them in place.  Matte Medium dries clear and also seals the fabric in place.  I love the mix of textures and pattern that the fabric provides!


Next I added half of a square doily to the canvas.  I really love the contrast that the white doily provides as well as yet another layer of texture and pattern.  This was also applied to the canvas board using Matte Medium and a brush. Heat set to dry.


Layers!  Layers!  Layers!  

Next I added two of Andy's new stamps from Creative Expressions!  I LOVE THEM!  The first was stamped with a bright magenta permanent ink.  This stamp is called "Circle of Thorns".  Then I stamped over it using Stream Adriondak Earthtones Permanent Ink and Andy's Mandala Stamp. I liked the way it looked but I wanted the Mandala stamp to have more of a WOW factor on the colored area of the canvas.


So, I restamped the Mandala Stamp over the first stamping using Embossing Ink and then sprinkled Andy's beautiful Funky Cold Patina Embossing Powder from Creative Expressions over the top of the stamp.  I heat set it and WOW!  I got that pop I was looking for!

I repeated this over all three of the Mandala stamps and added a circle rhinestone to the center of each using Andy's Quick Grab Glue from Creative Expressions.  


Next I added even more layers of paint by stamping Andy's new Pebble Beach into some Titanium White acrylic paint that was spread onto my craft sheet (like an ink pad).  This stamp was randomly added over portions of the canvas.  I love the white over the color that still is able to peek through! Heat set and be sure to immediately wash off your stamp to remove the paint!


Next layer includes a new and beautiful 6" x 6" dotted bird stencil from Andy and Creative Expressions called "Fly Free"!  I taped the stencil in place on the canvas and first stippled a layer of White Gesso to give me a white background to work with for the bird.  I let that air dry.  Then I added a layer of Cosmic Shimmer's Primary Yellow over the White Gesso.  I removed the stencil and immediately washed it off to remove the dried gesso and paint.  Then I let the bird completely air dry.  Next I added Glossy Crackle (like Glossy Accents) over each of the dots on the bird to give it some "lift" and more definition.  I noticed that some of the pink paint underneath bled through the yellow dots but I actually LOVE IT! 


Here is a picture of just the bird stencil right after I added the Glossy Crackle to each dot.  


Just for fun, I used Andy's Cosmic Shimmers paint bottle lid to add some circles to the canvas.  This is fun an easy to do.  Just pour a tiny bit of paint out of the bottle and spread it around with your finger.  Dip the lid into the paint and then stamp it randomly onto the canvas area.  I also did this with black paint.  And I added more little straight edges in black randomly onto the canvas as I was preparing to add a black stamp...


I love the simplicity of this stamp. It's also one of Andy's new stamps from Creative Expressions and called "First Class". I added the words "There's Always" above the stamp using a black permanent marker. 


Finally, I did some black marker work around the bird to better define him.  I used a Graphite Pencil and a small water brush to add shadowing around the bird and blend it out onto the canvas.  To frame the canvas, I dipped my finger into Black Acrylic Paint and ran my finger along the edges of the canvas to provide a border and pull everything together.  

I hope you enjoyed this tutorial and you've learned something new. In these times, this canvas is a reminder that there is ALWAYS HOPE!  Stay safe everyone!

Thanks so much for joining me here on Andy's Creative Team Blog!  Now I'd like to provide you with a list of the supplies I used so you can have a play with this type of mixed media.


Miscellaneous Supplies

  • 8" x 10" Canvas Board
  • White Gesso
  • Matte Medium
  • Large Palette Knife
  • Roller
  • Paint Brushes
  • Permanent Magenta Ink Pad
  • Permanent Black Ink Pad
  • Permanent Black Ink Pen
  • Glossy Crackle 
  • Miscellaneous Fabric torn pieces

About the Artist: Candy Colwell


Sunday, 31 May 2020

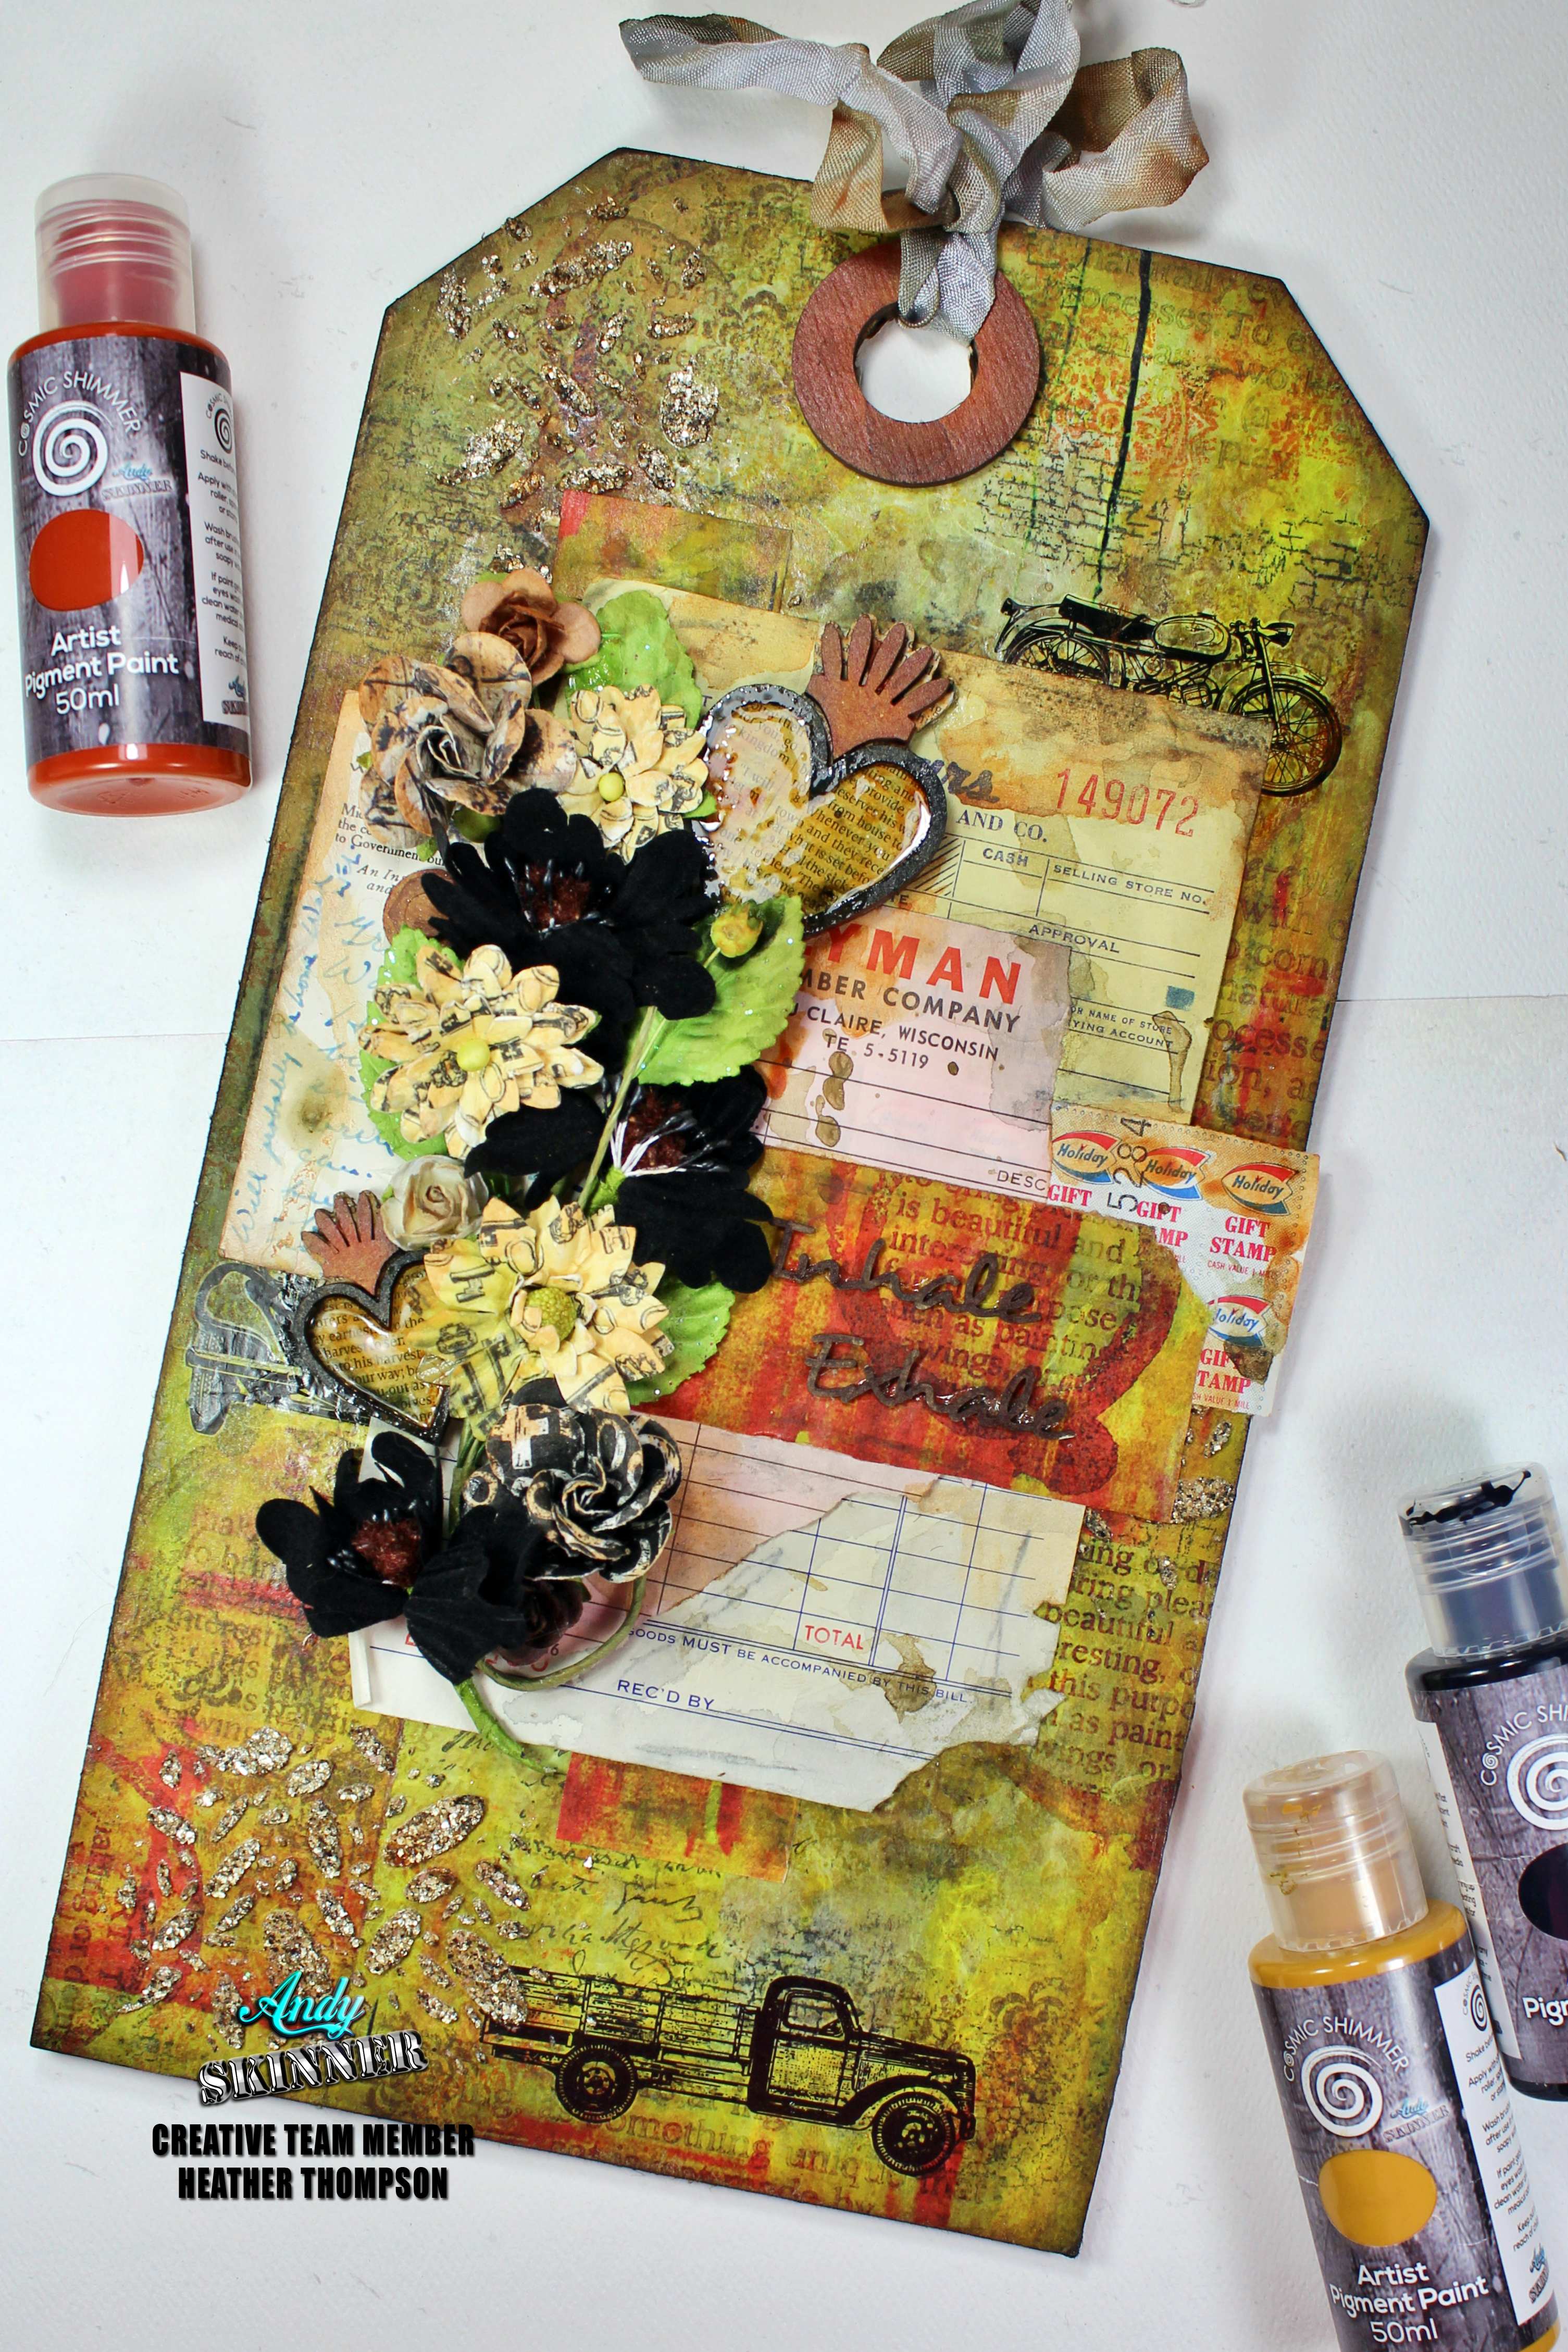
Inhale Exhale Mixed Media Tag By Heather Thompson

I hope this finds everyone well and safe. I have been busy on my end, and my art has taken a back burner.
I am really struggling on finding  the time to create. Between work and the kids being home 24/7 and home school. There has not been much me time. This tag took me about 2 weeks to complete and that is not normal for me. I have so many projects I want to do, its's just a matter of getting time.....only 1 more weeks of home school.  We are almost done, No Summer school for this momma!!!!
I would love to share a tag I made with Andy's rice paper's and rub-ons. I wanted to make something vintage looking. My mother had given me a numerous things of my opa who had passed. Old postcards, stamps, receipts, I think he saved everything. I wanted to incorporate them onto a project.
Andy Skinner Large Tag
A short video of the creative process.
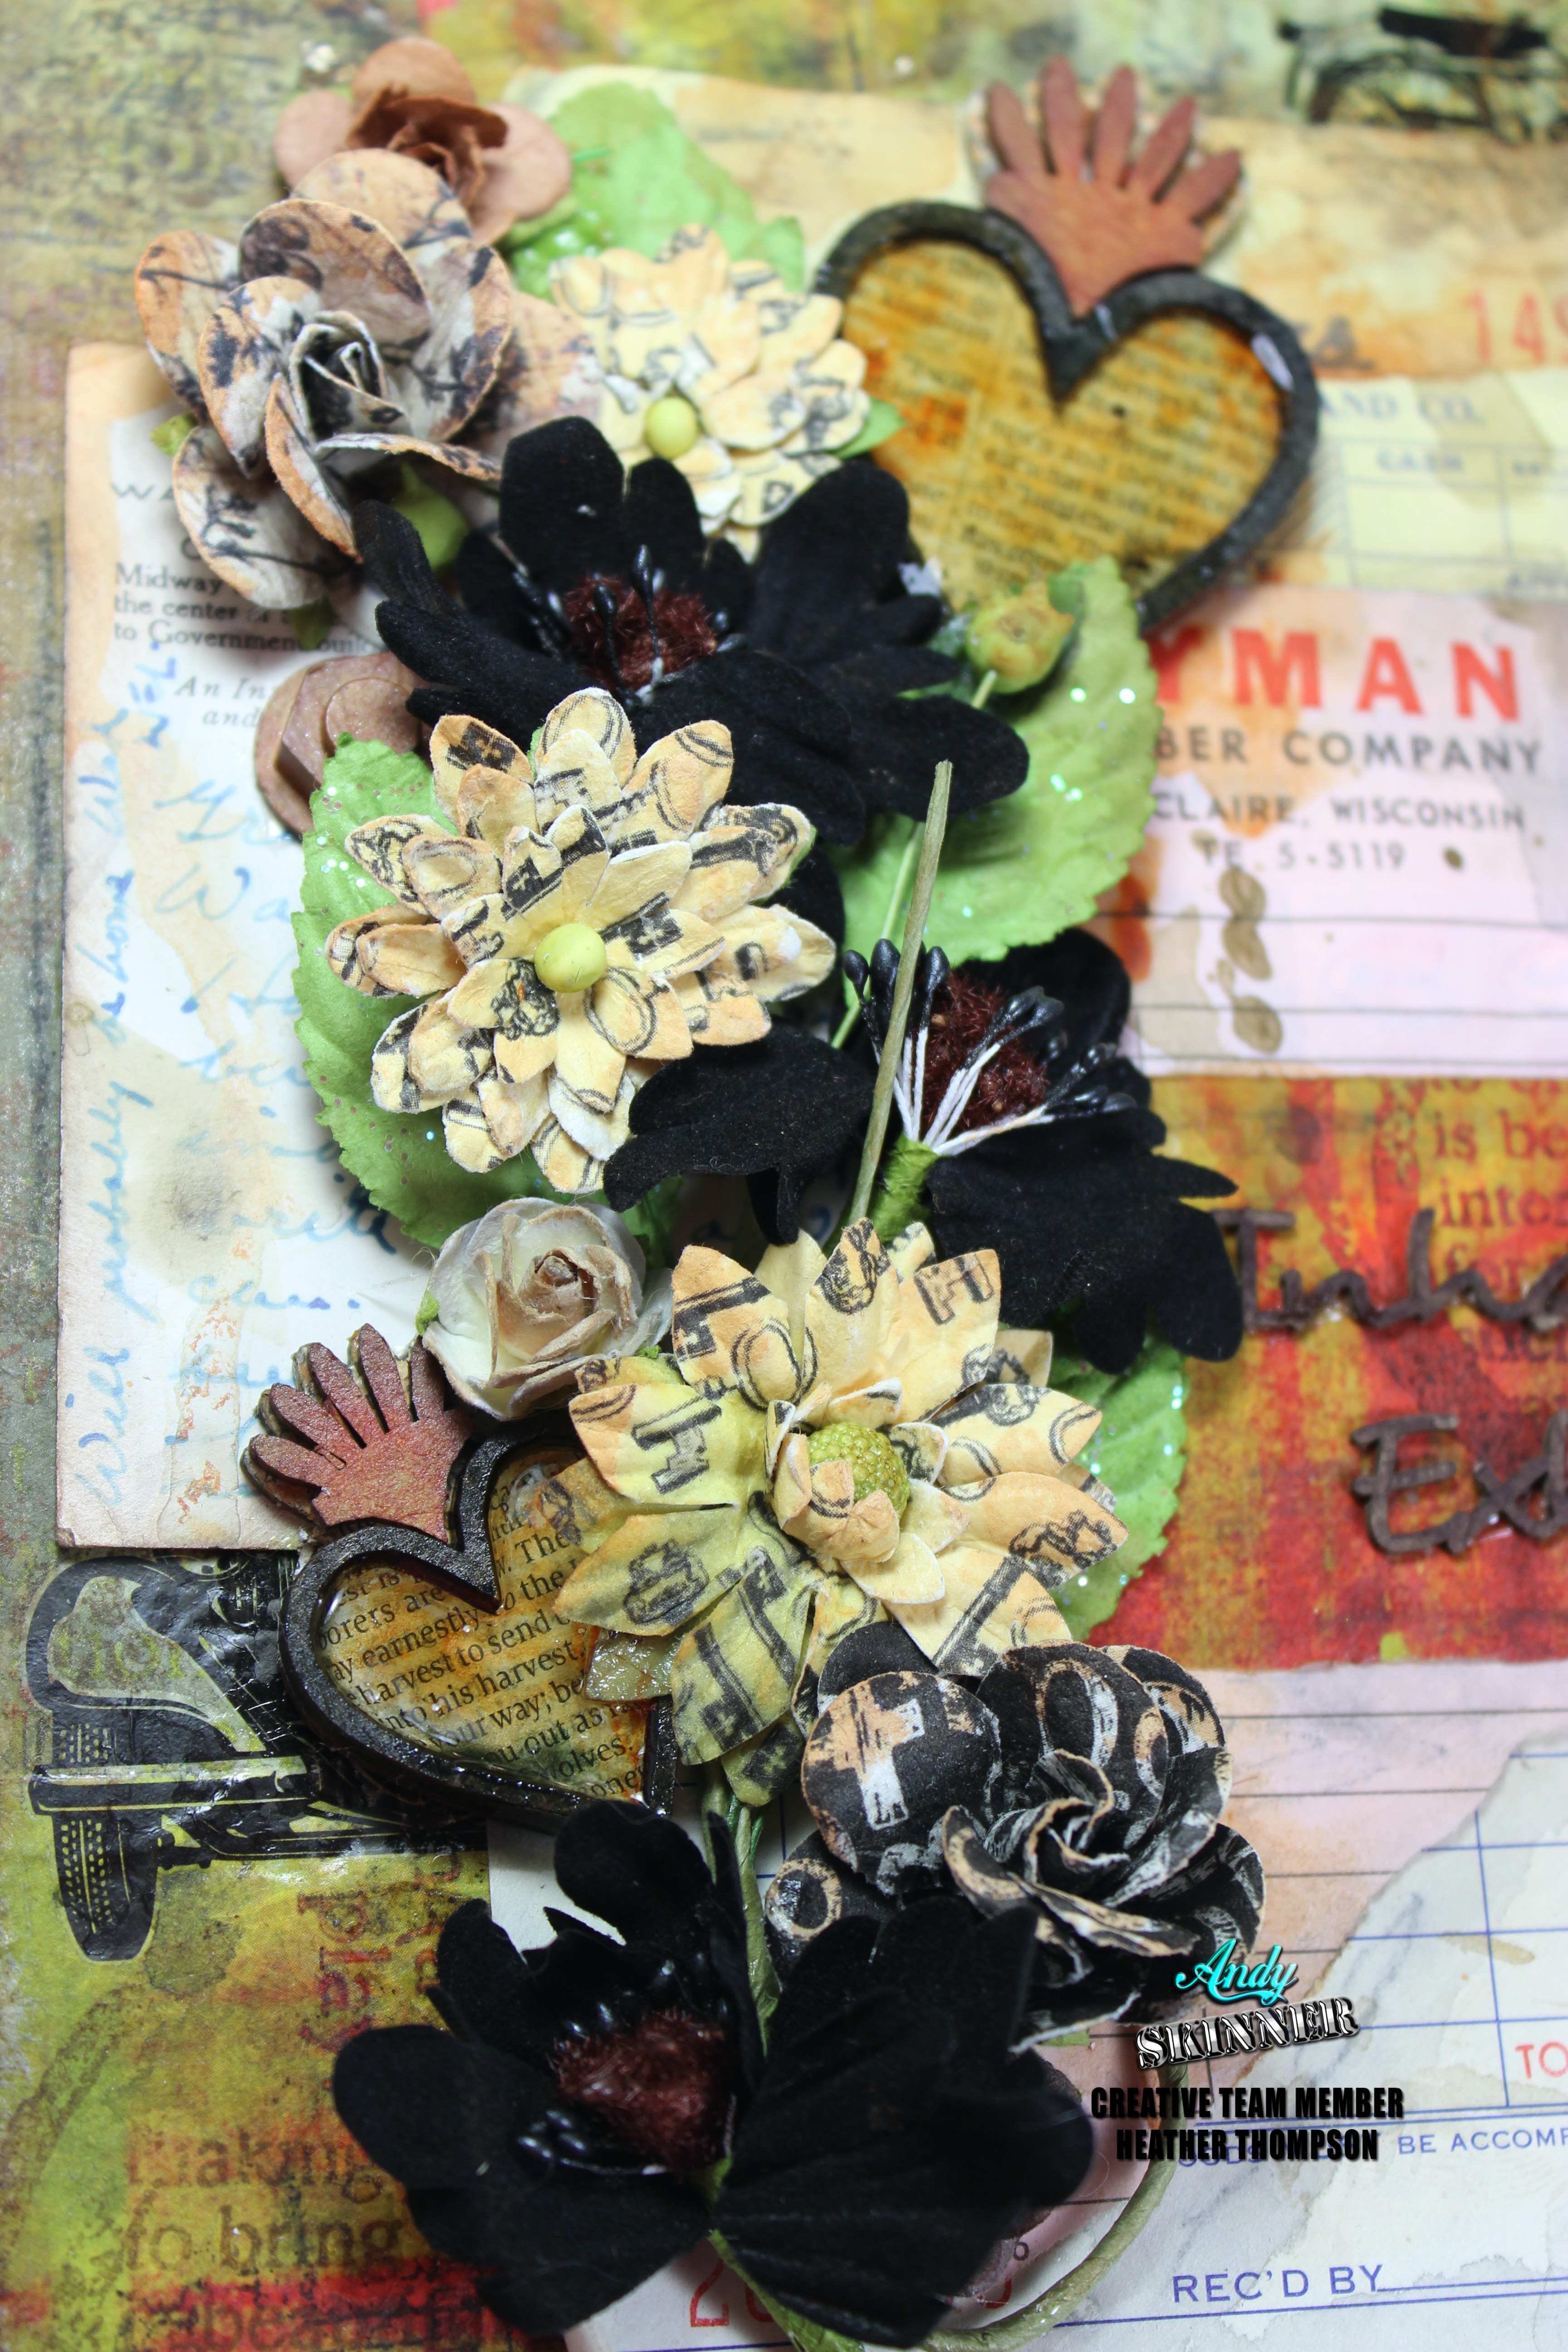
Here are a few close-ups.
Andy Skinner Large Tag 1
Using the flaming hearts, I used some thin scripture paper to cover the background. I added a vintage look with a combo of Quinn Gold and Paynes Gray  before adding a epoxy resin to the centre of each heart.
Andy Skinner Large Tag 3
Andy Skinner Large Tag 2
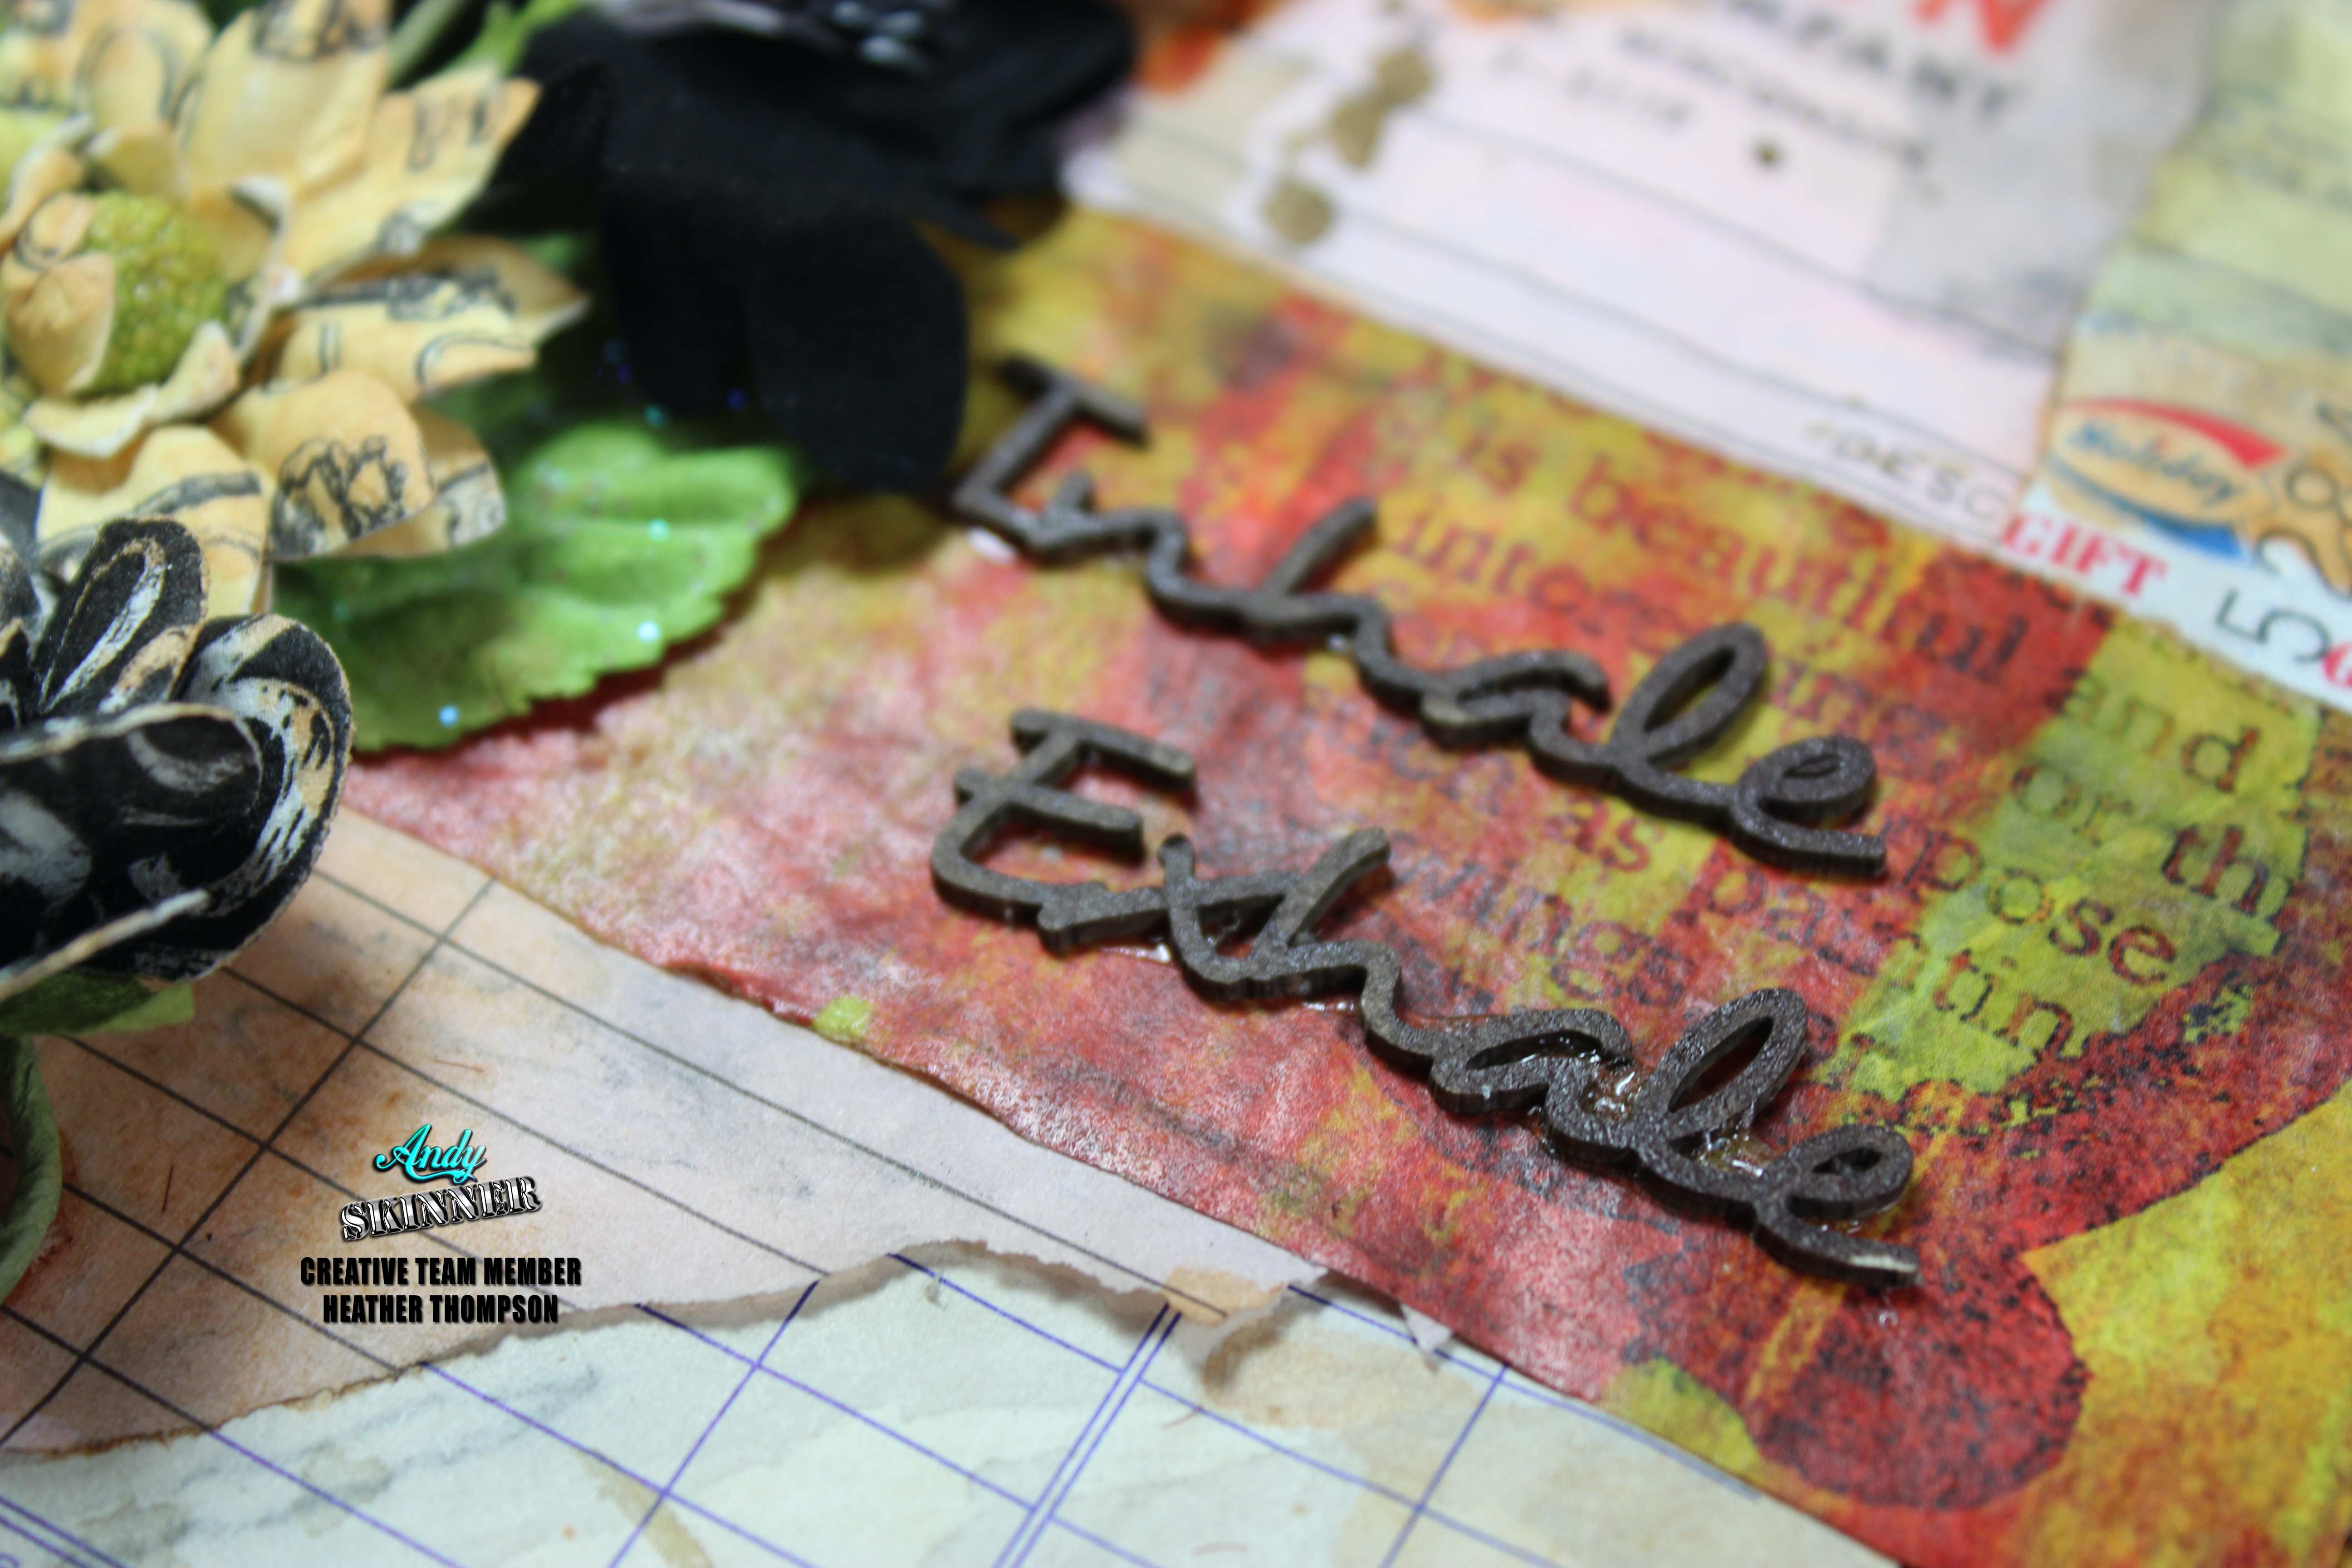
Using the "inhale exhale" from the book inserts, I added a little title to the tag.
Andy Skinner Large Tag 6
Thank you for stopping by today, Enjoy and look for more projects to come with the new released rub-ons and stamps.
black and white head shot
 
Creative Expressions
Andy Skinner
Rub On Transfers
Stencils:
Stamps
Mixed Media Pastes/Paints
Paint
Rice Paper

Monday, 30 March 2020

Alchemy Vials - 3 Ways to Alter your Glass Containers, by Natassa Blazaki


Hello lovely people!

Hope you’re staying healthy and safe. We’re going through very difficult times, but what makes me happy is that we’re all being supportive to one another.

So, here I am today, on Andy’s blog, with a vintage style project, that I really hope you enjoy and give it a try. You can also visit my IGTV and watch the video tutorial I prepared for you.

Alchemy Vials
I worked with Andy Skinners Matt Chalk Paints and in some occasions, I mixed in some Artist Pigment Paints. I’m telling you they work perfectly together.

For the first technique, I started by sanding the vial with a 180 grit sandpaper. Then, I applied a coat of dark color – Matt Chalk Paint Chestnut - as a base. I heat set and then, with an old brush, I applied Quick Grab Glue, spreading it in all directions. Didn’t care to have an even coverage. While the glue was still wet, I covered with Matt Chalk Paint Mustard Seed. The moment I started heat setting the paint, it began to crackle so beautifully. 
I continued again with a dark color, this time Artist Pigment Paint Raw Umber mixed with Chalk Paint Chestnut. I dabbed at the bottom and the neck of the vial, to make it look more distressed. Also added my all time favorite Quinacridone Gold to complete the aging effect. For the label, I stamped on a piece of scrapbooking paper with a stamp from a previous collection by Andy Skinner, Shabby Chic. 
You can stop here or make a “dirty wash” to apply on the whole bottle. I chose to add some distress oxide ink, which I applied all over the vial and then spritzed with water to activate the ink. When I heat set it, the vial got a gorgeous dusty chalky look.
For the second technique, I started by dabbing Quick Grab Glue on the vial with a soft sponge. I wasn’t looking for a rough texture here, but rather wanted to create a frosted glass effect. 
With the same sponge and while the glue was still wet, I dabbed some Chestnut mixed with Mustard Seed and a maybe a drop or two of Quin Gold. That’s what I call Alchemy hehe. Didn’t care to mix the paints well, just picked them up from my working surface and let them mix directly on the vial. I heat set the paint and dry brushed Mustard Seed on the edges to define the vial's shape. I stamped the Plague Doctor on a piece of scrap paper and glued it as a label on the vial.
For the third technique, I chose a skull shaped miniature bottle. This technique works best on special shape or relief bottles. I started by painting with Artist Pigment Paint – Paynes Grey – in all the recessed areas. I applied two coats, because Paynes Grey is semitransparent. 
I heat set the paint and went on with a coat of Matt Chalk Paint - Chestnut.  Heat set again and went back with Paynes Grey, which I randomly brushed on the skull. Then, I picked a warm white acrylic paint and dabbed with a soft sponge, paying attention not to get the paint in the recessed areas, I had previously painted with Paynes Grey. As a finishing touch, I lit up a couple of candles and let some melted wax drip on the bottle. You can apply a final coat of Super Matt Varnish to make the bottle look really old.

All three techniques can be applied on any kind of glass container and
I ‘m sure you’ve got quite a few stashed away. 
Now it’s a great opportunity to bring them out and decorate them. 
Go on and have some fun!

Hugs from Greece
Natassa