Happy New Year! Here's to a year full of creative adventure and FUN!
This is my first post of the new year for Andy's Creative Design Team. I am thrilled to be returning and my wish is to inspire you even MORE to explore the world of mixed media and not be afraid to experiment with all sorts of different mediums and elements.
Seriously, in mixed media ... if you dream it up, you CAN create it!
Tando Creative and Andy Skinner's fabulous laser cut Steampunk Clock was the inspiration for this piece. I loved the lines of it. I imagined a weathered, tactile yet funky clock. So I added Tando Creative Clock Hands, Tando Creatives's Drainpipe and a couple of nuts and bolts for Andy Skinner's Industrial Elements Kit to achieve that look.
As I said in the beginning, if you can dream it up, you CAN create it with mixed media! Example: rather than this just being a flat clock, I made it into a trinket box by adding a chipboard box between the top and bottom pieces of the clock. There are lots of elements to explore on this fun project so let's get started!
I began by brushing the clock front, back (both sides) and top arched piece coats of DecoArt Media Black Gesso. Heat set or air dry.
To make the top piece ornate, I stenciled an area of Andy Skinner's Baroque over the arched piece using DecoArt Media Black Modeling Paste. I did this by placing the stencil randomly over the arched piece and pulling the Modeling Paste over the stencil using a palette knife. Heat set.
To add even more dimension, I used one of Andy's tricks by adding half pearls into the design. These resemble rivets. I painted them with Black Gesso and heat set them. Next I added a mix of DecoArt Media Medium Grey Antiquing Cream and DecoArt Media Fluid Acrylics Metallic Silver over the arched piece. I did this using my finger and then wiping off the excess with a baby wipe. This gave a dull silver finish. Repeat until you get the effect you want. Heat set.
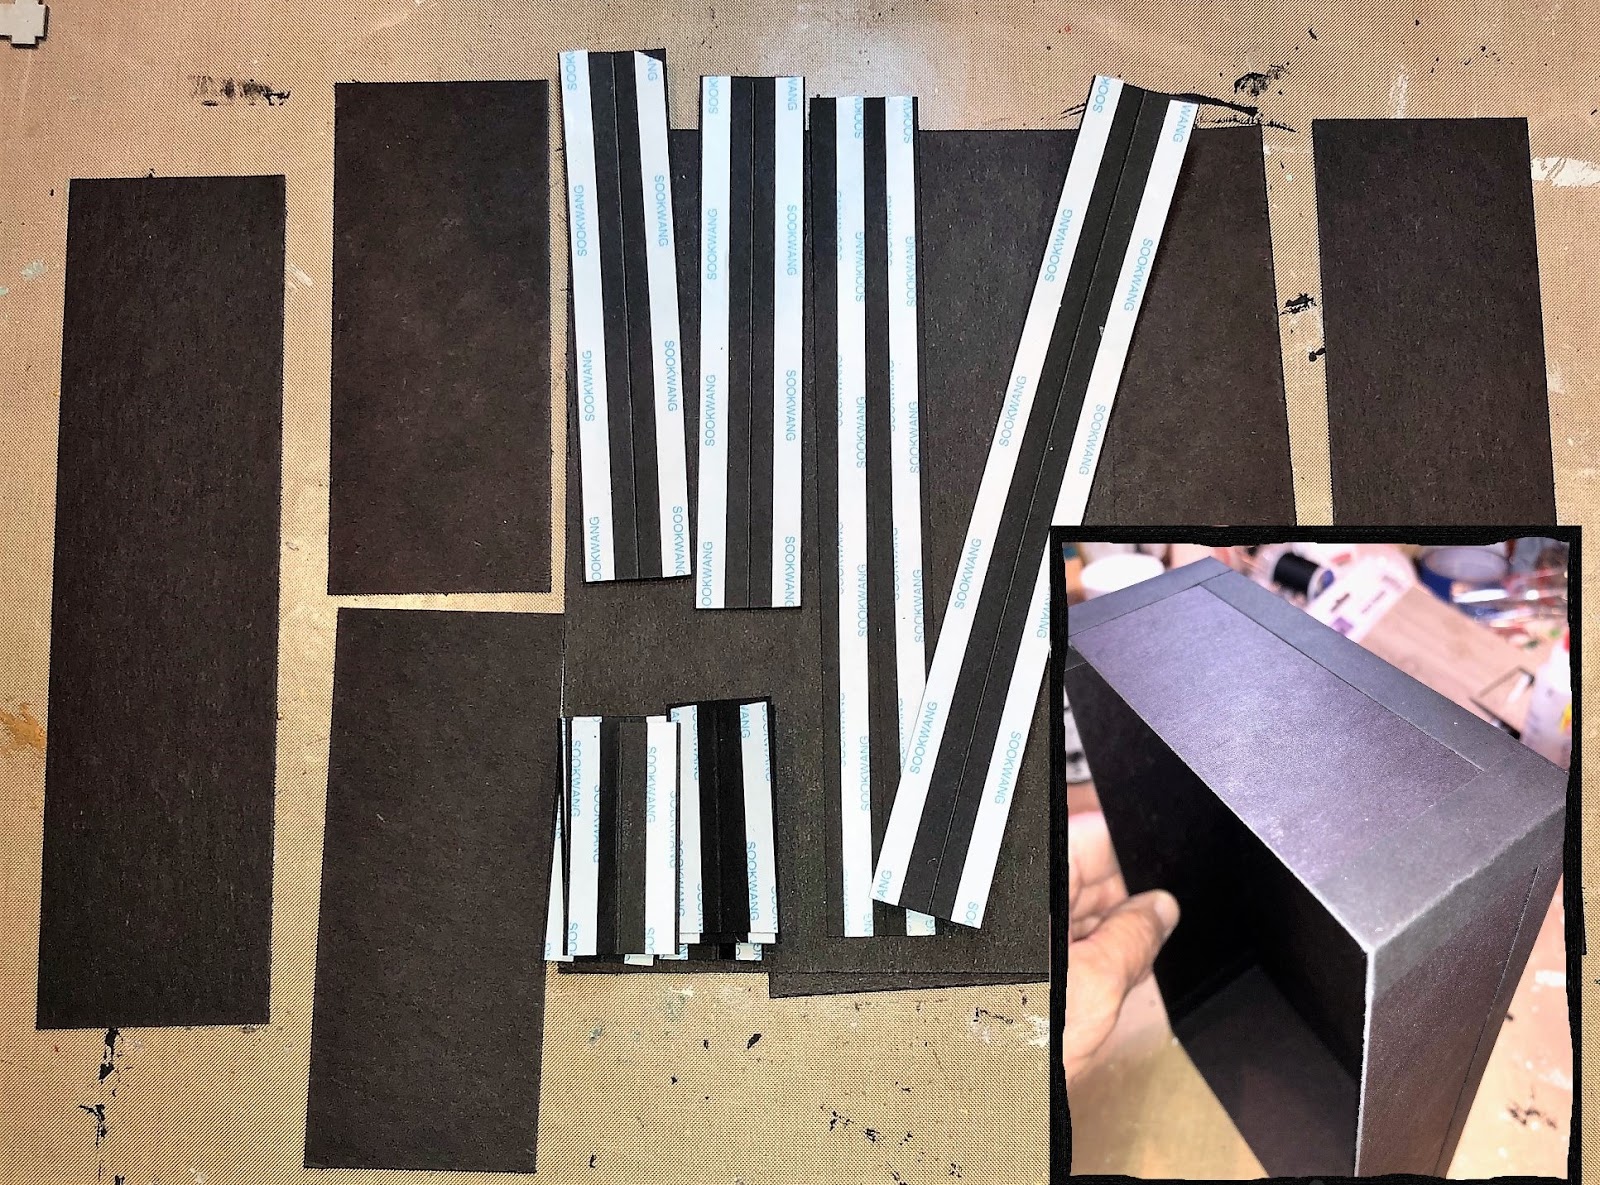
To create the trinket box, you need a box in between the front and back of the clock. I cut two boxes; one to fit inside of the other out, out of black chipboard. The larger of the boxes was 4 7/8" x 7 3/4". This would attach to the inside of the clock front. The smaller box measured 4 5/8" x 7 1/2". It would attach to the inside of the clock back and slip inside of the slightly larger box (lid). The sides of the boxes were 2" for the top box and slightly less for the bottom box.
The box was constructed using "structure strips". These are 1" strips cut from black cardstock. They are folded in half and 1/4" double sided tape is added to the outside edges of the strip. First lay the box center down and add each of the sides of the box, leaving a slight space between the two chipboard pieces so that the sides can be folded at a 90 degree angle. Once all four sides are attached with the structure strips, pull two sides up and place a structure strip on the outside and inside of the corner to hold it in place. Repeat this for the other three corners. You have made a box! More will be done with these soon.
Next I placed DecoArt's 12" x 12" Segmented Swirls" stencil over the entire front of the clock. Using a palette knife, I pulled DecoArt Media Black Modeling Paste over the entire front and heat set it dry.
I repeated this on the outside back of the clock piece. I also stenciled this design on all four sides of the black chipboard box I had just created and heat set.
Here is a picture of the clock pieces at this point.
Next, apply double sided tape to the bottoms of both boxes. You can see how these will fit onto the inside of the clock front and back once they have been completely finished being transformed into the Steampunk Clock.

To get a rather rustic, "grungy, industrial" look, I used my finger and rubbed the mixture of the DecoArt Media Medium Grey Antiquing Cream and the DecoArt Media Fluid Acrylics Metallic Silver over the entire surface of the stenciled front and back of the clock. I used a baby wipe to move the paint and remove any excess. I repeated this step until I was satisfied with the results. Then using my finger, I randomly wiped DecoArt Media Fluid Acrylics Quinacridone Gold over the surface to further the rusty, industrial look. This also "warms" up the colors and melds them together so perfectly. I repeated this process on the interior of the clock front and back, the stenciled clock back and the box sides. You can also see the more silvery arched ornamental piece that has been glued to the top of the clock.

This clock has some very cool bottom sections that are prominent and really add to the character of this clock. I used a floral stencil on a piece of black chipboard, cut in the size and shape of the clock front, to create a brocade type of imagery. Using a palette knife, I pulled the DecoArt Media Black Modeling Paste through the stencil and heat set it.
Next I used a baby wipe to add a layer of DecoArt Media Fluid Acrylics Titanium White to soften and highlight the pattern. I love teal so I added some DecoArt Media Fluid Acrylics Cobalt Teal Hue over the white (using a baby wipe) and got this lovely soft teal shade. Then using my finger, I added bits of DecoArt Media Fluid Acrylics Metallic Gold to highlight the raised areas and also pull in the industrial feel to the brocade.
The face of the clock is also cut out; inviting even more dimension! I used a piece of scrap cardstock and stamped two of Andy Skinner's images from his Steampunk and Industrial Stamp Sets randomly onto the background using Black Permanent Ink. Heat Set. Next I stamped over the entire area using an embossing ink pad and sprinkled Clear Embossing Powder over the entire surface. I removed the excess powder and heat set it. This gives a glossy finish that adds shine and also a tactile element to the clock.
Using the double sided tape, it's time to put the clock front together. Here is what the clock looks like at this point. Don't you just LOVE that brocade look?
Now for the Tando Creative Drainpipes that will adorn the front of the clock. They are very cool pieces laser cut from greyboard. There are a variety of shapes. Also pictured are more of the pieces that come with the Steampunk Clock Set. They look like they were made for each other!
I began with a mix of DecoArt Media Textured Sand and DecoArt Media White Crackle Paste. I rubbed that mix over the surface of all of these ornamental pieces and let them air dry so that the crackle would work properly. I was hoping that this would create an old weathered, wet patina pipe look ... like something from a dank basement or underground sewer system. I think I achieved it!
I love to use my fingers to paint. So, the next step was to add some DecoArt Media Fluid Acrylics Metallic Silver over the grainy white crackled surface. Next I added DecoArt Media Fluid Acrylics Quinacridone Gold to give that rusty appearance. Next was the DecoArt Media Fluid Acrylics Paynes Grey to define the objects and also give them some depth.
Finally, I added a mixture of DecoArt Media Fluid Acrylics Titan Buff and Cobalt Teal Hue (my favorite combination for patina) and tapped the objects to add a patina look. I love how the pipes turned out and they would look fantastic against the more greyish clock front.
I painted the clock hands and clock numbers using DecoArt Media Fluid Acrylics Metallic Gold because they helped them to stand out and also added another "metallic" look.
In this picture you can really see all of the textures, patterns and grunginess of this project. I added some shadowing to the two sections of the clock brocade where I would be adding the "East" and "West" compass pieces. The shadowing was simple using a Stabilo black pencil and a paint brush with a bit of water. Just smear the pencil marks with the water and it's done!
Here is the clock face pretty much complete I added some rusty nuts and bolts from Andy's Industrial elements onto the feet of the clock face and also at the top of the Drainpipes.
Now to put the trinket box together!
Simply attach the box bottom in place on the inside back of the clock. Then stand it up and line up the front side of the clock so that it will stand straight. Then press the top box in place on the inside of the clock front. Then you can just place the lid of the box on top of the bottom of the box and it's finished!
Here are a couple of closeup pictures of the finished box:
Supplies For This Project
Miscellaneous Supplies
- Black Chipboard
- Black Cardstock
- Double Sided Adhesive Tape
- Paint Brushes
- Palette Knife
- Glue
- Adhesive Half Pearls
- Embossing Ink
- Clear Embossing Powder
- Black Permanent Ink Pad
- Stabilo or Black Pencil
About the Artist: Candy Colwell