Showing posts with label Andy Skinner Creative Team. Show all posts

Friday, 28 February 2020

Brandy Glass Flower Bowls - using Quick Grag Glue for decoupage on glass

Today's project is a super quick 'repurposing' project.
Old brandy glasses, quick grab glue mixed 50/50 with water, and beautiful rice papers are all you need to repurpose old glassware. You can use this technique on soooo many surfaces with this glue!
 
You might have seen from a previous post with an upcycled wine bottle, how brilliant the Quick Grab Glue is for decoupaging rice papers. So I used the same combo for a mega quick project, repurposing two glasses in the process. To find the glue and papers, click HERE!
The glue is so good that, even when watered down 50-50, it still grabs quickly and is still really strong. So is a great way to decorate and strengthen glassware.
This combo of glue and rice papers is also a really good base, so I could easily paint over the whole thing if I want to change the colours or completely redecorate them.
Tell us how you've used the quick grab glue!
For more details and the full story, check out my blog www.craftyhumphreys@hotmail.co.uk
Thanks for looking.
Suz


Friday, 17 January 2020

Upcycled Bottle, Found Treasure and Broken Jewellery

It took just 4 fab products, 3 small rusty found objects and a bit of lace and pearl trim from my stash to give a wine bottle a bit of a facelift. I was just looking for an excuse to use Andy's new rice papers. I added some lava paste through his Crocodile Stencil - that worked well over the papers. Some lace and beaded trim around the neck from my large stash of vintagy bits. Then, I made a dangly charm thingy. For that I used broken jewellery chain with some charms on it, some found rusty objects (safety pin, metal washer and a piece of wire) along with a piece of shrink plastic stamped using Andy's Gypsy Queen stamp. I pinned my dangly decoration through the lace around the neck to secure. Then finished off by adding my candle.
 
 The Lava Paste applies so easily on dimensional surfaces.


 The bottle will work well as a candle holder, and all the drips of wax will add even more texture.
Amazing how different the colours look when photographed during daylight (on the left) and at night (on the right). Thanks so much for looking. You'll find a more detailed step by step here
Rhe products I've used, along with a link to them, are listed below.

Products used:
Floral Grunge Rice Paper
Lava Paste
Gypsy Queen Stamp
Crocodile Stencil

You can find all these products HERE. 


Wednesday, 30 October 2019

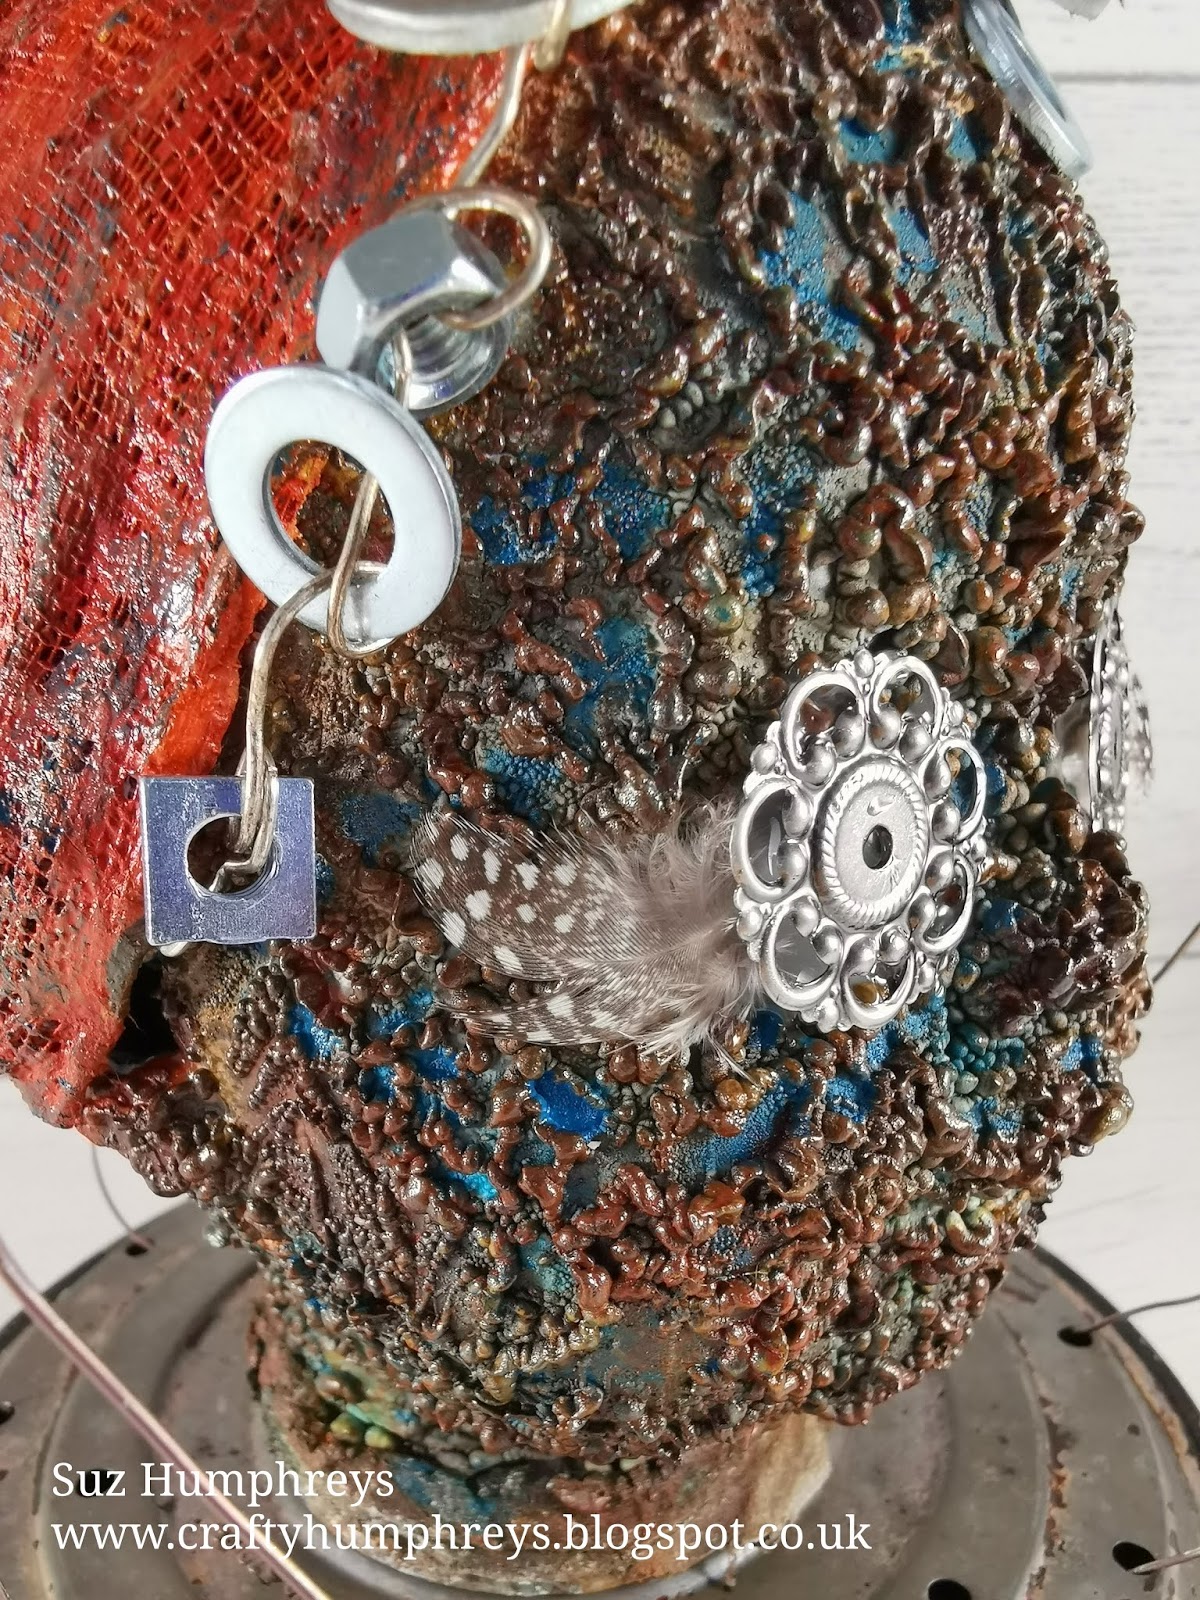
Industrial Altered Dolls Head

Hi all
Todays weird steampunky piece is made from a tatty, bald dolls head. I wanted to try out Andy's new Creative Expressions Paints so it seemed just the thing!


 To start with, a layer of black chalky finish paint, then Rust paint all over, topped with a Lava Paste face pack!
Stubby hair stumps covered up with a plaster wrap skull cap, which I then painted with layers of Quinacridone Gold, a hint of Rust and a smattering of the Cobalt Teal, The face is painted with layer upon layer of Quinacridone Gold, Cobalt Teal, Rust and Yellow, first using a brush, then a sponge to just highlight the texture.
I made a metal headband by threading metal nuts onto wire, added feathers and metal embellishments over the eyes. Then I took a very old battered cake time, turned the push up base part upside down and threaded wire through the air holes.
A bunch of feathers added to the top for a bit of fun, once the wire frame was finished and another metal embellishment on the top of the feathers to hide the feather stems and match the eyes.
Thanks for looking. For a bit more detail, visit my blog here.
Suz x


Products used:

Creative Expression Lava Paste, CE Paints: Rust, Quinacridone Gold, Cobalt Teal, Yellow
DecoArt Chalky finish paint and Heavy Body Gel

Other: Tatty dolls head, metal embellishments, wire, cake tin base and Feathers from my stash.

Tuesday, 10 September 2019

Vintage Bicycle Tag by Suz


Hi all
Here's a vintagy little tag inspired by Andy's new bicycle stamp.
A layer of music paper and some vintage paper from an old accounting book 
that belonged to my darling Betty who passed away in recently aged 102.  
Then layers of stamping, stencilling, some embossing powder and 
die inks all added to create the background.
Plus a little gold (I had to eat a chocolate to be able to reuse that gold wrapper, such sacrifice!). 
Then a grungy rose made from the bicycle wheels, 
and some bandage (cheesecloth) and stamped text. 

A pearl in the flower and a few smaller ones on the verticle gold strip, a bit of ribbon and it's finished.
Thanks so much for looking. If you'd like a more detailed step, by step, have a look at my blog here.

And here are all the gorgeous products I used:
Andy Skinner Range:
Stamps:
Imperial Rover Cycles
Grunge Wallpaper
Create
Embossing powders:
Raspberry Ice Cream
Supernova
Stencil: Cogged Up
Cosmic Shimmer Quick Grab Glue

Other products used: Inks:
Distress inks; Brushed Corduroy, Vintage Photo, Walnut Stain, Antique Linin, Bundled Sage
Versamark clear, Versafine Onyx Black


Monday, 26 August 2019

Candy Skull Festival Bag Dangle

Hi all
So excited about the new launch. The DT have been really fired up by the new products so I'll make this a quick post!
 I started off colouring some card with Distress Oxides, then
chose the area of colour I liked most and stamped onto it using Archival Ink. 
Acrylic paints helped to add pops of colour, and whiten the teeth. 


The skull is mounted onto a slice of wood (taken from an ash tree in our garden) which I painted with white gesso and covered with Andy's lush Crystal Glaze embossing powder.
Then I stamped out the image again, cut out the rose from the forehead, painted it and decoupaged it onto the main image to give depth. A few die cuts, feathers, beads, gems a hanging chain and of course a repurposed parrot earring, complete my bag charm!


Here is my 'festival dangle' hanging from it's new home on my back pack! For a more detailed look at the project and info on all the products, click here to see the post on my blog.
Thanks for looking. Enjoy the new products!
Suz 

Friday, 23 August 2019

Andy's New Releases

Hi everyone Dee here with a small note book I made I used a gel print to cover the book 
using chalk paint in cream pale blue and brown. I used a stencil took the print then
ran off a second print.


I used Deco art 2 Step Crackle over the Geli print. next i used antiquing cream over the top once it had dried. I stamped the skull onto stamping paper and just it out. i triple embossed the horns in silver and attached them. i attached a clay cog and added a crystal gem to the centre and attached it to the centre on the cog.


Inside the little book i inserted 3 tags made from the first release stamps from Creative Expressions.
I inked the tags up with distress oxide in sky blue, Antique linen and Vintage Photo in Distress ink.
First was the moth I wet the tags then dipped the tags into the ink.


The circus Tag was next i also added washi tape


the fish skeleton again I used washi tape and dipped the tags into the inks to create the background, Once the tags were dry I inserted the tags into the little note book.
I hope you enjoyed the post would love your feedback on the new stamps.


PRODUCTS USED

  1. Creative Expressions Rubber stamp by Andy Skinner Buffalo Stance


  1. 2 Step crackle glaze
  2. Antiquing cream in patina
  3. chalky finish paints


Friday, 28 June 2019

Washed Ashore, by Natassa Blazaki


Hello my dear friends!

Natassa here, this time with a new project inspired by the Pirates of the Caribbean.

I had a beautiful bottle, that once had some kind of liquor inside and which I nearly threw away in a declutter frenzy. I think you can all relate…
Anyway, I finally decided just to empty it from the liquid and hide it away for some future creation. And the future came!


Its fish-like shape made me think of a sea themed project. I thought of what I’d like to find, on a walk on a deserted beach, one summer evening just before the sun set. It would be a treasure from the past, washed ashore, sticking out of the sand just a tiny bit for me to discover. Then pirates came to my mind and so on.

I wanted a pirate’s skull on my bottle and since I didn’t have one, I made one with polymer clay. I also made some tentacles out of epoxy clay and casted a couple of star fish with light air-dry clay. 


I aged the skull, by applying a combination of Media Antiquing Creams.

I used the clock stamp from Andy’s Steampunk set with air dry clay and made a couple more embellishments. You can see the process, in the video below.


To create some texture, I did some stenciling with Andy’s 6x6 Snake’s Web stencil and black modeling paste. I used heavy gel to glue mini art stones here and there. Also, I glued some gears from Tando’s Industrial Kits.

As a base coat, I applied Americana Decor Chalky Finish – Carbon. , I colored the bottle with Traditions in greens and blues. For the next layers, I mixed the paints with DecoArt Glazing Medium  and also did some dry brushing with Traditions Warm White, mixed with a drop of Transparent Yellow Iron Oxide. 


Since my main colors were green and blue, I chose warm orange and red for the highlights.


Altering this bottle was great fun! 
I really hope you enjoy it too.
Wishing you all a happy creative weekend!


You can find Natassa Blazaki - Art Recipes and More in:


6x6 Stencil Snake’s Web

Steampunk Stamp Set


Chalky Finish Carbon
Traditions Phthalo Blue, Teal Green, Aquamarine, Quinacridone Gold, Transparent Yellow Iron Oxide, Warm White, True Gold
Media Fluids Primary Magenta, Diarylide Yellow, Raw Umber, Paynes Grey
Media Antiquing Creams English Red Oxide, Carbon Black
Matte Metallics Aged Bronze
Glazing Medium

Premium Heavy Gel Medium Gloss

Other supplies


Polymer Clay
Epoxy Clay
Light air-dry Clay
E6000 glue
Flat brushes

Archival Ink Black