Showing posts with label Tando Creative Industrial Elements. Show all posts

Friday, 20 July 2018

Altered Steampunk Clock

Hi Everyone! I must be the crazy lady with all the huge altered projects. I was at the discount store and saw this awesome clock, bought it, and tore it all apart, added a number of Andy Skinner Industrial Elements, and altered the daylights out of it. Clock Andy Skinner
For photo purposes I took the glass out. But this is what the clock somewhat looked like after I tore it all apart. 
IMG_4196.jpg 

 I took the back panel off and the outer ring.
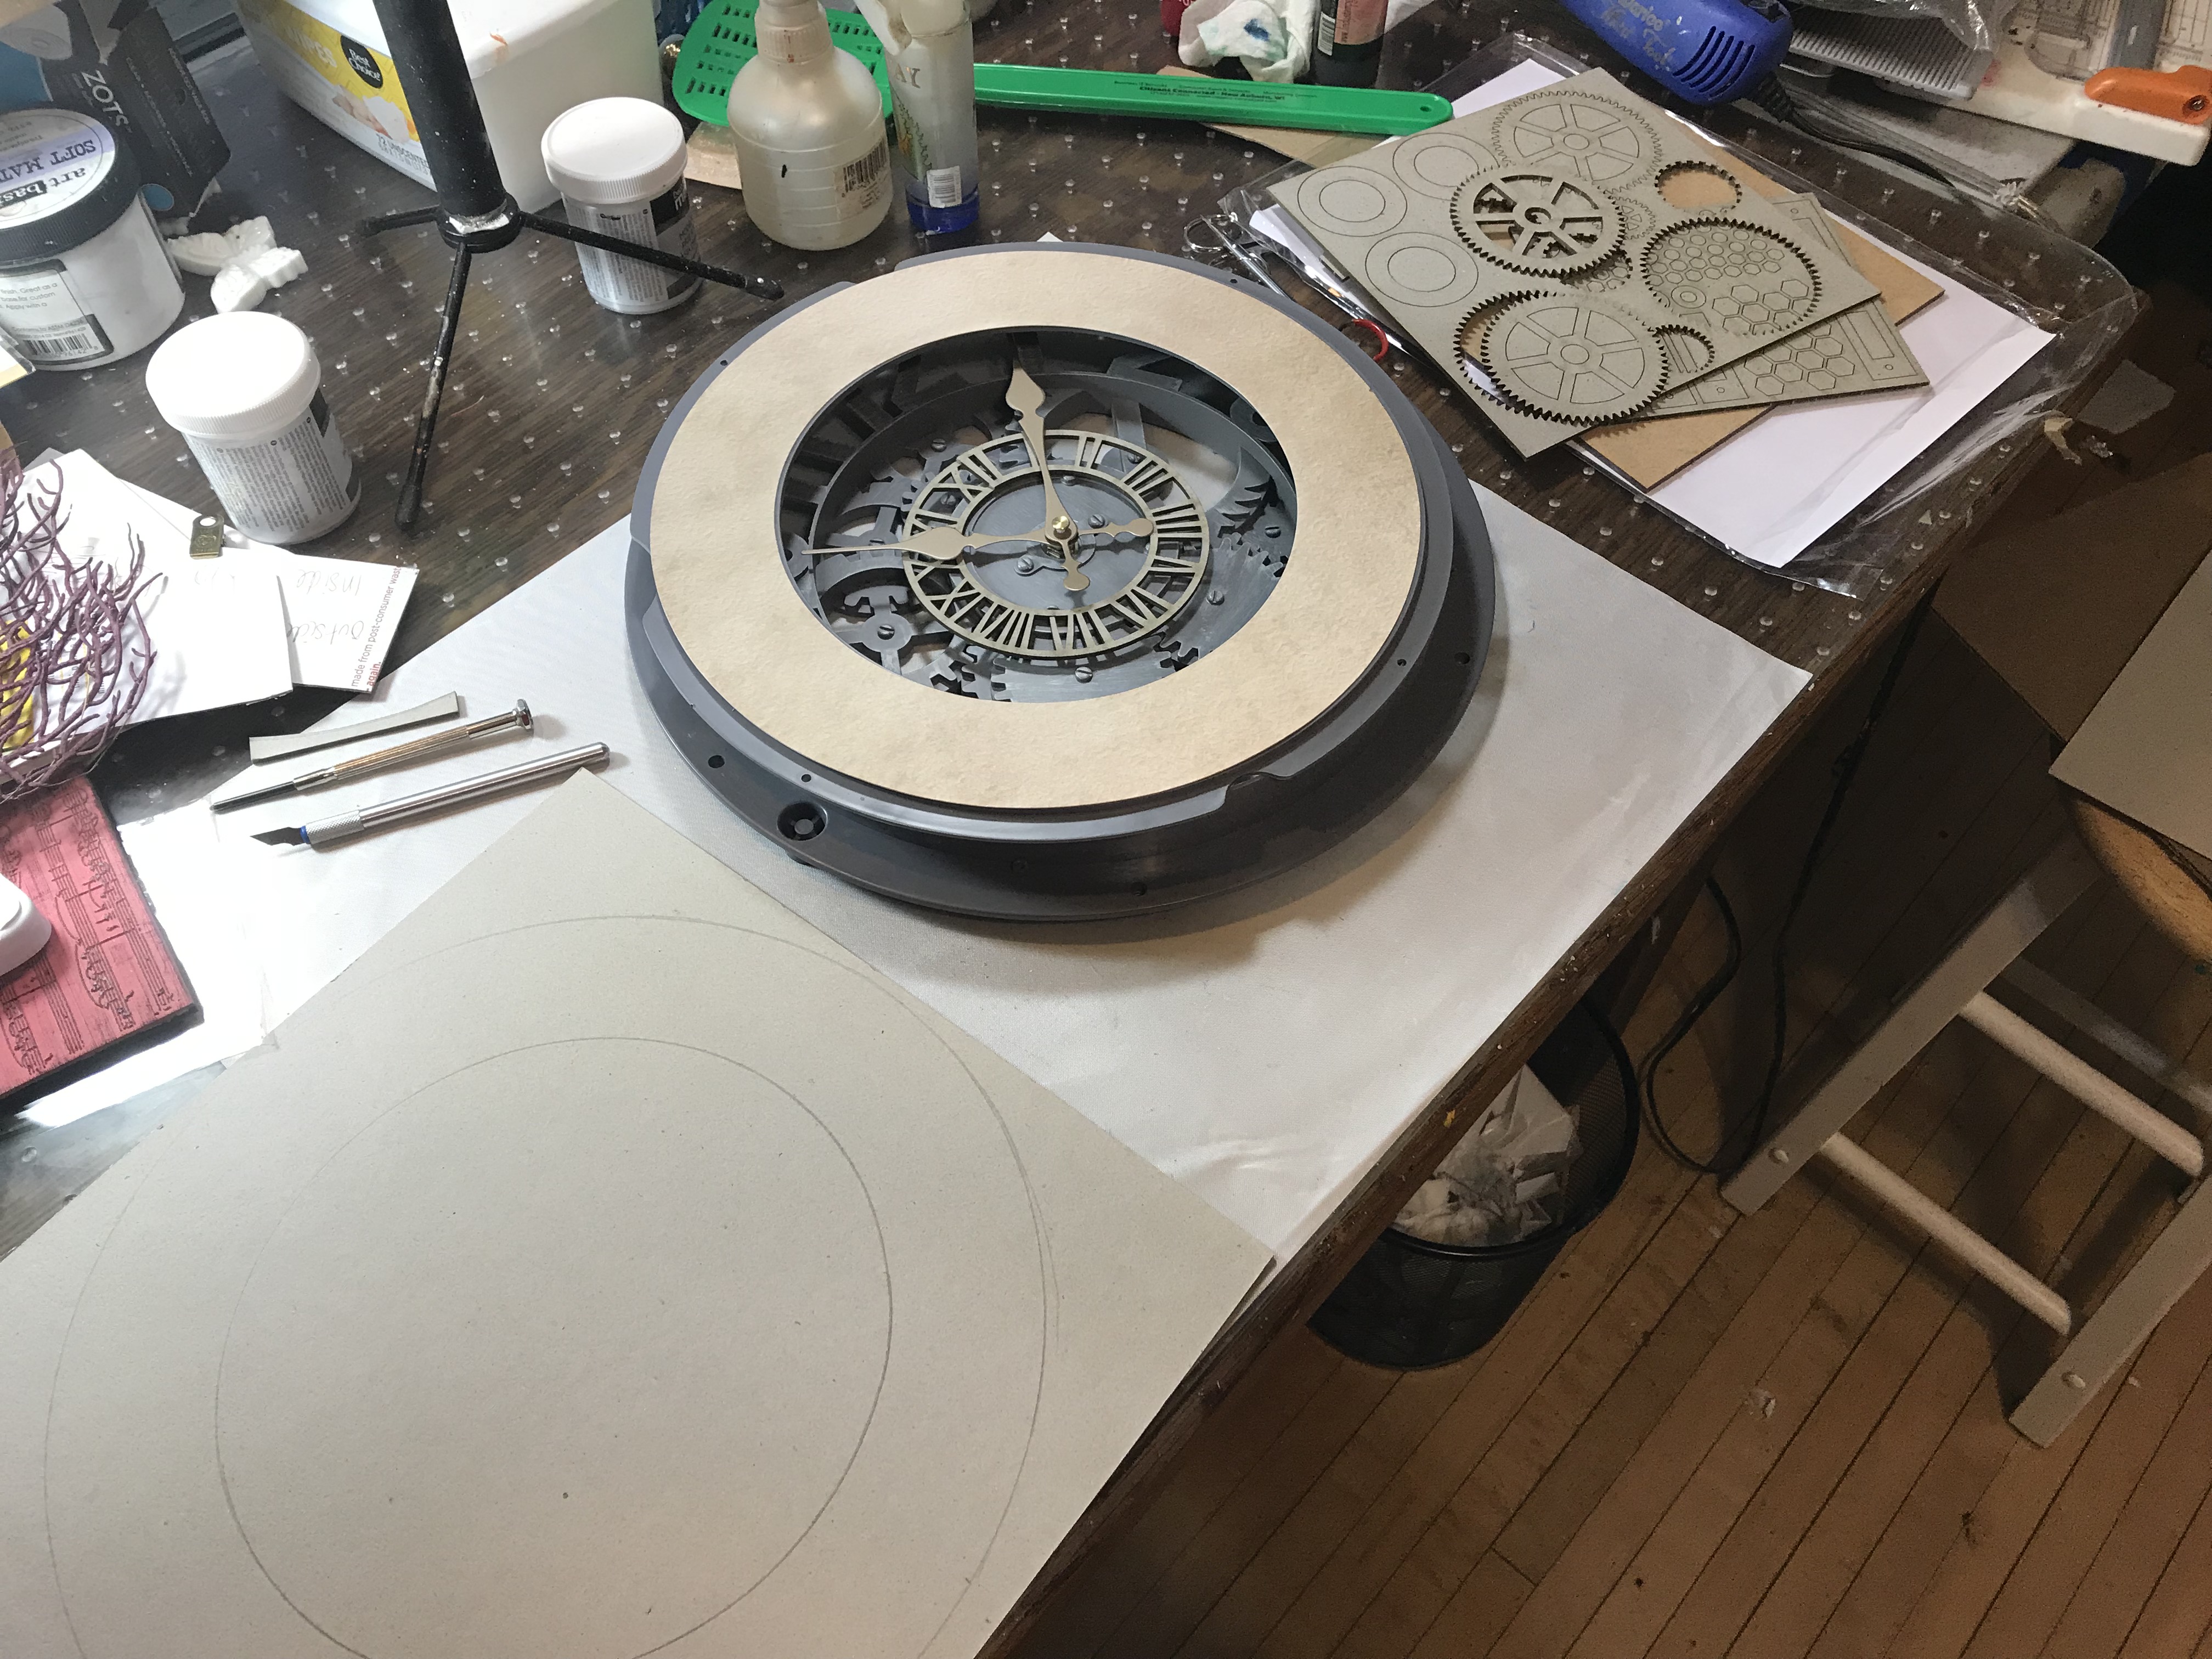
  IMG_4199 
 Using a thick piece of cardboard, I traced the outer circle and cut into smaller pieces. IMG_4202 
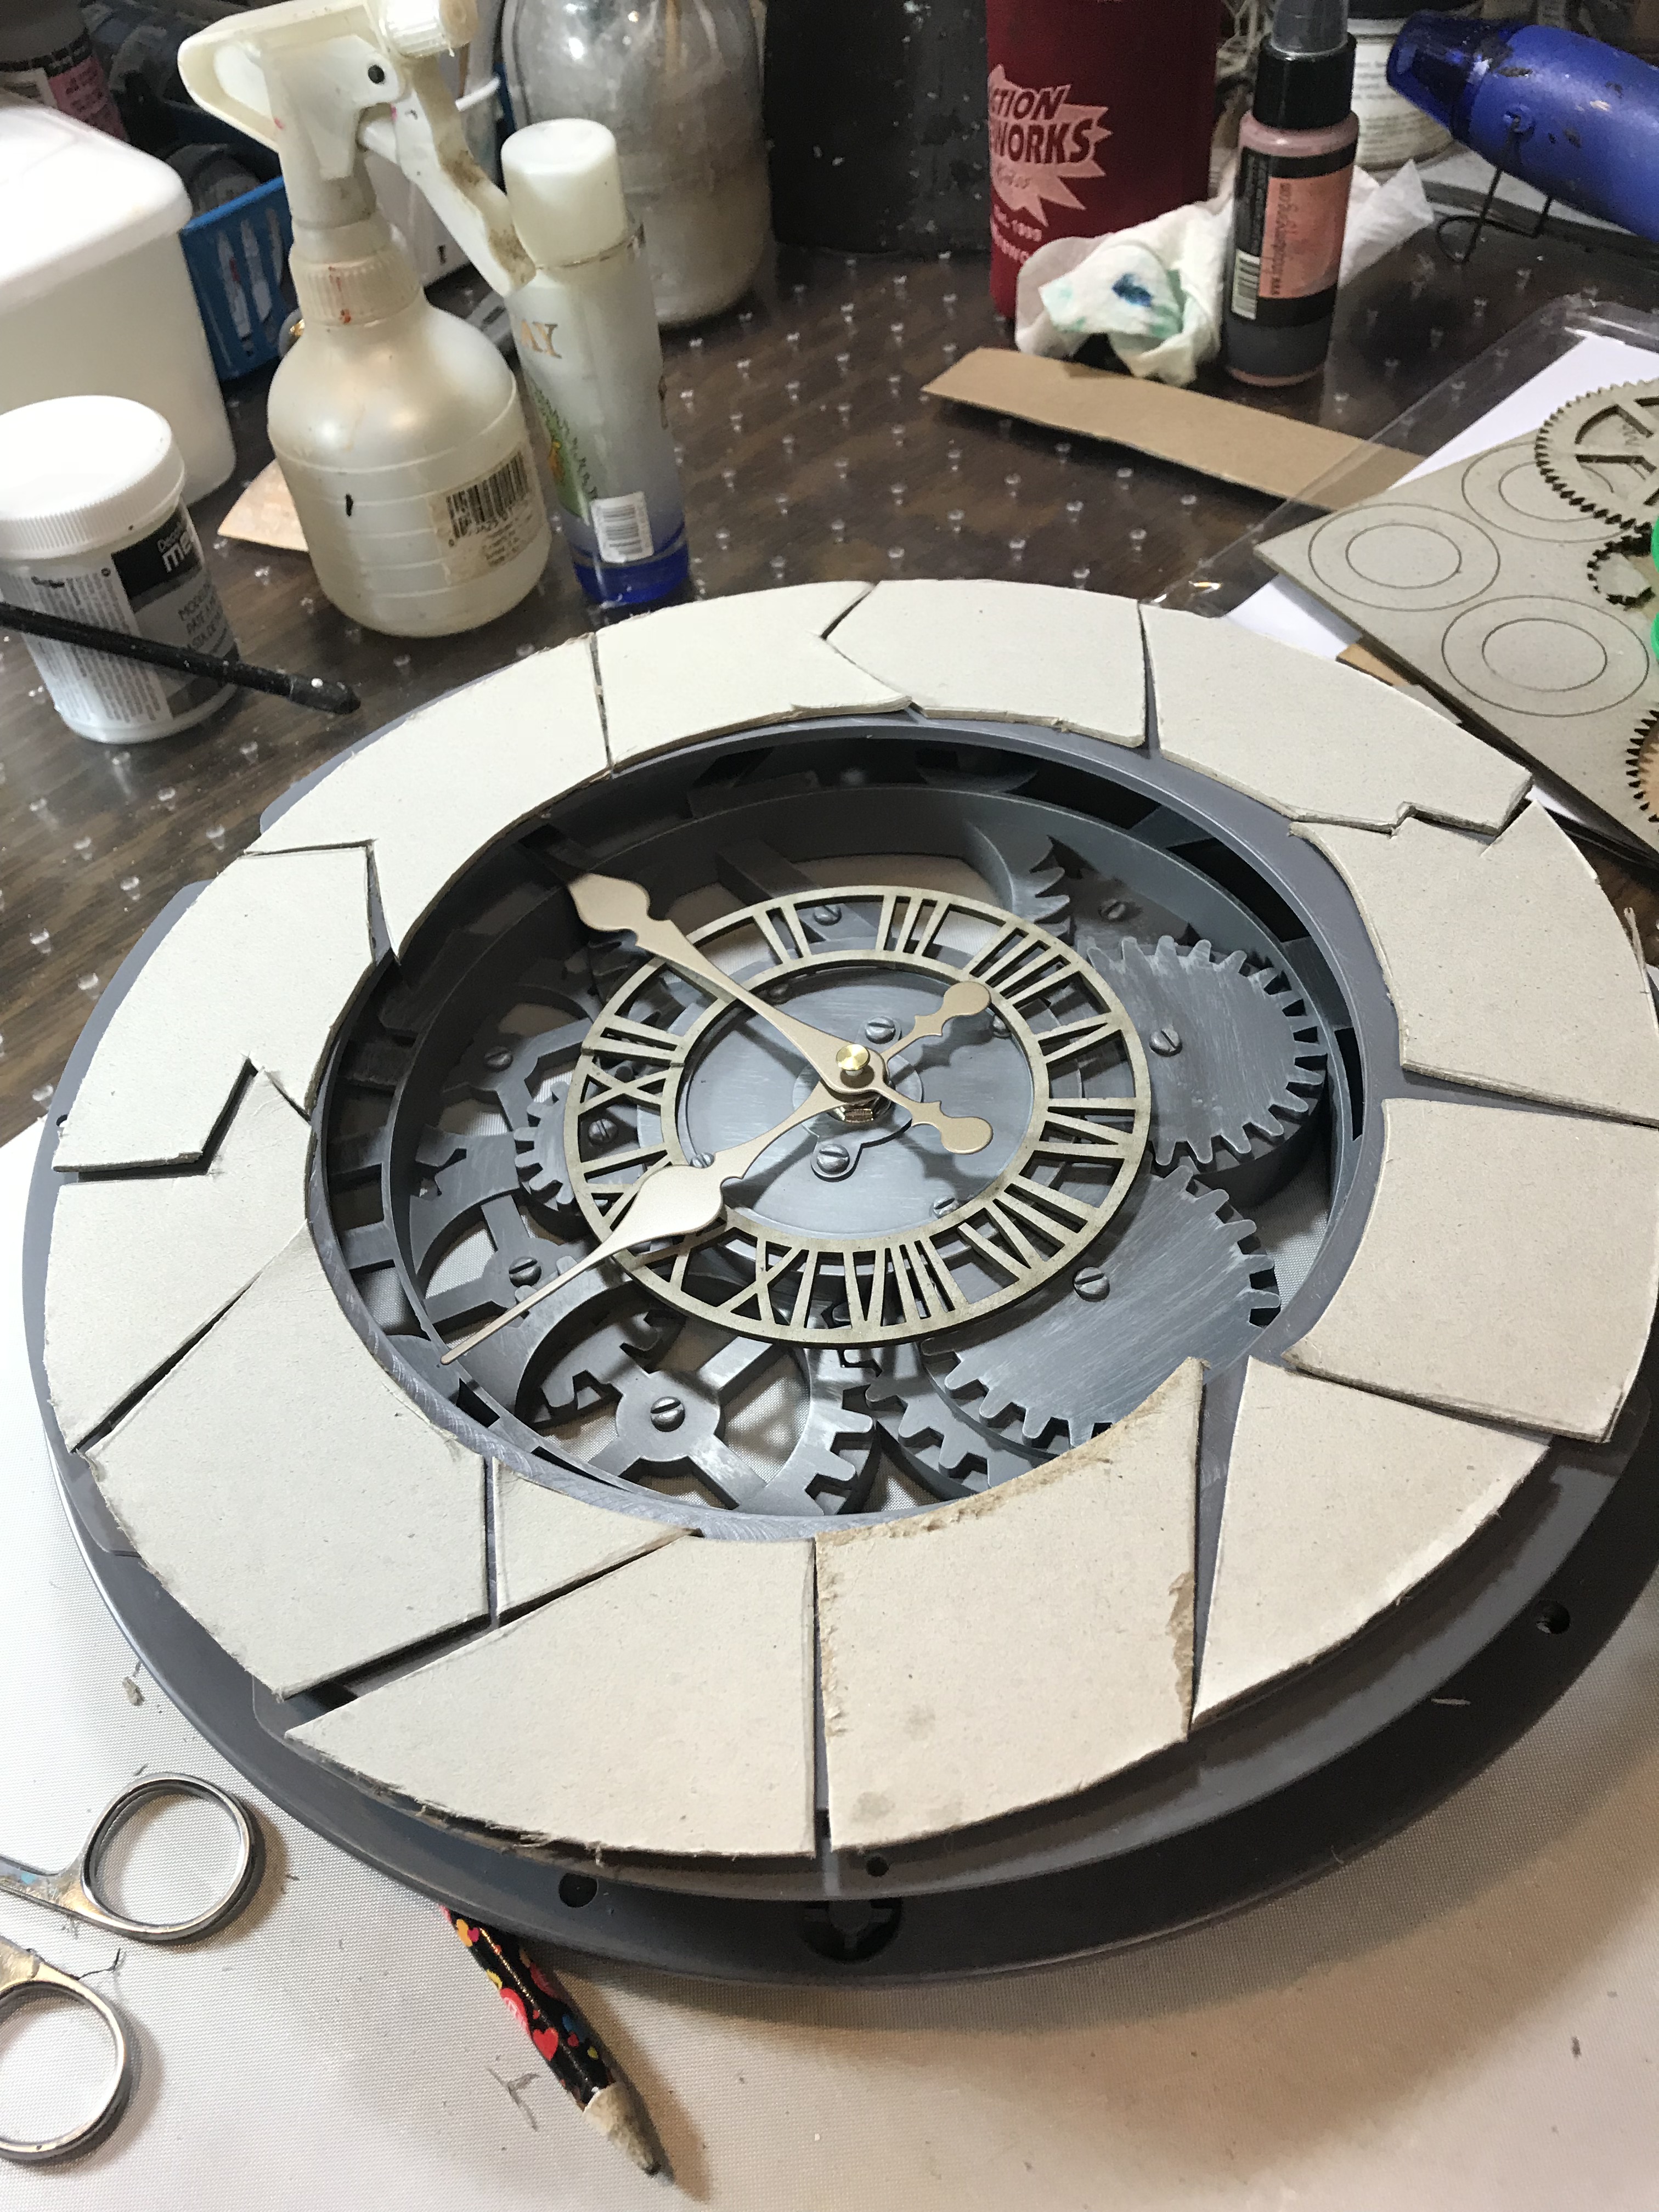
 I distressed the edges of each piece and then glued it all together. IMG_4207.jpg 
 After I added a layer of gesso, I painted with layer after layer of DecoArt Fluid Acrylicsfor just the right grunge look. 
IMG_4208

IMG_4224.jpg 
 After I got the background really how I like it. I decided to wrap all the numbers on the clock with metal tape. Using a thick crackle glaze to get the aged look, I used a bit of a dirty wash to highlight the cracks on the numbers. 
  Clock Andy Skinner close up 5
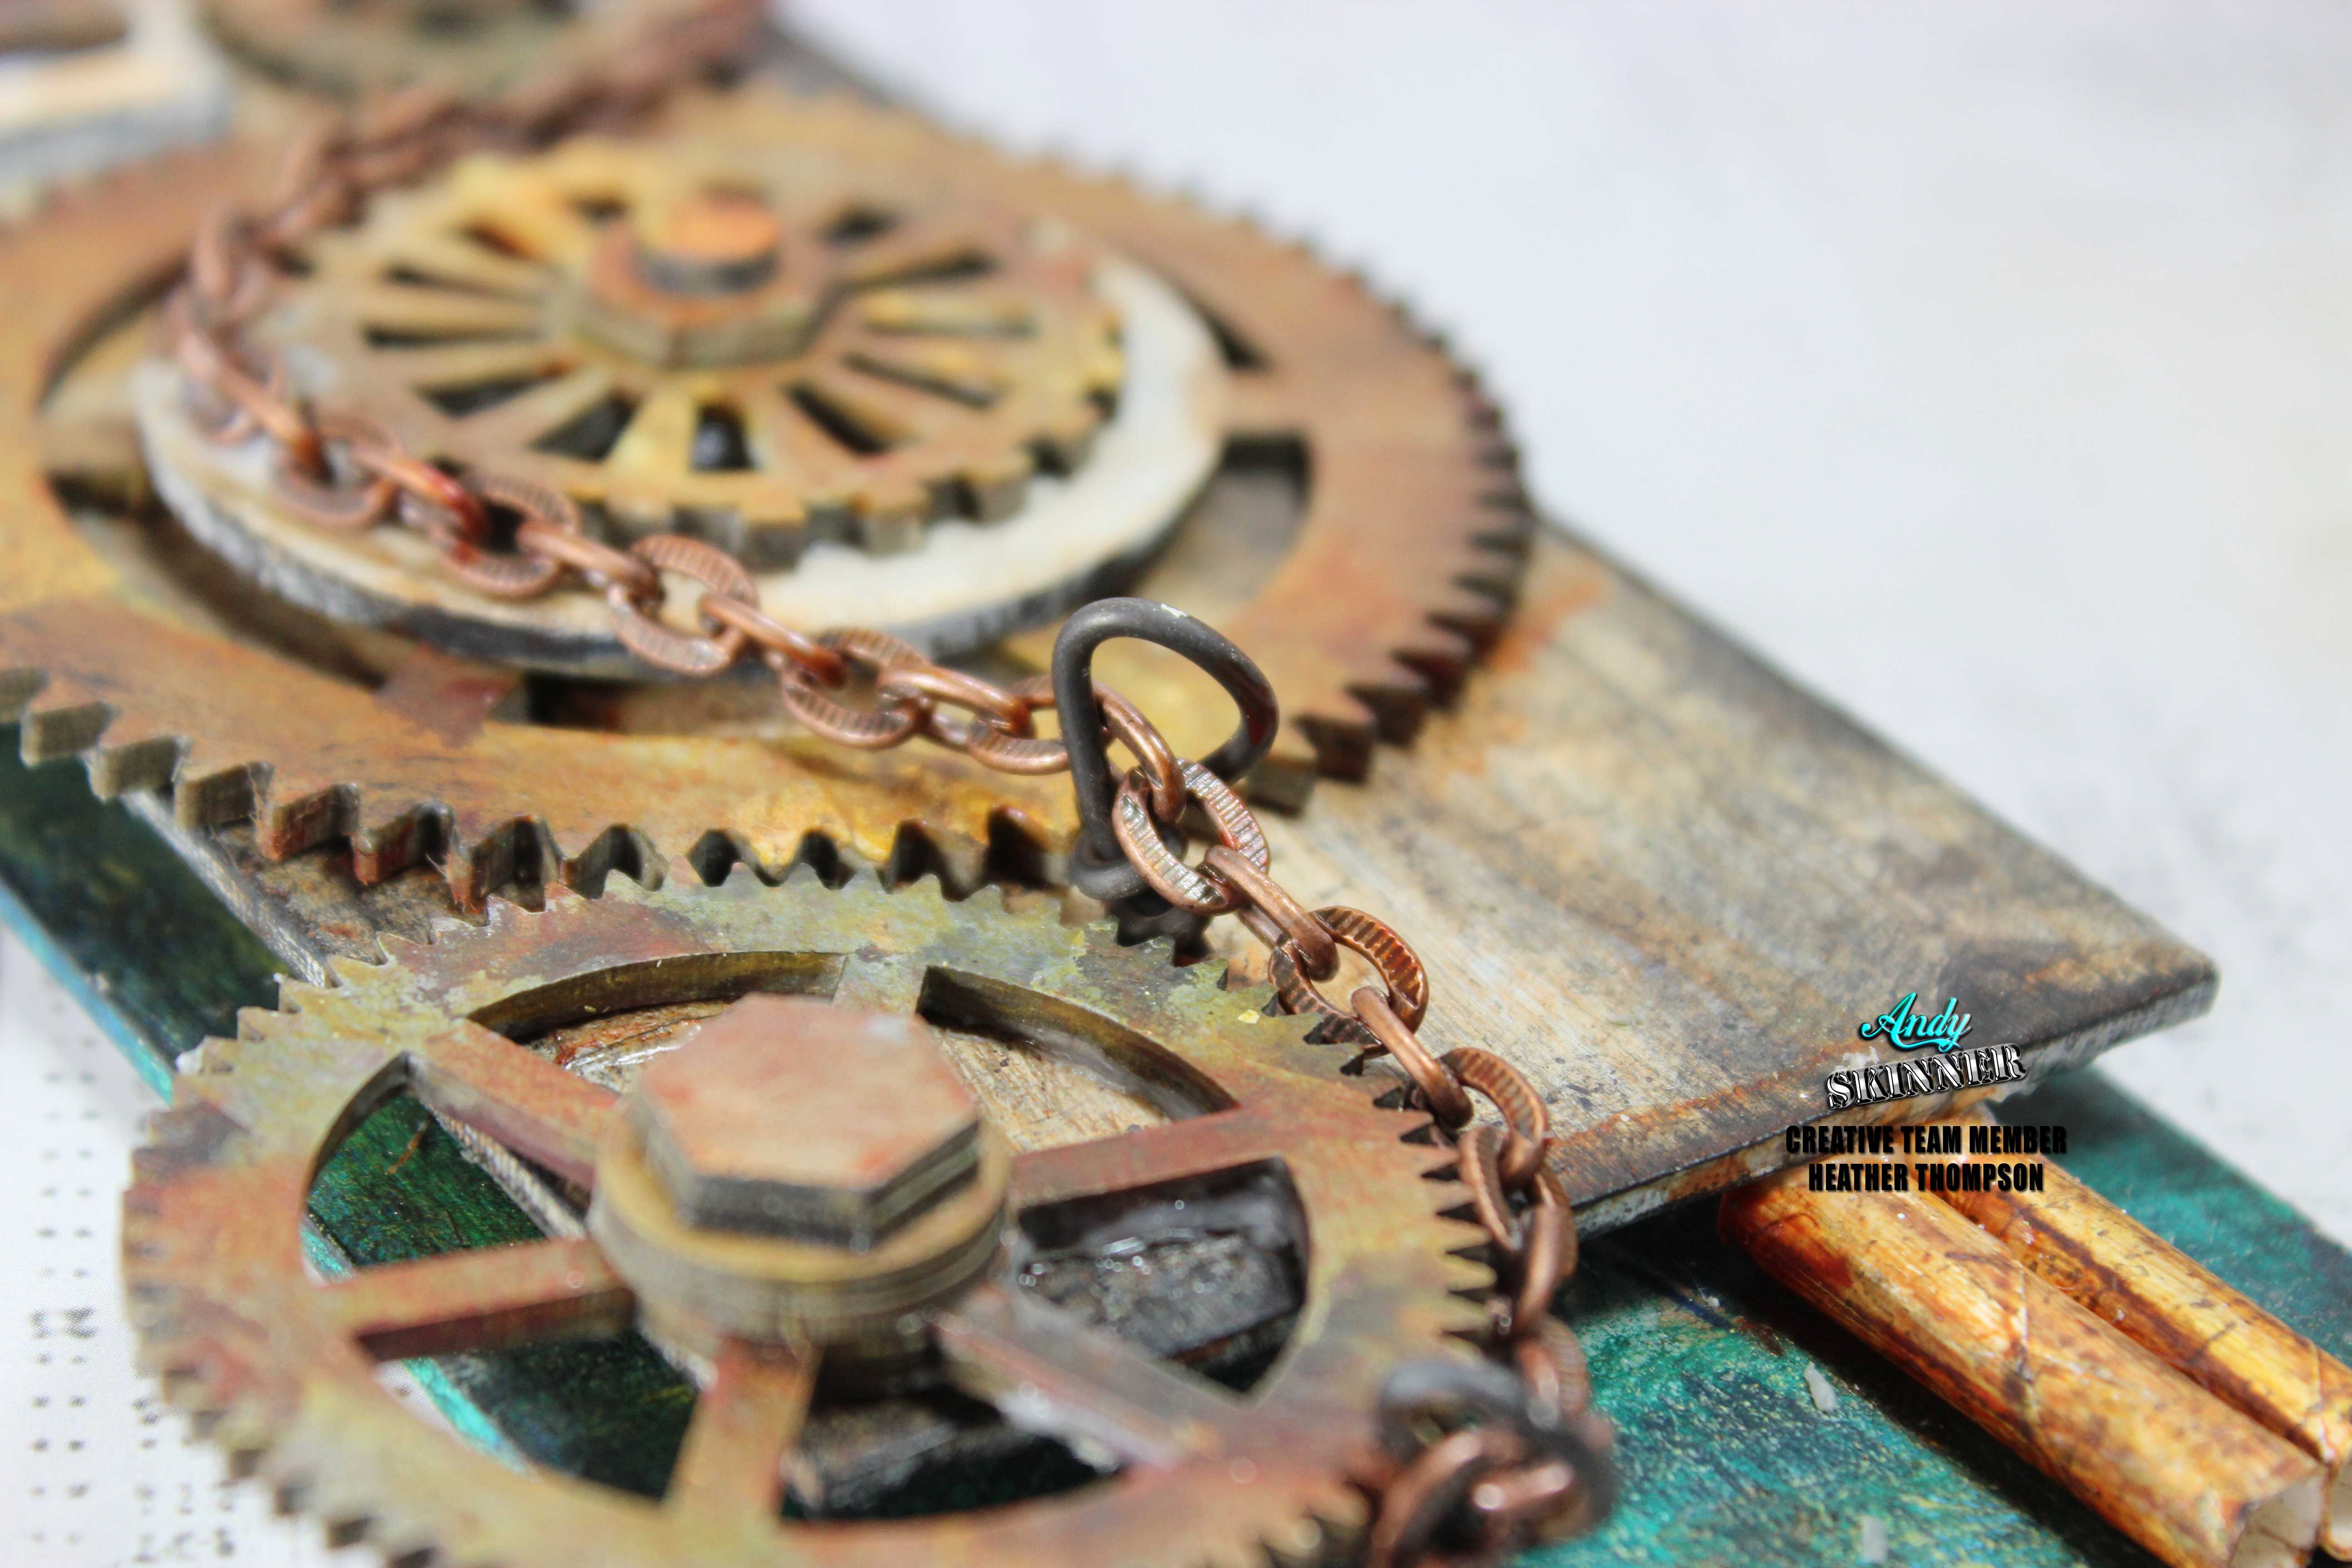
I thought the centre of the clock could use something so I added an additional clock face from the Compendium kit in the centre. Altering the Industrial Elements I added more gears, and bolt heads. Clock Andy Skinner Close up 1
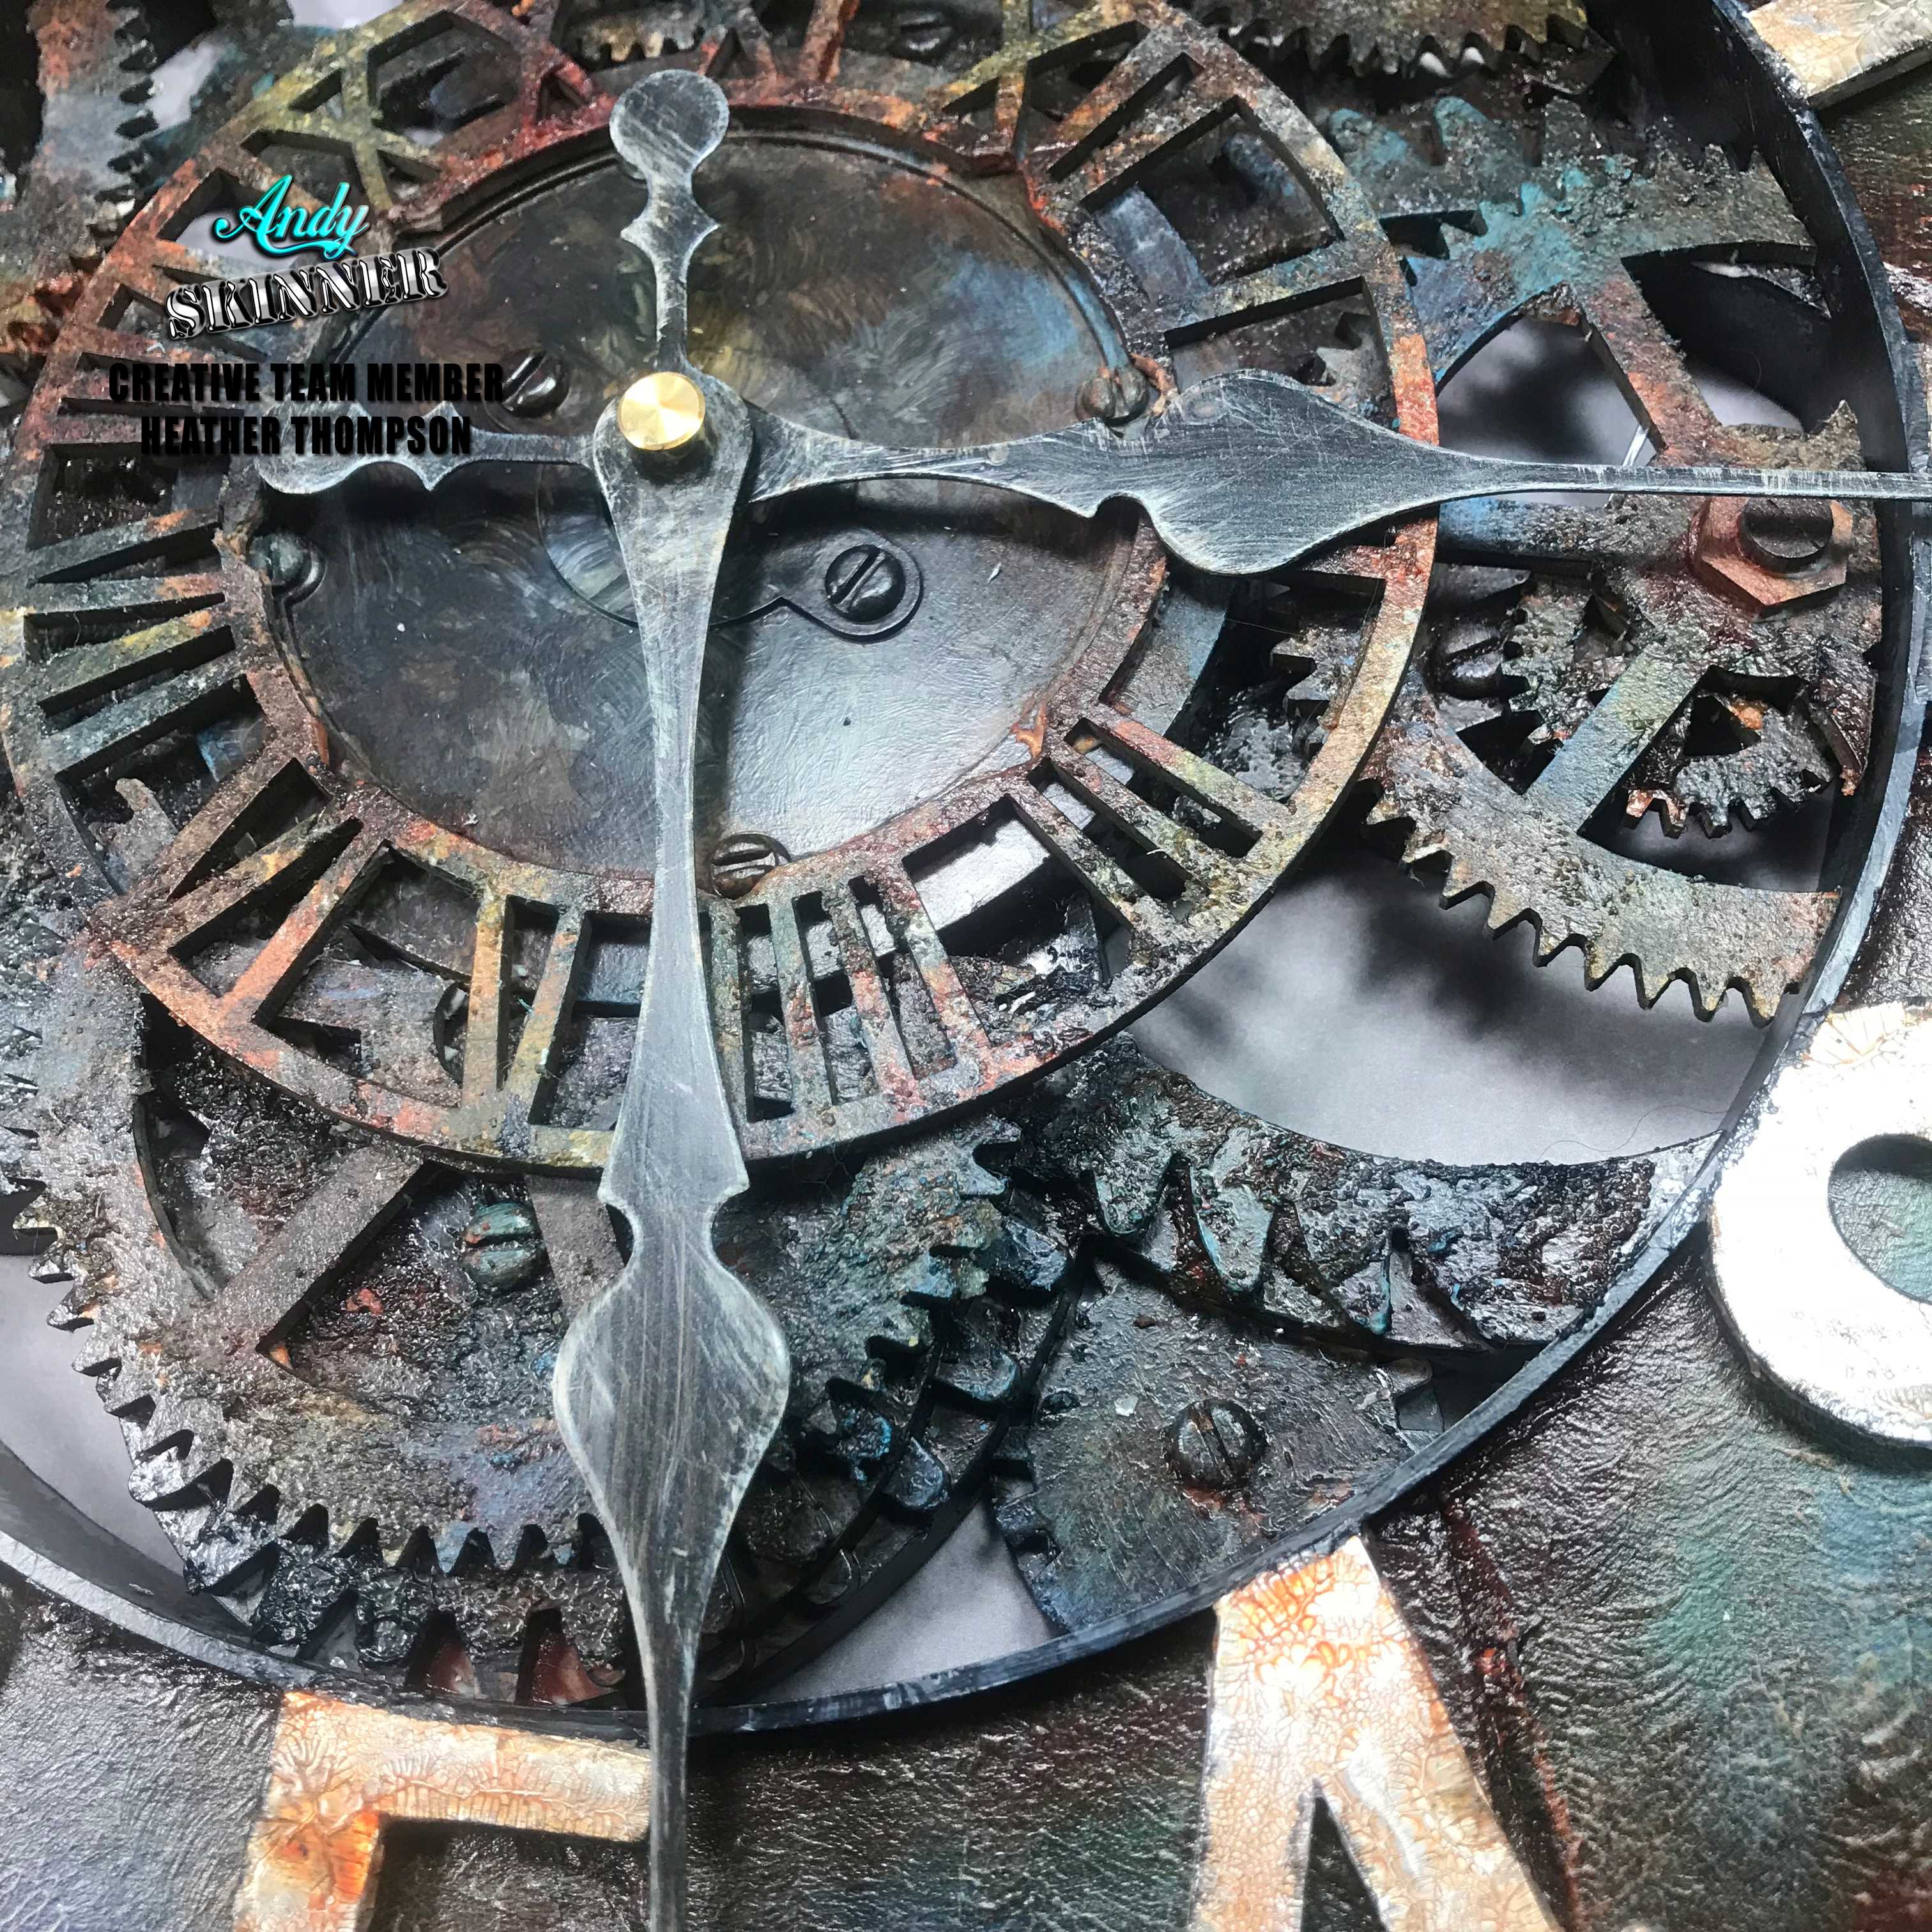
I used the texture sand paste to add more details to all of the pieces and with fine attention to details. I fit extra gears in here and there.

Clock Andy Skinner cloe-up 3 
 After all was said and done, the inner rim was a little tight and needed some trimming but it all came together great. I put in a battery and perfect, the clock actually worked, It still would have been a great project even if the clock didn't work, but I am so glad it did. clock Andy Skinner cloe up 2
I hope you enjoy the project and look forward to my next crazy project.
Have a great creative Day!
black and white head shot
Supplies:
AS LOGO
Supplies:
decoartlogo
Titian Buff
Paynes Grey
Burnt Umber
Dioxozine Purple
Phthalo Turquoise
Transparent Yellow Iron Oxide
Cobalt Turquoise Hue
Quinacridone Gold
Carbon Black
Ultra Matte Varnish
Tinting Base
Modeling Paste
Crackle Glaze
Texture Sand Paste
tandologo

Friday, 15 June 2018

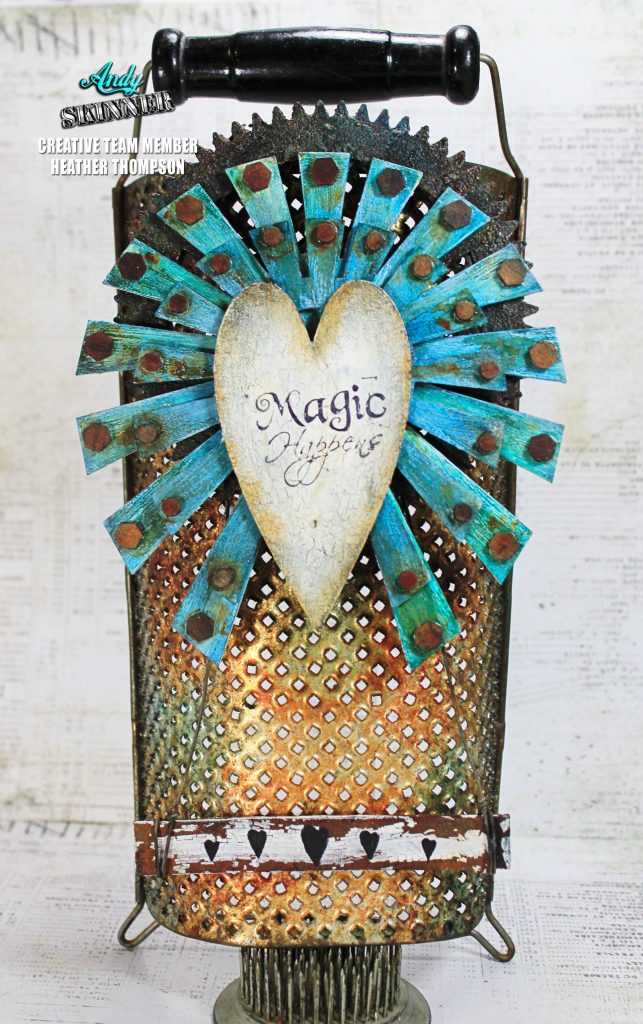
Magic Happens by Heather Thompson

I finally got a new kitchen after years of waiting so patiently, so I am continuing to add art to my second favourite place in the house.  I have found all different vintage gadgets and tools over the years, and have always had plans to alter them in my style and details. 
_MG_4703

This antique cheese grater was left as it was originally found, I only added some more rust colour and patina.
I used various techniques and products on the projects from rusting to crackle medium, to the pealed paint look. 

_MG_4704
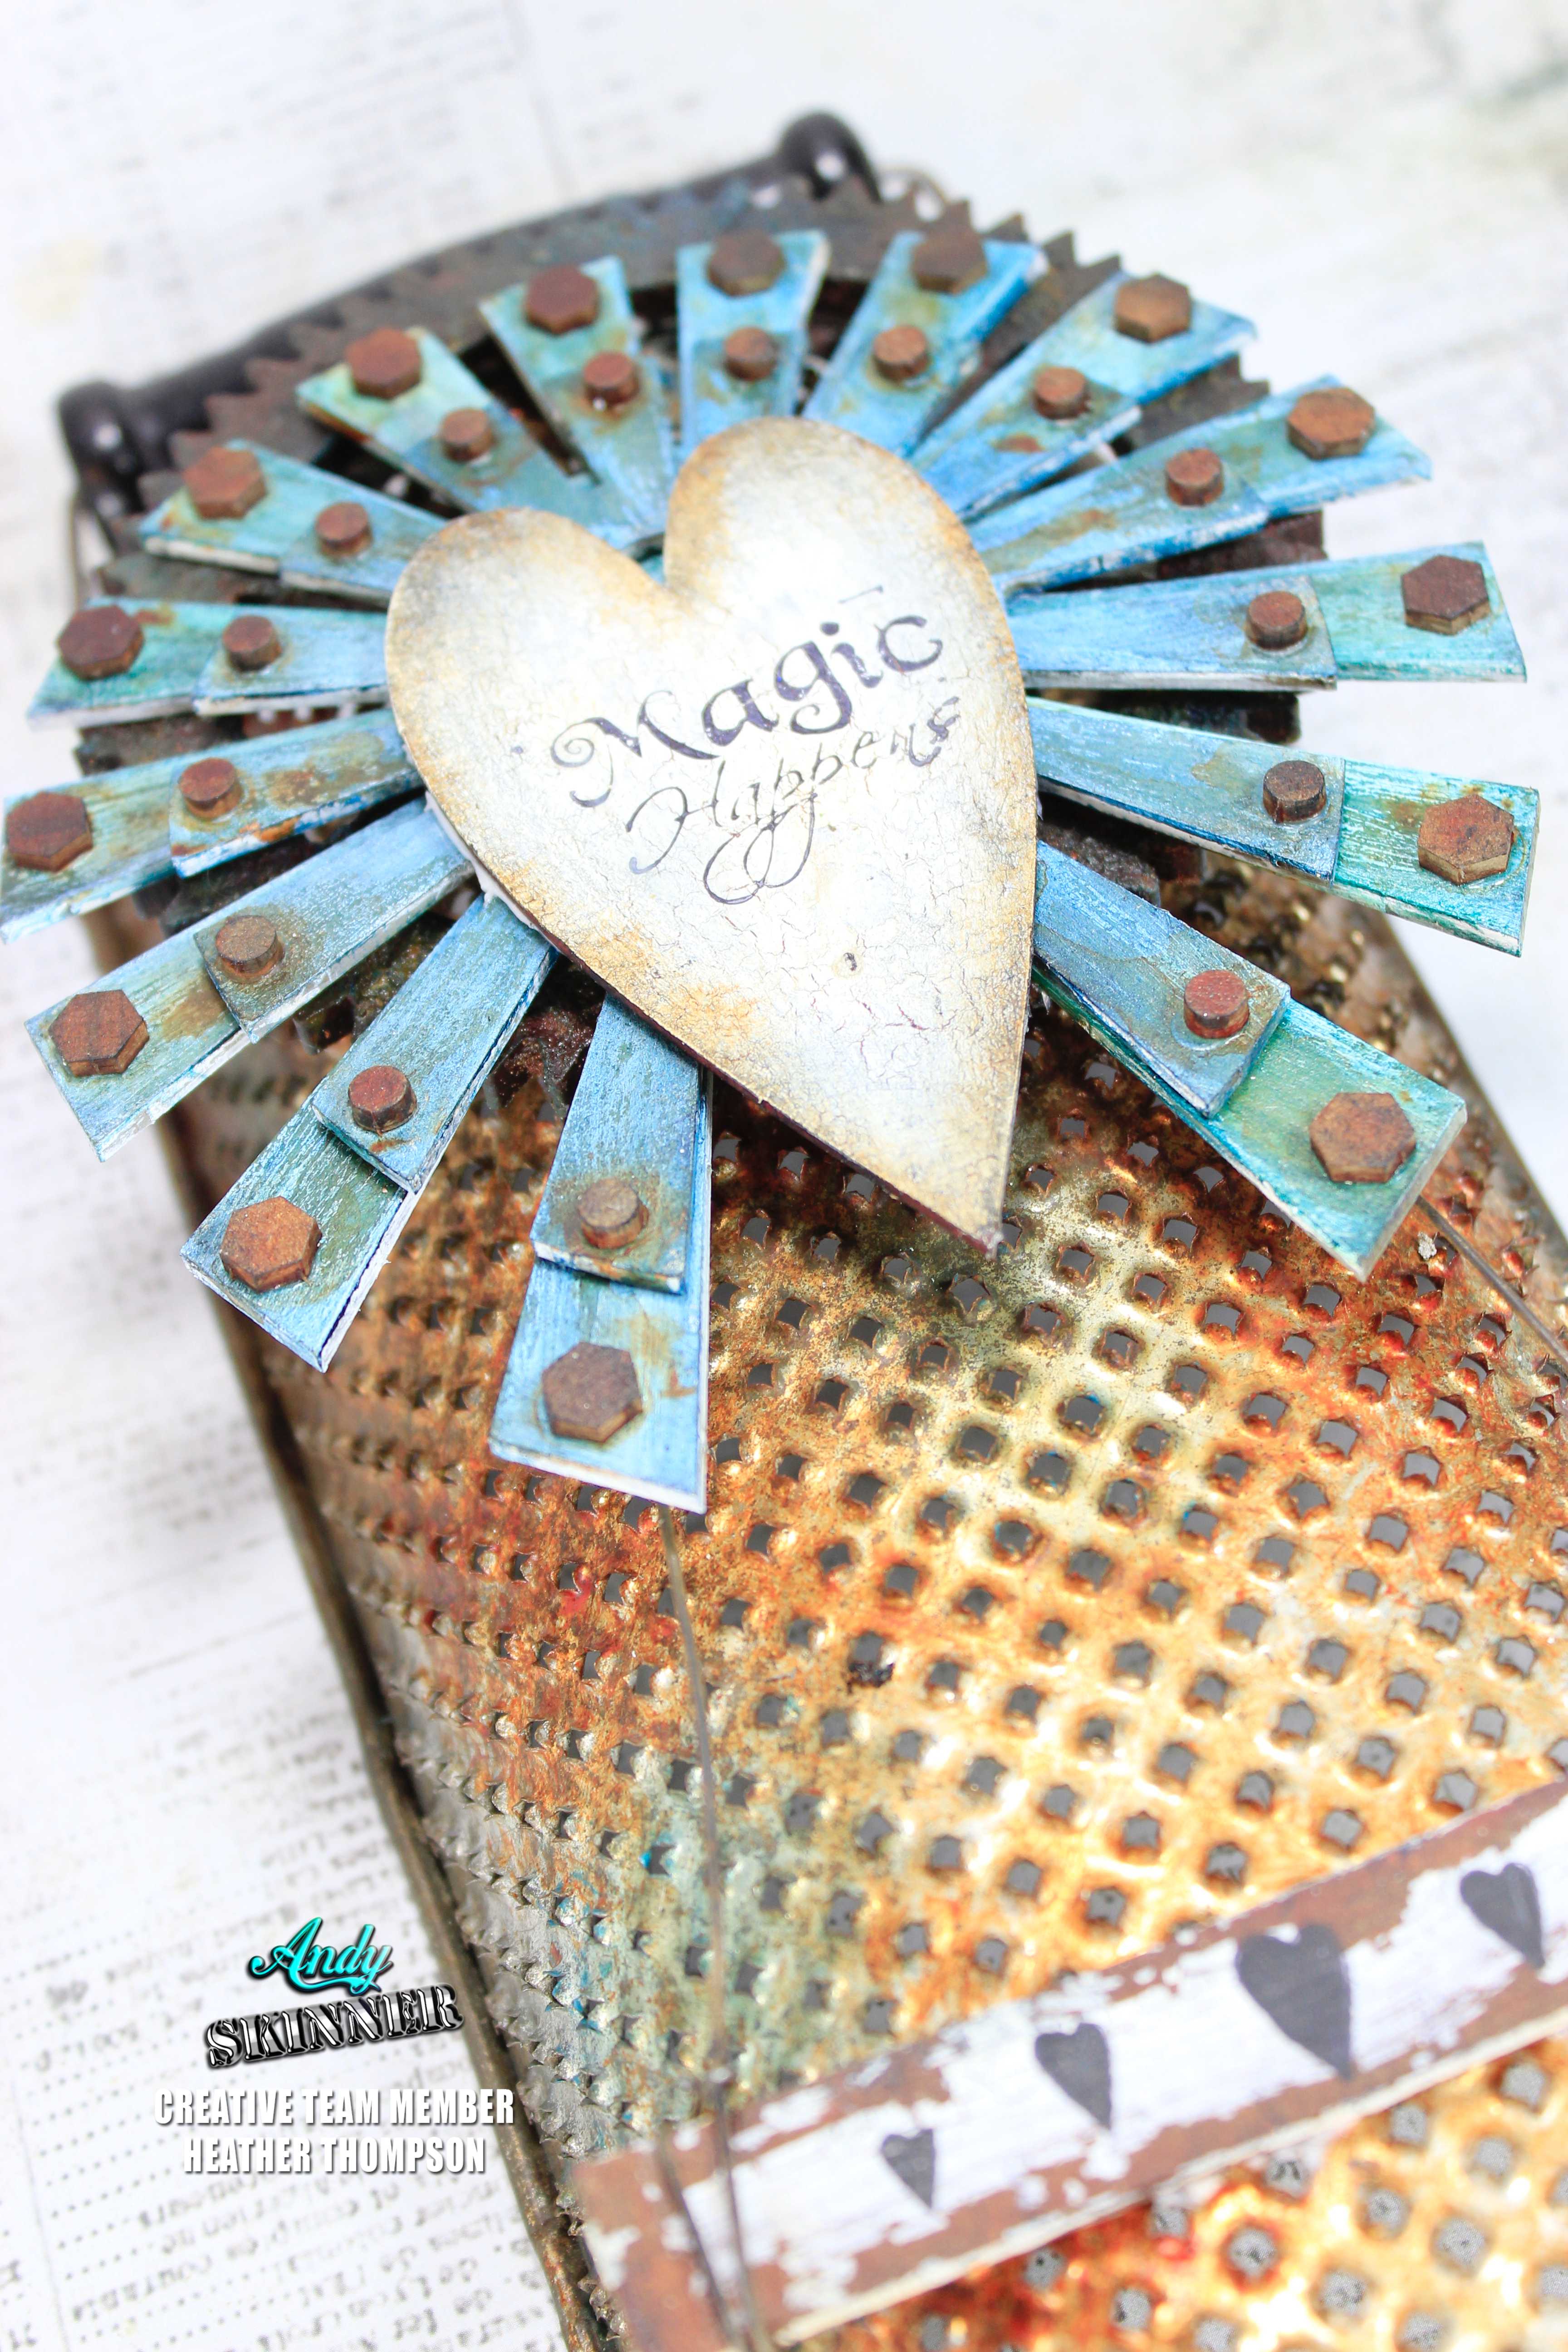
I didn't want to add to much to the grater, I still wanted it to be recognisable to what it was and its use. So I only added a large MDF gear that I textured and rusted for the base. And a set of the Industrial Wings.
_MG_4705
Using stamps from the Perfect Words Collection, I added some mini hearts and the title. I used some Rusty Wire to hang the placard on the grater.
_MG_4706
I love how this adds to all the other elements in my kitchen.
_MG_4708
Thank you for stopping by and have a great creative day.
black and white head shot
Supplies:
AS LOGO
decoartlogo
Sap Green
Paynes Grey
Carbon Black
Ultra Matte Varnish
Colbalt Turquois Hue
Transparent Yellow Iron Oxide
Burnt Umber
Quinacridone Gold
Medium Grey Value 6 Titanium White
Prussian Blue Hue
Americana Decor Crackle Medium
tandologo
Stampendous-Logo
Andy Skinners Industrial ASCRS03

Tuesday, 24 April 2018

" Chained And Geared" By Heather Thompson

I am back after a fabulous holiday with so many great friends. After a very creative weekend with the crew at Ministry of Mixology, I jumped right in creating when I landed on home soil. 
IMG_3577
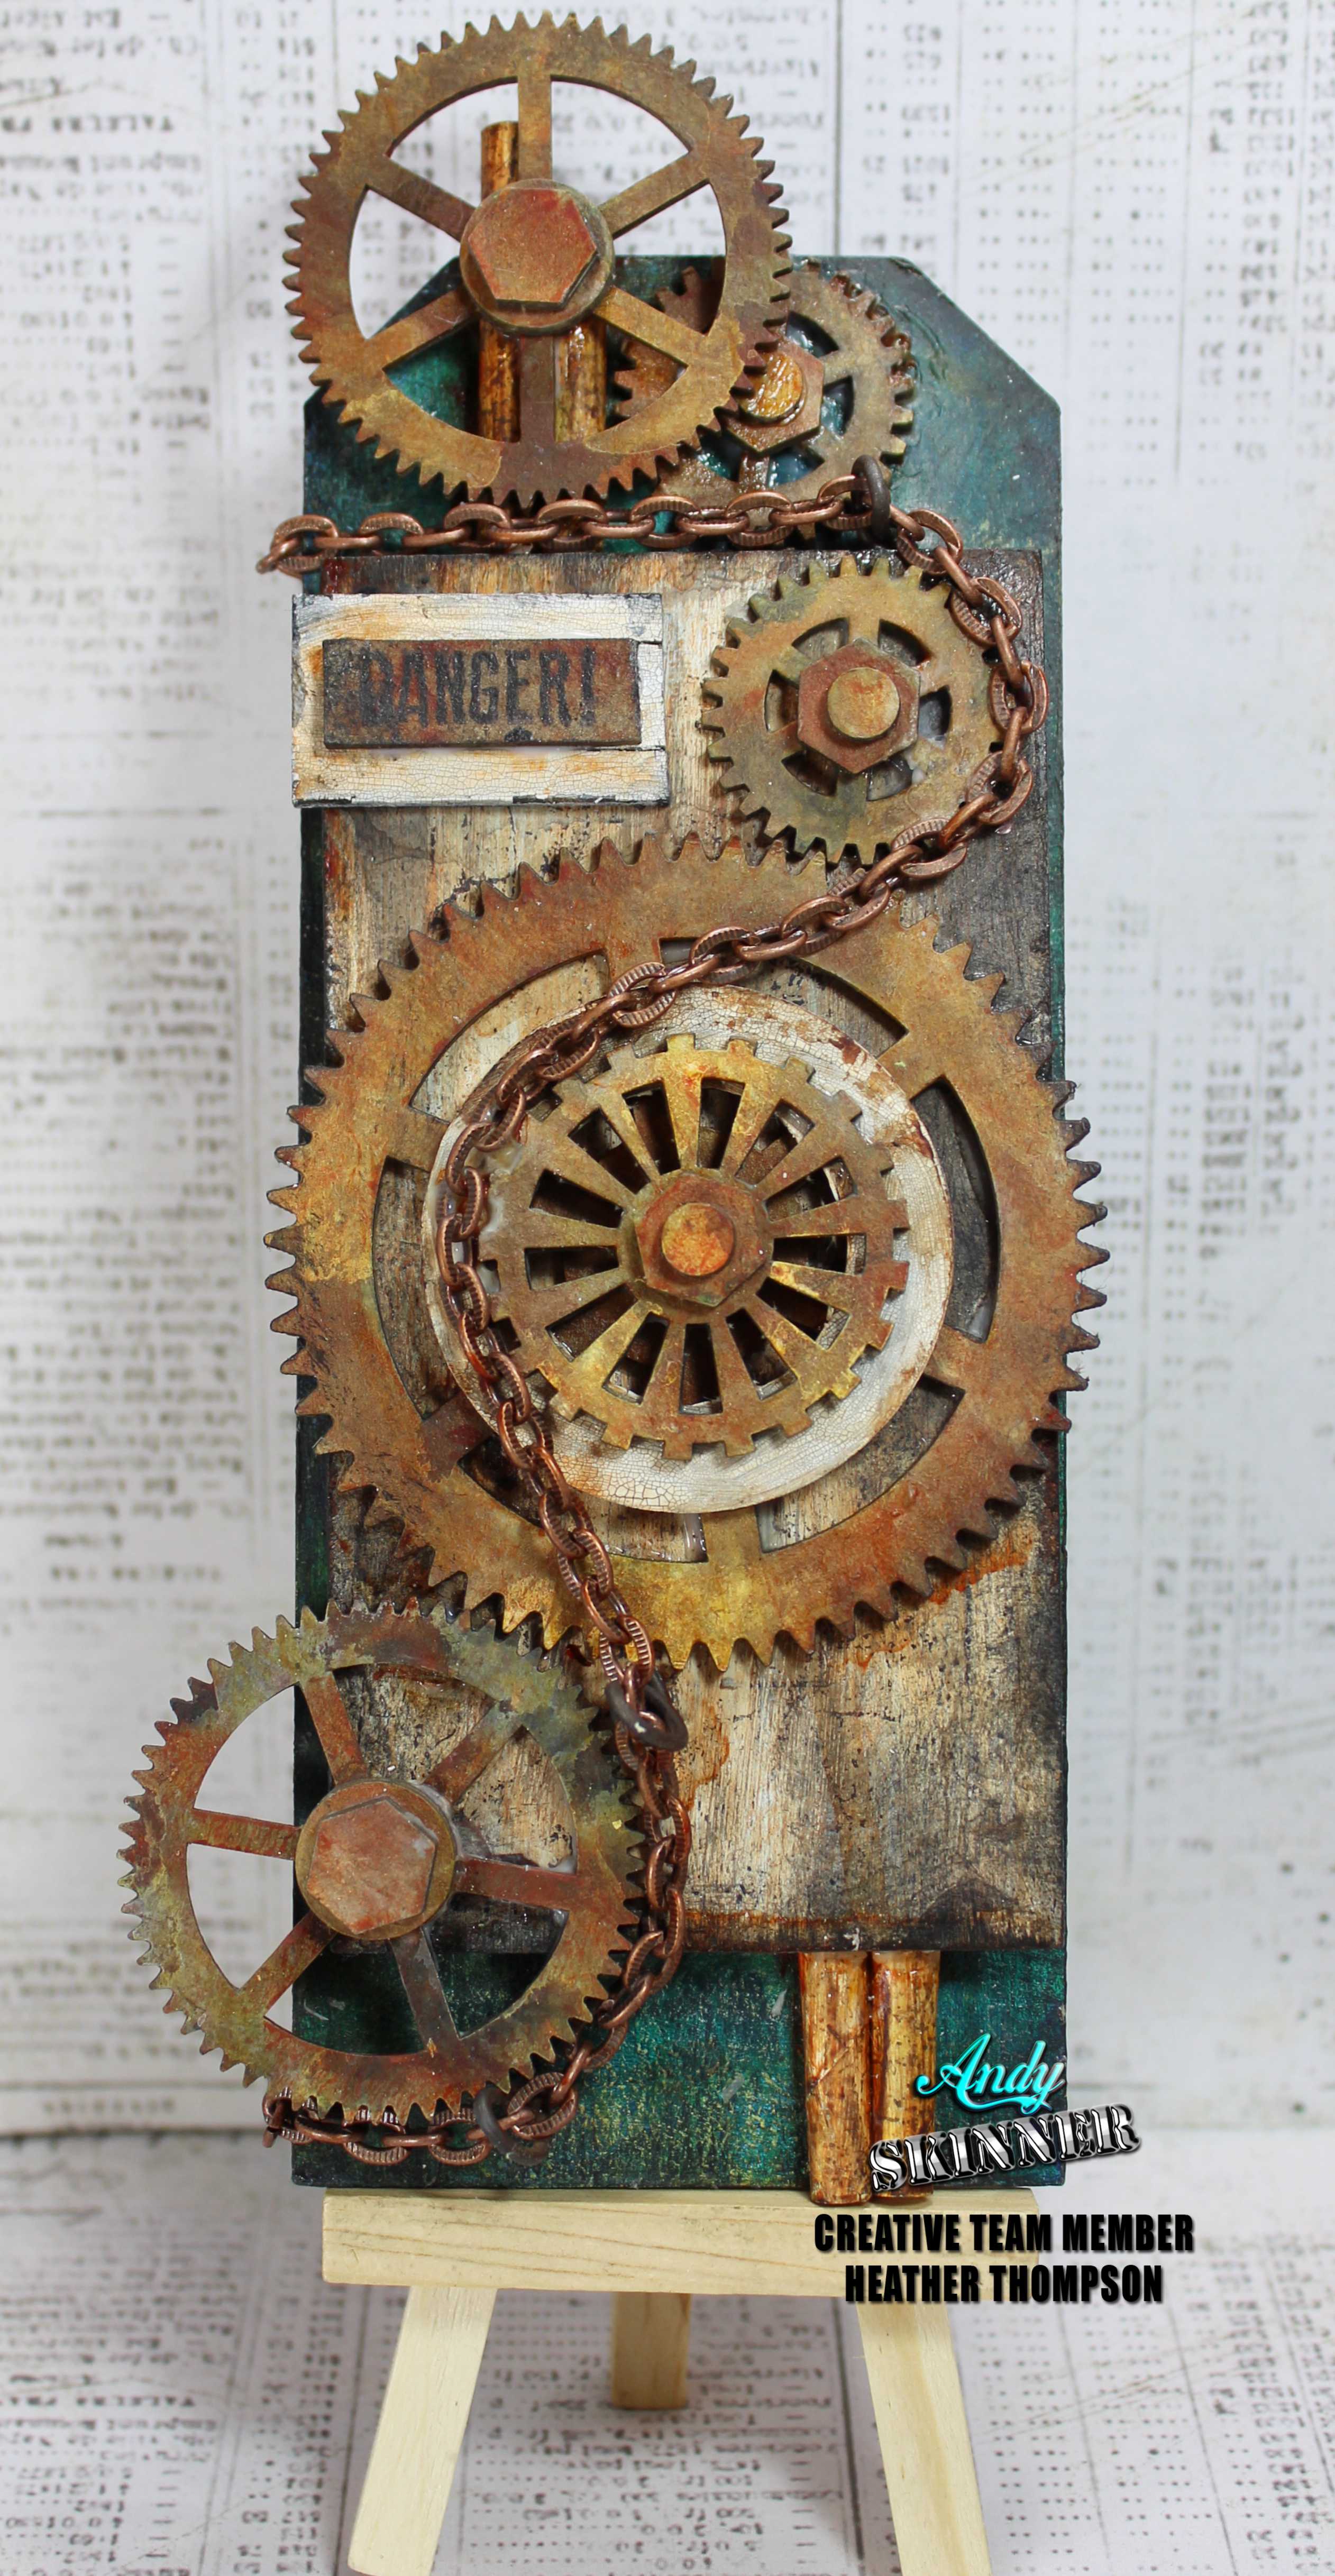
I created a gear filled, rusted mechanical assemble, "Chained and Geared" and totally ready to go. 
I  love this tag, I love how it has the illusion of actually working cogs and gears.
IMG_3590
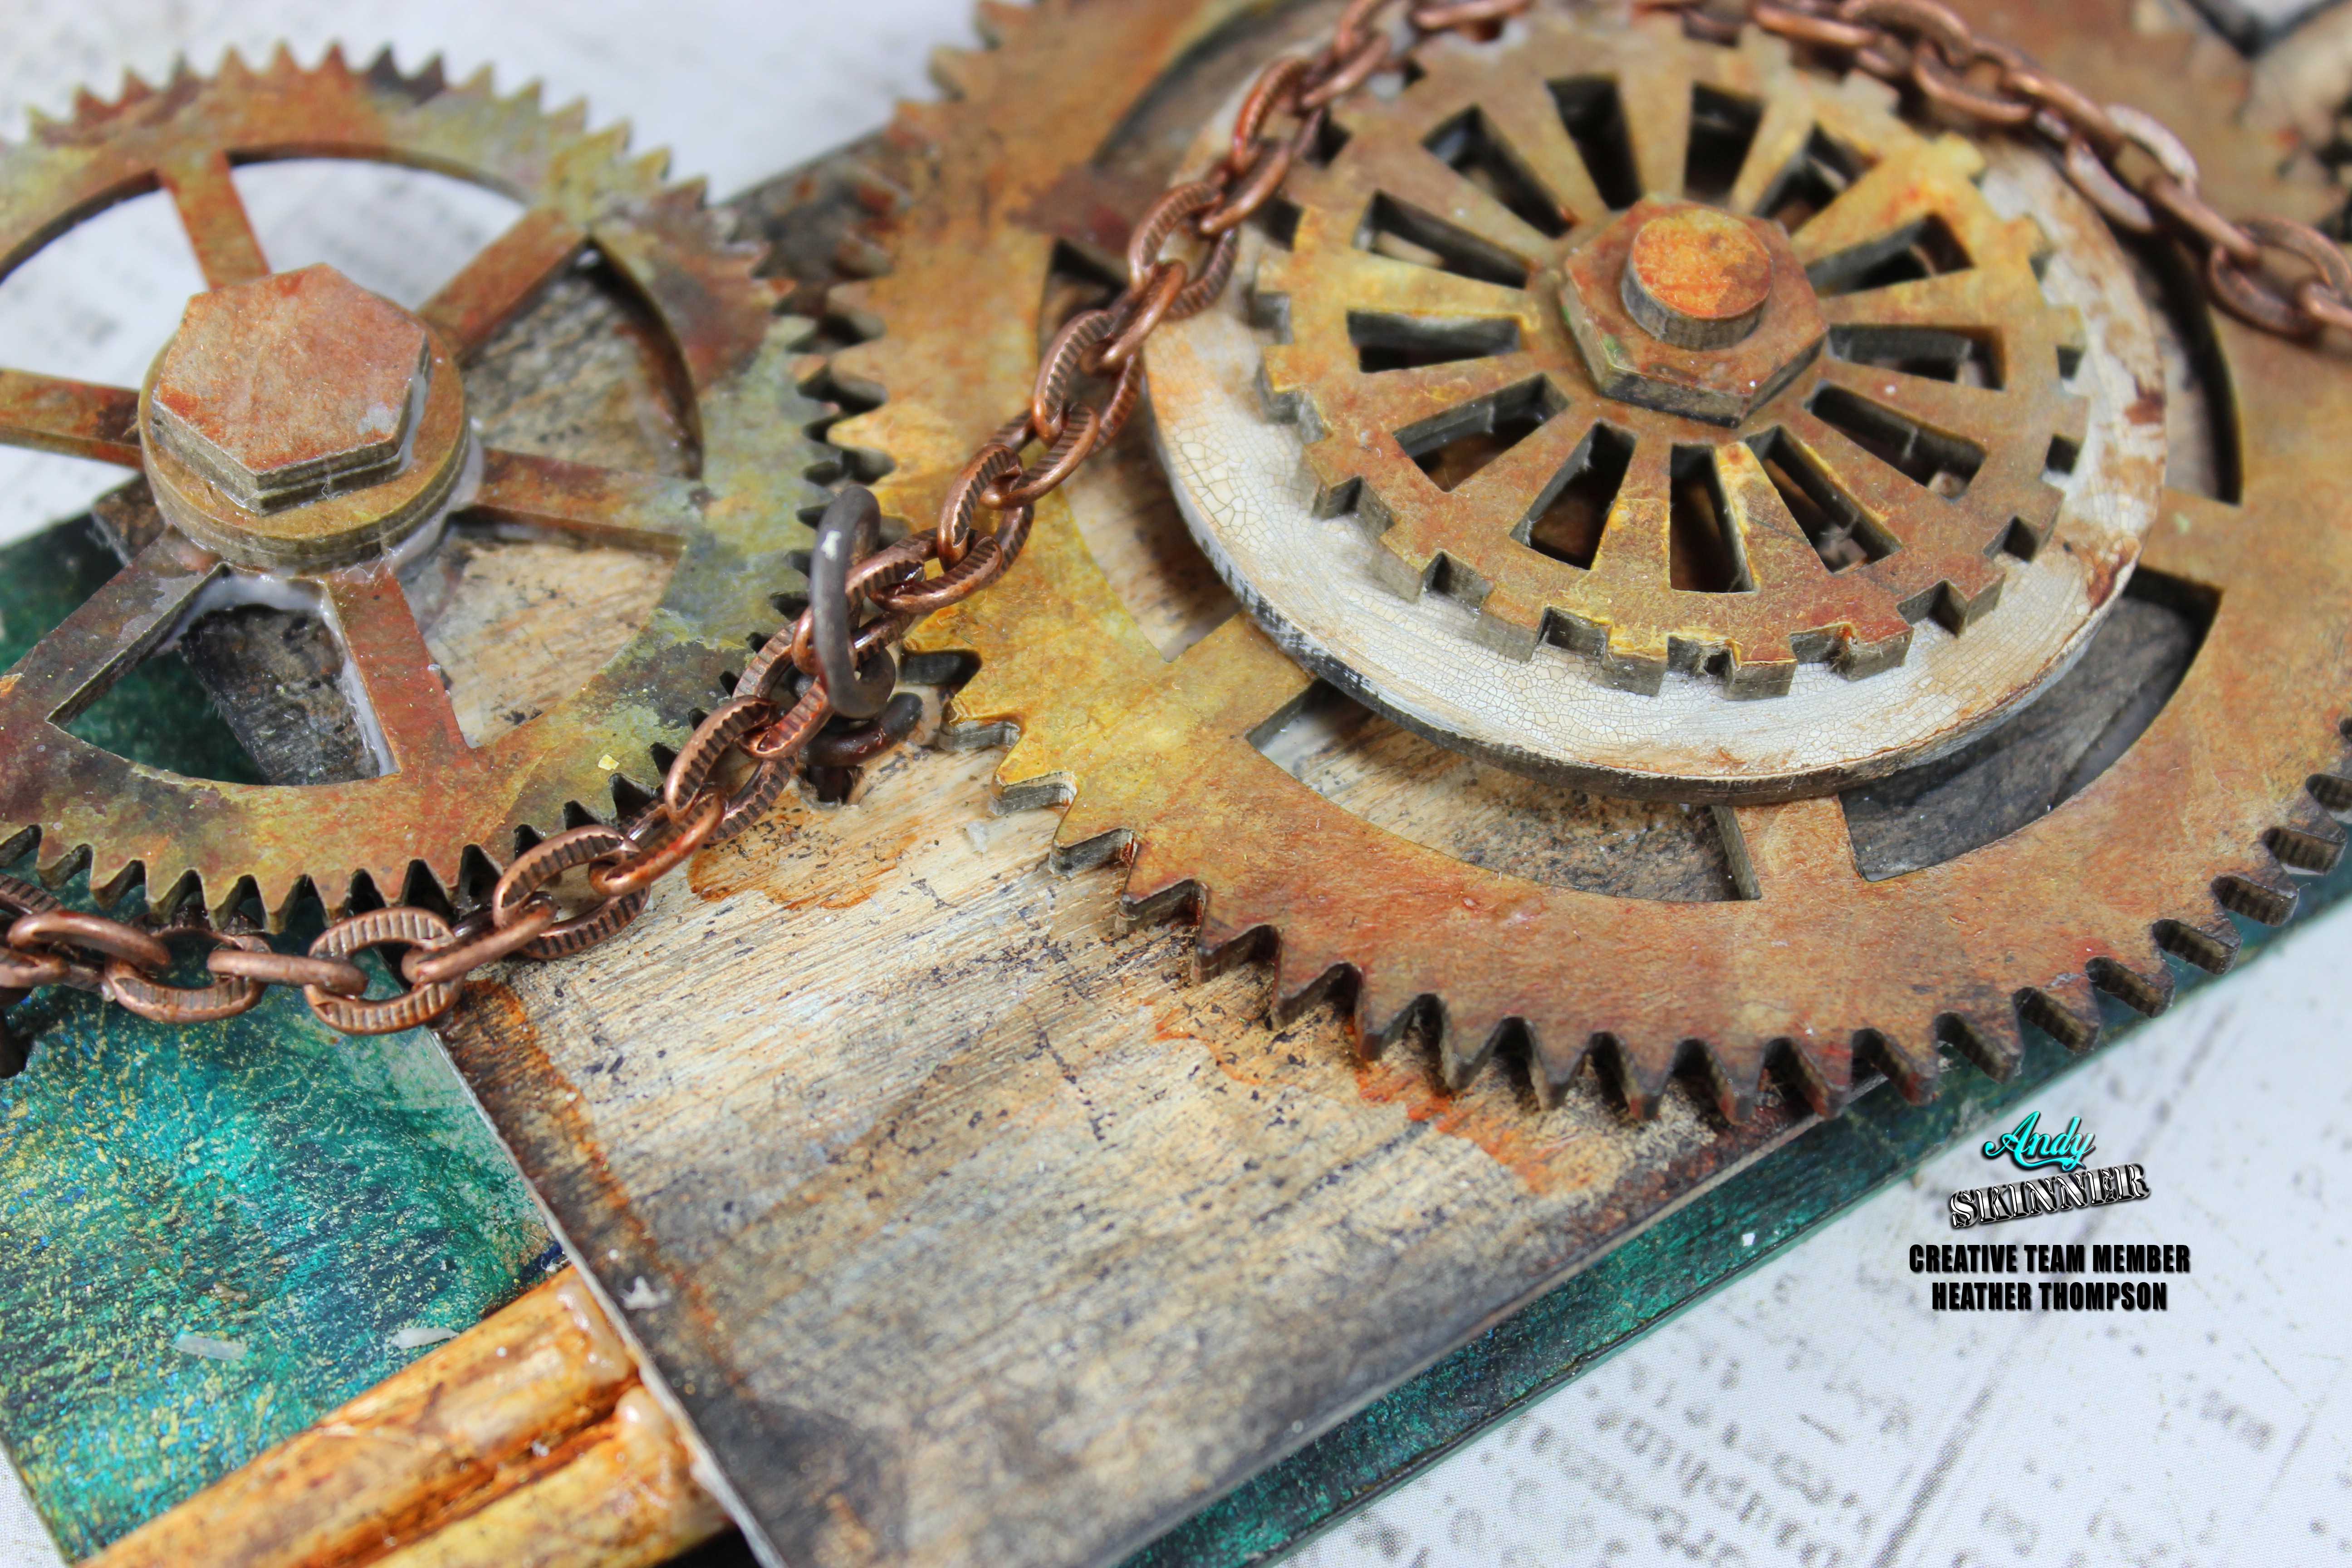
Using rusty wire, I anchored the chain down in order to work around the gears and keep things where they ought to be.
IMG_3587
I have already thought about expanding this tag, and continuing the theme all the way around the backside of the tag. How cool would that be? A 3-D tag.......oh the possibilities.
IMG_3581
Here are a few close ups for you .
IMG_3594
So stay tuned for phase 2 of the evolution of the tag.
 
Have a great creative Day
black and white head shot
Supplies
26685978_10156947111614008_1186625561451155764_o
   
decoartlogo
Titian Buff
Phthalo Green Blue
Cobalt Blue
Titanium White
Quinacridone Gold
Medium Grey Value 6
Transparent Yellow Oxide
Burnt Umber
Paynes Grey
Carbon Black
Ultra Matte Varnish
Tinting Base
   
tandologo
   
Stampendous-Logo
Andy Skinners Industrial ASCR03

Monday, 16 April 2018

Uncertainty tag by Monika Maksym

 Hi all!
it's Monika here! Today I'm going to show you my latest tag with grungy, rusty background. You'll need a brayer ( rubber paint roller) for this technique.


To start with, prime the large tag from the Tagtastic 1 kit with black chalky finish paint. Squeeze a few dots of medium acrylic paint  on the craft mat and start rolling your brayer to get even, thin coat, then run it through your tag. ( I've used Decoart Media Fluid Acrylics in  Paynes Grey, English Red Oxide, Quinacridone Gold, Titan Buff, Transparent Yellow Oxide)  Repeat this step with all of the colours and as many times as you like until you're satisfied with your background.


 Stamp your chosen image and word on regular cardstock, then cut them out ( word has to be slightly smaller than your bookplate- measure it ) Using decoupage glue stick them on the tag and seal it with glue. With a small brush and transparent yellow oxide tint and shade your image. 


Paint your bookplate, bolts and nuts with Paynes Grey wash, then add Quinacridone Gold on top. Glue them on once fully dry and apply a thin coat of ultra matte varnish.

Thank You for stopping by.
Monika, x

 Products used:


Decoart Media Fluid Acrylics -  Paynes Grey, English Red Oxide, Quinacridone Gold, Titan Buff, Transparent Yellow Oxide
Decoart Chalky Finish Paint - Carbon ( you can use black gesso or premium acrylic paint instead)
Decou-Page glue
 Decoart Media Ultra Matte Varnish


Facebook page:  Love Creations
Instagram: Love Creations

Thursday, 14 September 2017

THE BIRD BRAIN HALLOWEEN DOOR HANGER

BOO!

Greetings to all boys and "ghouls"!
Trick or Treat?  How about some tricks and techniques in creating this fun project?!

Barney the "Bird Brain" skeleton is forever immortalized on this whimsical Halloween Door Hanger. Pairing Andy Skinner's fabulous Skull and his ever popular Specimen stamps along with his newest Raven was the perfect combination for this project. 


This was a fun and easy project to do. 
Here are the supplies needed for this Halloween treat!


  • DecoArt Premium Acrylic Tube Paint - Titan Buff
  • DecoArt Premium Acrylic Tube Paint - Transparent Yellow Iron Oxide
  • DecoArt Premium Acrylic Tube Paint - Burnt Sienna
  • DecoArt Premium Acrylic Tube Paint - Titanium White
  • DecoArt Premium Acrylic Tube Paint - Paynes Grey
  • DecoArt Premium Acrylic Tube Paint - Quinacridone Gold
  • DecoArt Premium Acrylic Tube Paint - Yellow Oxide
  • DecoArt Premium Acrylic Tube Paint - Carbon Black
  • DecoArt Premium Acrylic Tube Paint - Pale Gold
  • DecoArt Premium Acrylic Tube Paint - Gold
  • DecoArt Premium Acrylic Tube Paint - Cadmium Red
  • DecoArt Premium Acrylic Tube Paint - Primary Yellow
  • DecoArt Media Fluid Acrylics - Silver
  • DecoArt Americana Acrylics - Sour Apple
  • DecoArt Media Crackle Paste
  • DecoArt Media Crackle Glaze
  • DecoArt Media White Gesso
  • DecoArt Liquid Glass
  • Andy Skinner Whirlpool Stencil
  • Andy Skinner Skuldoggery Stamp Set
  • Andy Skinner Birds and Bones Stamp Set

  • Andy Skinner Industrial Elements 
  • Door Hanger
Miscellaneous Items

  • Stamping Paper
  • Black Embossing Powder
  • Heat Tool
  • Craft Mat
  • Paint Brushes
  • Scissors
  • Black Permament Ink Pen
  • White Permanent Ink Pen
  • Palette Knife
  • Scrap Chipboard
  • Wire and piece of chain
  • Miniature Light Bulb
  • Monocle
  • Black Permanent Ink
  • Clear Embossing Powder
  • Double Sided Tape or Glue
  • Adhesive Pop Dots
Before we get started, let me say this ... you can also use DecoArt's Media Fluid Acrylics paints on the project.  They are wonderful paints and I use them A LOT! But, I have been playing with the NEW Premium Acrylic Tube Paints and I totally LOVE THEM as well!  The colors are creamy, go on so beautifully, have a different finish and ... well, you need to try them! Now ... let's get started!

The first thing you do is stamp a couple of skulls onto a piece of stamping paper using Black Permanent Ink. Sprinkle with Clear Embossing Powder, remove excess powder and heat set the black skulls.  (I stamp a couple of them in case I need to start over when painting them).


Begin adding paint color to the image to make it more spooky and realistic.  The first layer applied is DecoArt Premium Acrylic Tube Paints Titan Buff and Transparent Yellow Iron Oxide. 


The next layer of color was DecoArt Premium Acrylic Transparent Yellow Iron Oxide coupled with Burnt Sienna. See the difference already from the first photo?


Next layer was adding more spooky shadows with DecoArt Premium Titanium White mixed with Paynes Grey.


Finally, add a little DecoArt Premium Quinacridone Gold wash over the skull and heat set.  Then cut out the skull leaving just a hint of a border.  Run your finger with a bit of DecoArt Premium Acrylic Carbon Black around the cut edge of the skull.


 Stamp the raven just as you did the skull.  Add a wash of DecoArt Premium Quinacrieone Gold over the bird, heavier in some areas; especially the beak and feet.  Paint the eye with DecoArt Acrylic Sour Apple Paint.  Heat set.  Cut out around the bird, leaving a slight border and edge it with the Carbon Black paint; just like the skull.


Draw a jagged line across the skeleton's forehead with a Black Permanent Ink Pen and cut across it to open up the skull. Create "brain matter" on a piece of scrap stamping paper with a Permanent Black Ink Pen. Paint it with a mix of Decoart Premium Cadmium Red, Burnt Sienna and Titanium White. Cut it out and glue it in place behind the skull.  Then glue the bird in place, coming out of the skull. Set aside for now.


I did not have a Tando Creative Door Hanger and I was so mad because I love the shape of them!  So, I grabbed what I had in my stash but Tando Creative has two different styles of door hangers that would work perfectly!

First I covered the complete door hanger with DecoArt Media White Gesso and let is dry.  Then I scraped on a layer of DecoArt Media Crackle Paste and let it AIR DRY. When dry, I placed Andy Skinner's Whirlpool stencil over the door hanger and scraped another layer of DecoArt Crackle Paste through the stencil. Let AIR DRY. When dry, repeat this step for the top of the hanger.  **NOTE:  Be sure to wash the stencil immediately after use. The inset picture shows a close up of the lovely crackle you get with DecoArt Media Crackle Paste.


Create a "specimen" plaque for the door hanger. First paint over some stamping paper using a combination of DecoArt Premium Acrylic Yellow Oxide and Quinacridone Gold. Stamp onto the colored stamping paper using Black Permanent Ink. Then, just as was done on the skull and raven, sprinkle with Clear Embossing Powder and heat set. Cut around the specimen stamp and edge with Carbon Black. Use your finger and coat the specimen stamp with DecoArt Media Crackle Glaze. Let air dry. 

Create a background of the specimen stamp using a piece of scrap Chipboard. Paint it with DecoArt Media Fluid Acrylics Silver. Lightly add some DecoArt Fluid Acrylics Carbon Black with your finger to "age" the silver. Heat set. Use glue or double sided tape to set the specimen plaque in place on the silver background.


Paint the door hanger background using a wash of DecoArt Premium Acrylic Paynes Grey.


Get that great Halloween orange in the background by mixing DecoArt Premium Acrylics Cadmium Red and Primary Yellow.  (I did not have any of the Premium Orange paints so I made my own!) Heat set.


For some fun and added depth, use a small paint brush and add first DecoArt Premium Acrylics Pale Gold followed by random areas of Gold over the embossed areas of the hanger. You can see the difference in the two gold colors above. Heat set.


Wrap wire around a Craft Knife or thin rod of some sort and glue or double sided tape them behind the bird's head.  Poke a hole through the metal bottom of the miniature light bulb and attach a squirrely wire to it. Glue or double sided tape behind the bird's head.


Write "BOO" on the skeleton's eye using a White Permanent Ink Pen and heat set. Add a chain to the monocle using a jump ring. Glue the monocle in place over the skeleton's eye using DecoArt Media Liquid Glass. Glue the skull in place on the door knocker. Also glue the end of the chain onto the door knocker using Liquid Glass. (That end will be underneath the specimen plaque.)  Attach the specimen plaque to the bottom of the hanger using Adhesive Pop Dots. 


Finally, add the "The Bird Brain" banner at the top of the knocker. It is glued in place. The banner was computer generated letters. The banner was colored using DecoArt Premium Yellow Oxide paint followed by smudges of DecoArt Premium Burnt Umber.  The two nuts on either side are from Tando Creations Industrial Elements Set. They were first painted with DecoArt Premium Acrylic Silver followed by a touch of Carbon Black and finally a light coat of Quinacridone Gold.

Easy, fun and a great Halloween decoration!  

Thanks for stopping by and have fun with this project!

About the Artist:  Candy Colwell
Blog: http://candycreates.blogspot.com
Facebook:  https://www.facebook.com/candy.colwell.9
Twitter:  https://twitter.com/rindacelly
Instrgram:  https://www.instagram.com/candy.colwell/