Monday, 26 February 2018

Handle With Care by Heather Thompson

As the new Winter Releases are coming out, (I am waiting patiently) Ok I will stop lying, I'm not really.  I decided to just sit and relax and make a creative tag. I know some of us would cringe for taking a perfectly good tag and hacking it into pieces. But I had this brilliant idea to use Andy's Handle With Care Stamp, but how could I put meaning into the saying. Cut it apart and put it all back together.
IMG_1289
I love the colour pallet.
IMG_1293
Some times I even wonder how applying layer after layer of paint, how can these colour not turn into a muddy mess.
IMG_1294
But as this evolved, always treat yourself as No 1 and Handle with Care.
IMG_1296
Have a great creative Day
black and white head shot
Supplies:
26685978_10156947111614008_1186625561451155764_o 


decoartlogo
Andy103 Stencil
Titian Buff
Sap Green
Phthalo Turquoise
Paynes Grey
Carbon Black
Ultra Matte Varnish
Tinting Base


tandologo


Stampendous-Logo
Andy Skinners Handle with Care ASCRS7

Friday, 23 February 2018

Something a Bit Different

Hi everyone Dee here with Andy's new stamps they are fabulous I am loving playing with them.
I have done something a bit different with them in that I have most probably taken 
the concept mixed media to a whole new realm. 
I am quite pleased with the results it is a mix of home made tissue paper
embossing enamel, texture sand paste, gauze/modrock and chalk paints
Oil crayons were used as well, all melted together with
hot beeswax.
In these photo's you can see the colours below and if you look carefully 
at the frog skeleton you can just make out the embossing
 below the wax on the bottom right.
The beauty of wax is you can see the layers below which is what I
love about it. 
A close up you can see a hint of the text below against the lovely 
textured sand 
This one is a piece I did for the Stampendous catalog using
 this method for when Andy his Birds and bones set 
was released

That's it for today thank you for taking the time to stop by
Cheers Dee.

INSTRUCTIONS
  1. Firstly soak mod rock in water till soft squeeze and dry.
  2. Take 3 Tando ATC's and paint with colours of your choice .
  3. Use home made tissue paper that you have stamped with Andy's Stamps and cover half of it with the tissue and the other with the dried gauze glue it all down.
  4. If you want to have embossing on it do it prior to gluing it all down
  5. Heat up ATC before you put your melted wax on to it.
  6. Use your heat gun to control where you want the want it to settle.
  7. place your image where you want it and give it a final coat of wax.
  8. Finally using oil pastels rubb these into the wax and shine up with linseed oil. 

PRODUCTS USED
Andy skinner stamp sets from Stampendous Birds and Bones set along with Andy's new release Fossils Stamps These can be purchased here!


Tando creative:- ATC's these are a brilliant base as they hold all the media without buckling.

Deco Art:- Gesso for the base of the tag, Texture sand paste, Chalk finish paint of your choice.


Wednesday, 21 February 2018

Call Me Already.


Morning all Fiona here today with another post for the Andy Skinner Creative Team.

I've been having a play with two of Andy's new grey board kits Tagtastic and Call me Already manufactured by Tando Creative which were released at Stitches this week, along with his new stamps Tech Trauma  and Word Up from Illusionary Artists.

Here's a quick rundown on how I created it.

1. base coat the large tag from the Tagtastic kit with DecoArt Media Tinting base and dry.

2. Stamp the tag with images from The Tech Trauma Stamp Set using Watering Can Archival Ink.

3.Cut and emboss different sizes of  squares and rectangles from Tando Creative Greyboard and coat
with DecoArt Media Tinting base.

4. Attach greyboard pieces to tag on one side. Then in a couple mini mister bottles add Cobalt Turquoise hue and Paynes Grey Media Fliud Acrylics to water and spritz over the tag.

5.Take the Small phone dial from the Call me Already kit and apply Andy's rust technique. To the dialled numbers paper provided in the kit apply Andy's aged paper technique , stamp a number from the Word Up set and them emboss with clear embossing powder.

6. Apply some DecoArt Texture Sand Paste to the cogs and when dry add DecoArt patina antiquing cream to the cogs then coat with DecoArt Media Ultra Matte Varnish to seal.

7. Arrange the cogs and the phone Dial on top of the Embossed Greyboard pieces. Add some art stones in places with DecoArt Heavy Gel medium and when dry brush With DecoArt Metallic Lustre in Black Shimmer.

8. Add rusty wire , some paint splats in black and white Media Fluid Acrylic and coat edges  of tag in Paynes Grey Media Fluid Acrylic to finish.

 
Here's a close up of all the detail.


Hope you have enjoyed this project and look forward to the next.
 
List of products used.


DecoArt Media Fluid Acrylics:- Cobalt Turquiose Hue, Paynes Grey, Quinacrodone Gold, Carbon Black ,White.

DecoArt Media :-Texture Sand Paste, Tinting Base, Heavy Gel Medium.

DecoArt Metalic Listre:- Black Shimmer.

DecoArt Media Antiquing Cream:- Patina.

Other:- Archival Ink Pad:- Watering Can. Clear Embossing Powder, Rusty Wire.


Tuesday, 20 February 2018

Dance in the Pale Moonlight by Katy Leitch


I've been mixing and matching Andy's stamps new and old for this week's tag project, combining the Stampendous skeleton image with those fabulous gravestones from the new Illusionary Artists Gothic Grunge set.

Here's a quick guide to how I made it:
1 Gesso the tag white. Punch a circle from paper to use as mask for the moon. Stick it down with temporary adhesive.

2 Paint the tag with greys, blues and purples, lightening the tone as you blend from bottom to top. When the paint is dry, remove the mask.

3 Add some pattern to the moon (I stamped this with a homemade carved stamp but you easily paint some detail in there). Add a wash of Paynes Grey so the moon is a little less stark white. Add a halo of light around it by blending Transluscent White paint around the other edge with your finger - you can blend out the edge with a baby wipe to make it really soft.

4 On a separate piece of card, stamp the skeleton. Fussy cut and wash with Paynes Grey.

5 On another piece of card, dab black, Sap Green and grey paints using pieces of sponge (I use cheap kitchen sponge). Cover the whole card but make sure areas of all colours remian visible. Stamp the gravestones onto this card and cut them out.

6 Assemble all as shown, using heavy gel on some of the gravestones to lift them slightly. The sentiment is from Word Up and stamped onto a Tim Holtz banner die cut.

Hope you like my spooky tag!
See you soon,
Katy

Products used:
Illusionary Artists Stamps: Gothic Grunge, Word Up (available here)
Stampendous Andy Skinner Stamp Set: Birds and Bones
DecoArt Media: Fluid Acrylics
DecoArt Media: Heavy Gel Medium, White Gesso
Tando Creative Tall Tag

Monday, 19 February 2018

Altered Tablet Case by Phoebe Tonosaki

hello guys, today I am going to show you an altered Tablet case using the gorgeous Andy new stamp and the wonderful DecoArt Media Misters.

My Tablet cover had been all dirty after my gesso-dirty hands touched it all over in my workshops. Hub was complaining how ugly and embarrassing it was and I decided I should alter it to make it better.


I primed the surface with a thin coat of DecoArt Gesso. and then I started using DecoArt Media Misters to spray on the surface repeatedly on random area.
Please let me remind you again the awesome DecoArt Media Misters. you can click to watch this short but very informative video by Andy HERE.


You can see what colors of the Misters I have used on the end of this post. Any colors will make it super beautiful, you only need to have the basic color chart in your mind (eg red+blue = purple, yellow+blue=green) because the misters are highly interactive and they make amazing, out of the world beautiful colors for your creation.


After putting on the colors, the whole surface was very very bright. I could take it as it was but I wanted it to be a tone lighter. So I applied a small amount of DecoArt Media Shimmer Misters White to do the job.


On the top of the Misters, I used the latest Andy Skinner stamp sets fm Illusionary Artists and stamped them with the white color Staz On on the surface.
I used the Tech Trauma set as the main as I really like the designs !


Final step we cannot forget is to add two coats of DecoArt Media  Soft Touch  Varnish after the misters has completely dried. As the tablet will be carried and used in outdoors, you dont want it to stain the table cloth when you are having dinner with your friends !! :D

I hope you enjoy this project and I hope this inspires you to start your own !


 DecoArt Media Gesso
DecoArt Media Misters
Primary Cyan
Primary Magenta
Primary Yellow
Purple

DecoArt Media Shimmer Misters
White
Yellow
Turquoise

DecoArt Media  Soft Touch  Varnish 

Phoebe Tonosaki
Blog - http://tonosakiphoebe.blogspot.jp/
Youtube - https://www.youtube.com/c/tonosakiphoebe
Instagram - https://www.instagram.com/phoebetonosaki/


Friday, 16 February 2018

Ammonit Box using the new Andy Skinner Fossil stamp set and Stampendous Enamels

Hi all

Another teaser for you; a project made using Andy's fantastic new stamp range. The good news is it is being released THIS WEEKEND and when they are finally available you can get them here!

 Here is the finished project and below is a brief outline of how I created it.
I painted the box lid and base. Triple embossed the lid using Stampendous Enamels, and stamped into the lid while the enamels were still molten.
Once cooled, I used DecoArt white antiquing cream, paints and metallic lustres to give depth to the ammonite. I love it - very touchable! Hope you like it too. For a detailed step by step, have a look at my blog.
Thanks
Suz
x


Products used:
DecoArt: Paynes Grey and Titan Buff Media Fluid Acrylics
Extreme Sheen Antique Bronze Metallic
White Antiquing Cream
Metallic Lustres in Black Shimmer and Iced Espresso

Stampendous Products:
Andy Skinner Fossils Stamps (being released at the Stitches ICHA this weekend. Find them here after launch!
Frantage Embossing Enamels in Aged Copper, Aged Gold and Aged Scarlet

Other products used:

Archival and Versamark ink pads and a small cardboard box

Wednesday, 14 February 2018

Secret Heart Tag by Hannah Oxberry

Hi all, Hannah here with another post for the Andy Skinner Creative Team - this time featuring a new greyboard kit designed by Andy and manufactured by Tando, which is being released soon!

The Tagtastic Kit 2 features three tag bases, along with a range of embellishments. For this particular project I have chosen the tag with the ragged bottom, a heart, washers and a book plate.

The background of the tag has been layered with DecoArt Chalky Finish paints and crackled to give an aged effect. Further weathering has been added by using washes of DecoArt Media Fluid Acrylics, Stampendous and Illusionary Artists stamps add further textures.

The sentiment for the tag, the word "Secret", is stamped from the Word Up & Numbers Stamp set from Illusionary Artists. This has been included within the book plate, given a rusty paint effect.


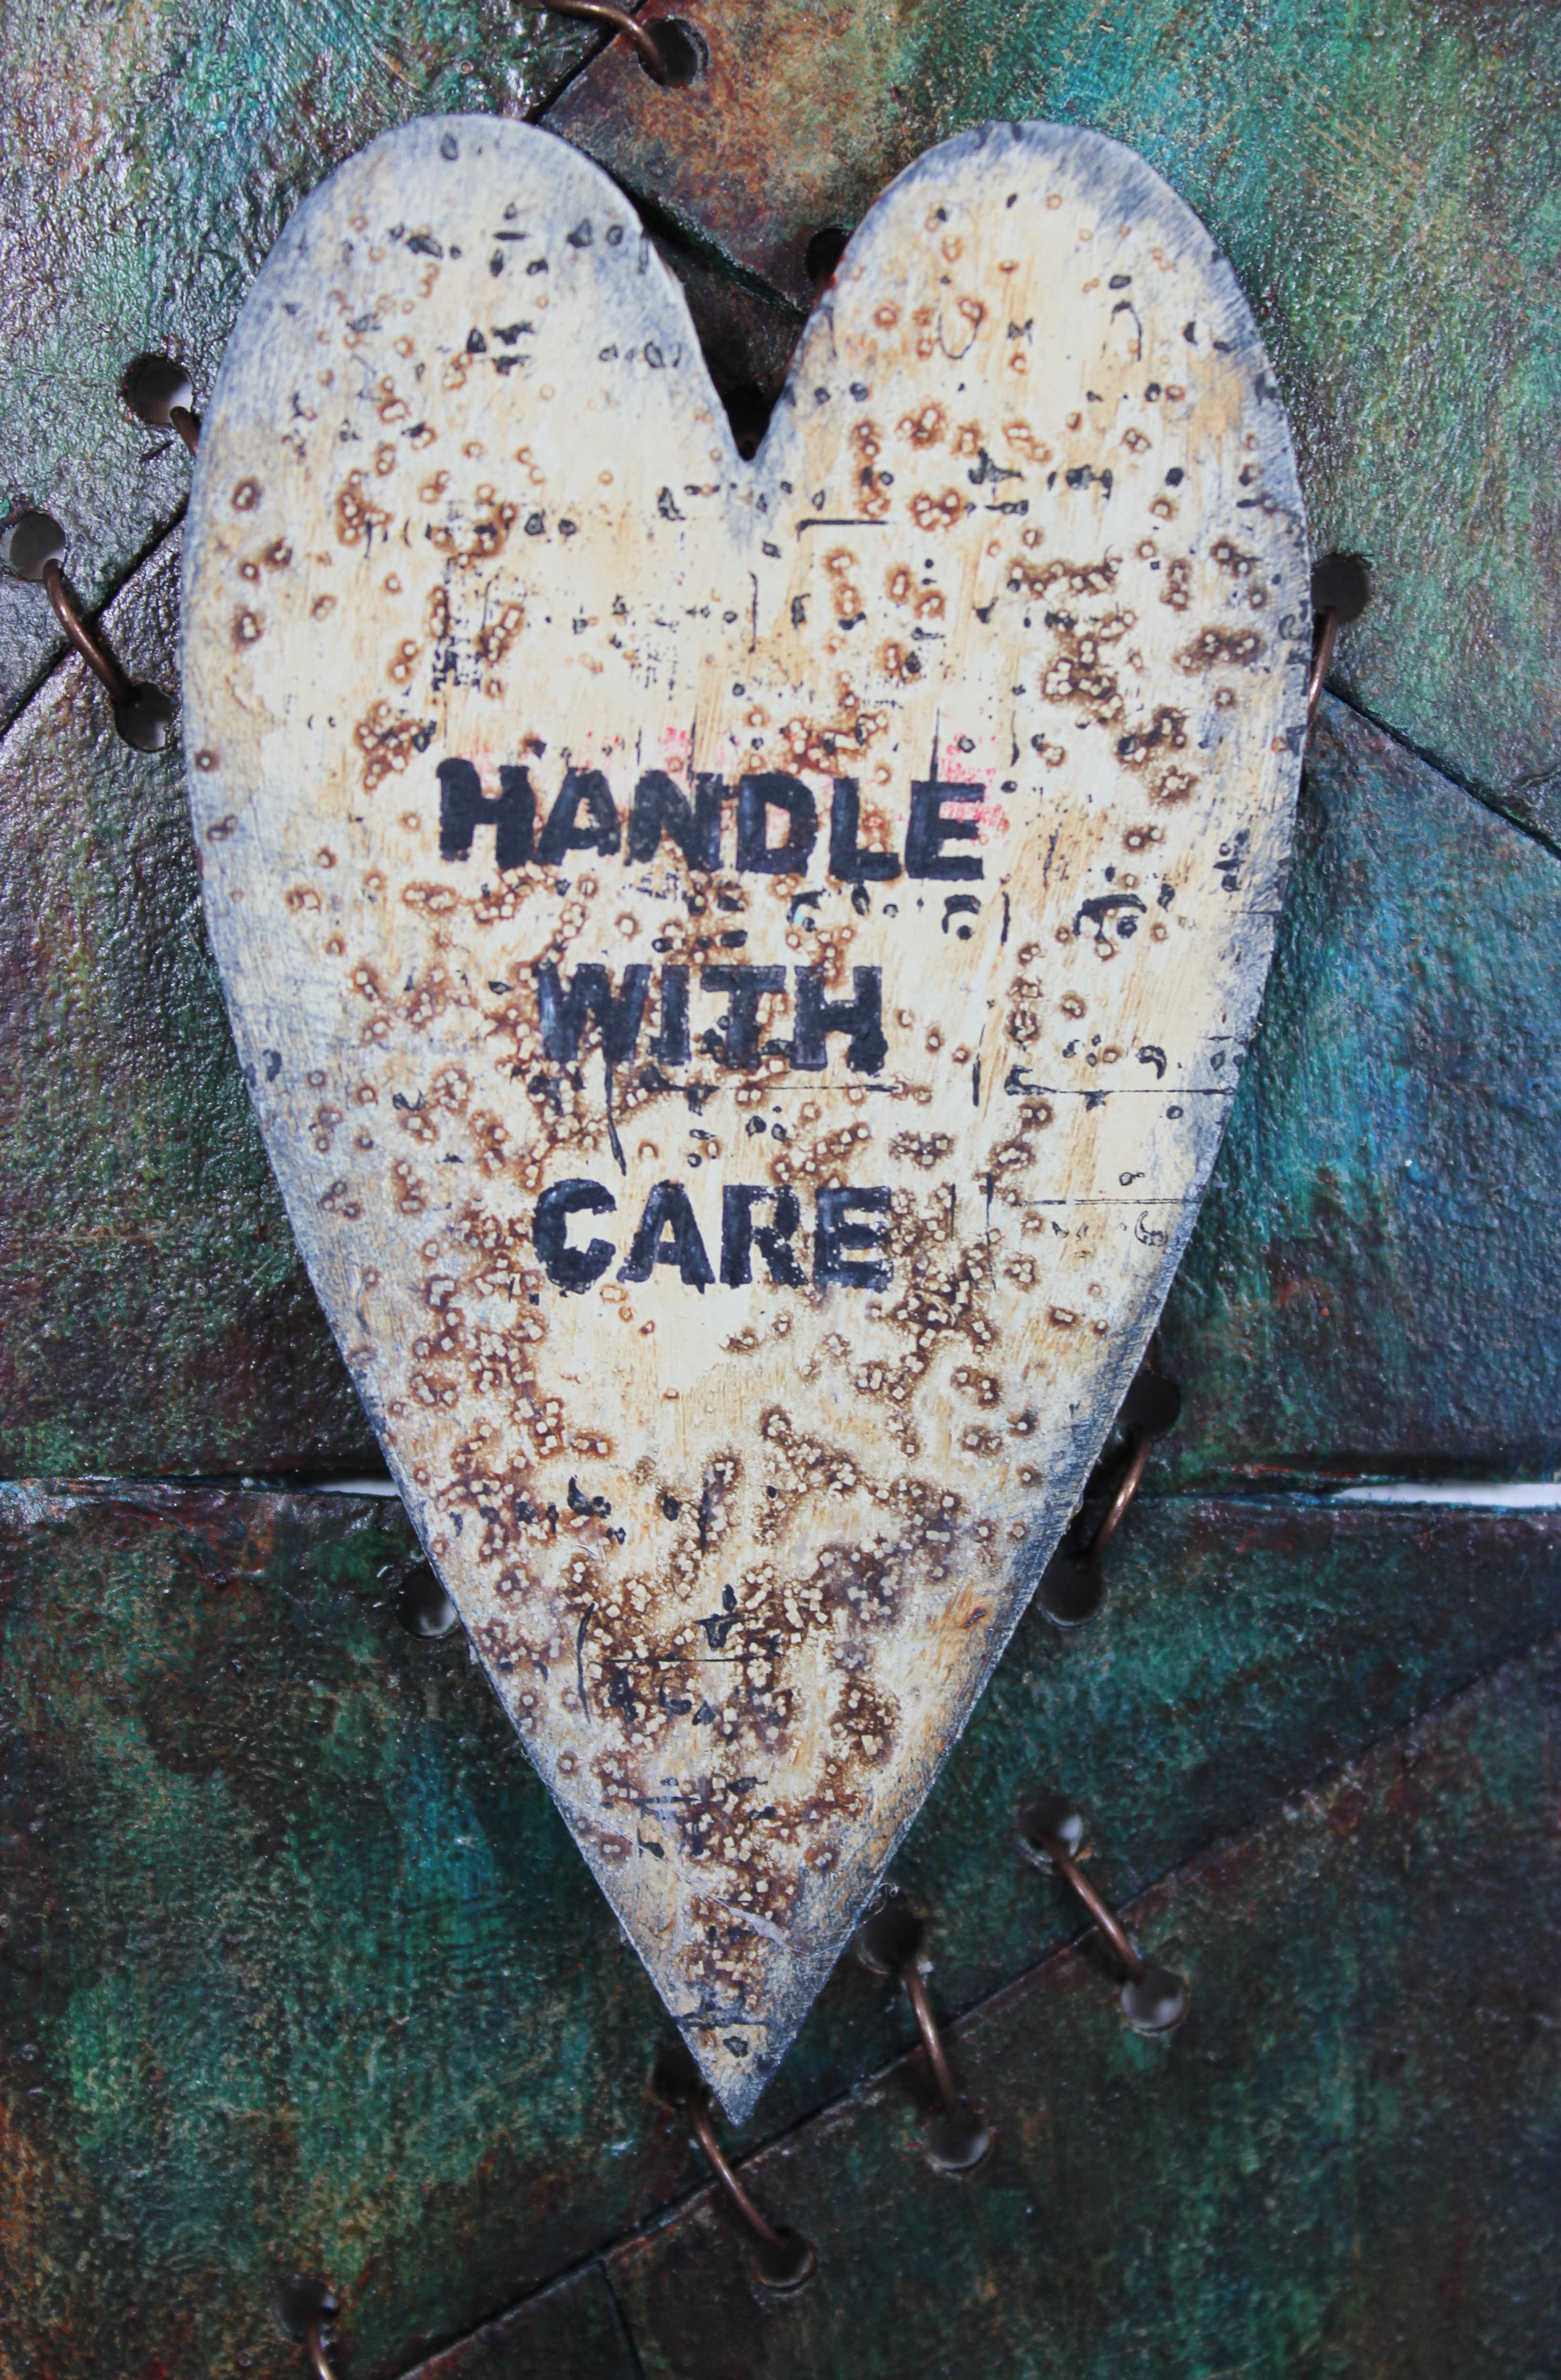
For the feature of the tag, I drilled holes though the heart - on to which I layered DecoArt Dimensional Effects Paste, before sinking two rust effect washers in to the paste to sit around the holes. 

The heart has been painted in DecoArt Media Fluid Acrylics and dry brushed in Metallic Gold to highlight the textures. 

Finally I bound the heart in Rusty Wire, before mounting it on foam pads to raise it off the background.


I hope you have enjoyed this project, and look forward to the next!
Hannah


List of products used:
Tagtastic Kit 2


Andy Skinner Textures Stamp Set


DecoArt Americana Decor Chalky Finish - Relic
DecoArt Americana Chalky Finish - Refreshing
DecoArt Americana Decor Chalky Finish - Everlasting
DecoArt Americana Decor - Crackle Medium
DecoArt Media Fluid Acrylics - Metallic Silver
DecoArt Media Fluid Acrylics - Paynes Grey
DecoArt Media Fluid Acrylics - Burnt Umber
DecoArt Media Fluid Acrylics - Yellow Oxide
DecoArt Media Fluid Acrylics - Quinacridone Gold 
DecoArt Media Fluid Acrylics - Cadmium Red Hue
DecoArt Media Fluid Acrylics - Cadmium Orange Hue
DecoArt Media Fluid Acrylics - Primary Magenta
DecoArt Media Fluid Acrylics - Metallic Gold